When you click on links to various merchants on this site and make a purchase, this can result in this site earning a commission. Affiliate programs and affiliations include, but are not limited to, the eBay Partner Network.
Re: My 91 Z28 build. 17 years in the making... Finally going to do this right
When you say 2K you are referring to a 2K primer surfacer for example? By that I mean it cold be just a primer or a primer surfacer.
I figure I will use surfacer and sand the whole car to try and get it as smooth as possible.
I used a lot of bondo straight on metal in my engine bay. Firewall and strut towers as well as battery trays. And added block off panels.
Are you saying this is not good, and I should remove all of it, epoxy, THEN Evercoat Rage Ultra on the epoxy?
I am not intimidated by the amount of rework this would be. I just want it to be as good as possible. Thanks for all your advice so far. You are a great help.
Re: My 91 Z28 build. 17 years in the making... Finally going to do this right
Originally Posted by dennisbernal91z
When you say 2K you are referring to a 2K primer surfacer for example? By that I mean it cold be just a primer or a primer surfacer.
I figure I will use surfacer and sand the whole car to try and get it as smooth as possible.
I used a lot of bondo straight on metal in my engine bay. Firewall and strut towers as well as battery trays. And added block off panels.
Are you saying this is not good, and I should remove all of it, epoxy, THEN Evercoat Rage Ultra on the epoxy?
I am not intimidated by the amount of rework this would be. I just want it to be as good as possible. Thanks for all your advice so far. You are a great help.
If the body filler you used says it can be applied direct to metal should be fine. Although, even if the body filler says can be applied direct to metal I still would spray epoxy and then a 2K and then use the body filler on top the 2K. If used right over bare metal a body filler can absorb humidity/condensation/water and then cause the exposed metal that it is attached to to corrode/rust. If there is relative to no humidity in the air you'd probably be OK as long as you don't let it sit for long periods. I definitely wouldn't be using body filler direct to metal in the winter. Two things can happen there:
1. If you use a heater you can get condensation forming on the metal for the filler to absorb.
2. When the filler is curing it literally heats up. I've made batches wit too much activator that really get hot, well over 100*. That can cause condensation to occur.
3. As an added reason, it's just using body filler right on top of bare metal is the wrong order. How do you know where to put the filler until you have a guide coat? And epoxy primer is not a guide coat.
4. Another reason I forgot, unless the epoxy has fully cured it is still outgassing and can ruin the bond between the two components.
Re: My 91 Z28 build. 17 years in the making... Finally going to do this right
Hi Tibo - That spray gun seems more than reasonable. I will pick on up for sure.
So when I was using Bondo on my engine bay I didn't know what I was doing. (I thought I did...)
I have had Bondo on bare metal for over a year now, with no epoxy, or 2K. Sitting my garage for 2 winters and a summer.
I am cleaning and prepping the front wheel wells now. Basically one of the last places I had not really had "eyes on metal" yet. Once I weld up a couple pin holes I found, I was planning to clean them so they are spotless and down to either metal and patches of OEM primer, then scuff with 80 grit, and spray 2K epoxy from a can that Eastwood sells. Repeat on the other side. Followed by some brand of bedliner.
As for the engine bay, I will wire wheel away all the old bondo and get down to bare metal as much as I can. Scruff with 80 grit, then epoxy.
Buy the gun you listed and spray the 2K primer surfacer. Level as best I can, after a guide coat and THEN use high quality bondo like the ULTRA you mentioned above. Then 2K over that again followed by a base coat.
That should fill my Fall months with work before winter gets here.
Over the winter I will strip the floor boards down to metal and repeat what I listed for the engine bay, minus the bondo work. Still not sure what to use under the rest of the car. Haven't got that far.
Re: My 91 Z28 build. 17 years in the making... Finally going to do this right
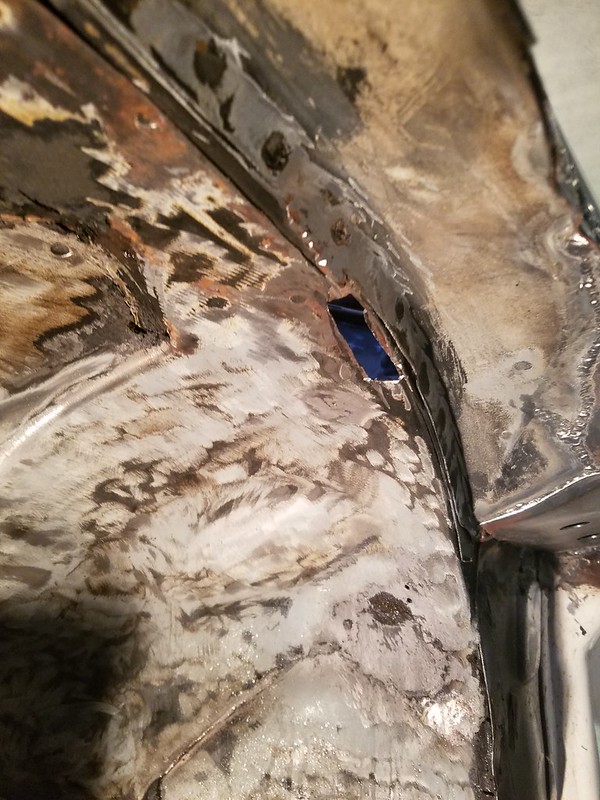
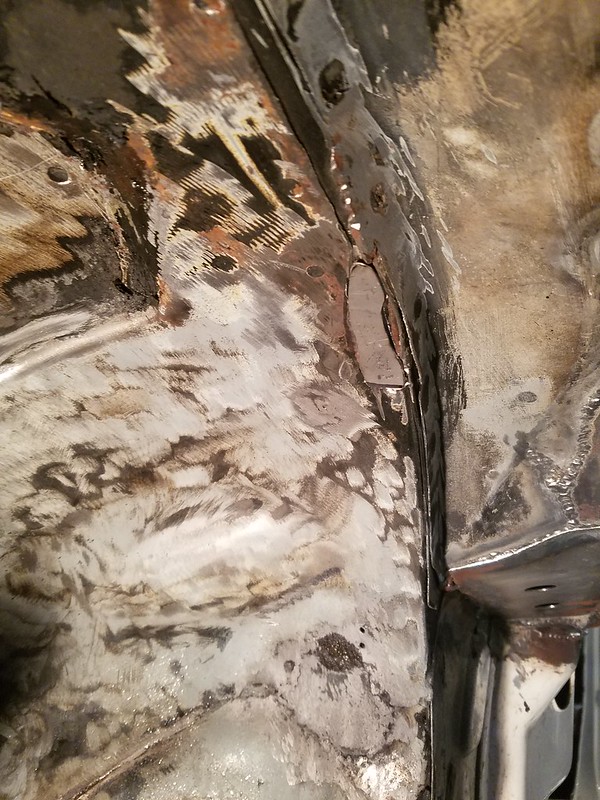
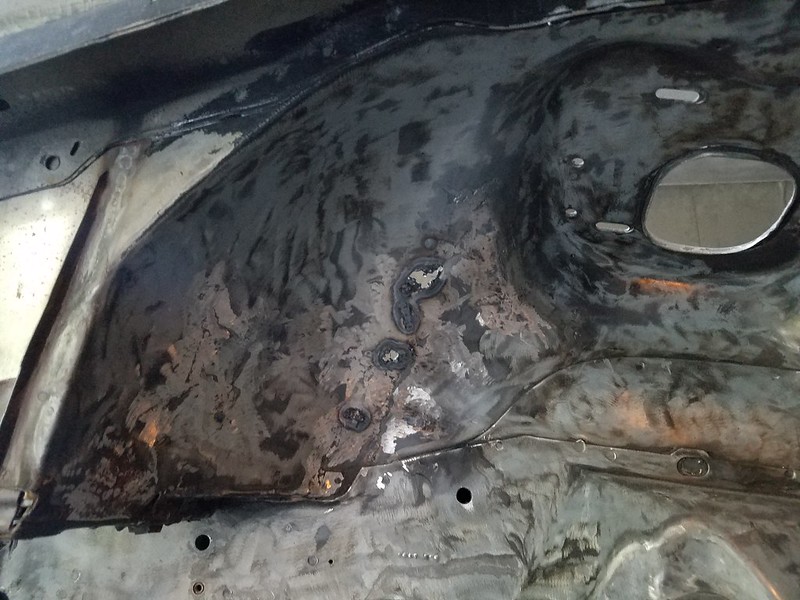
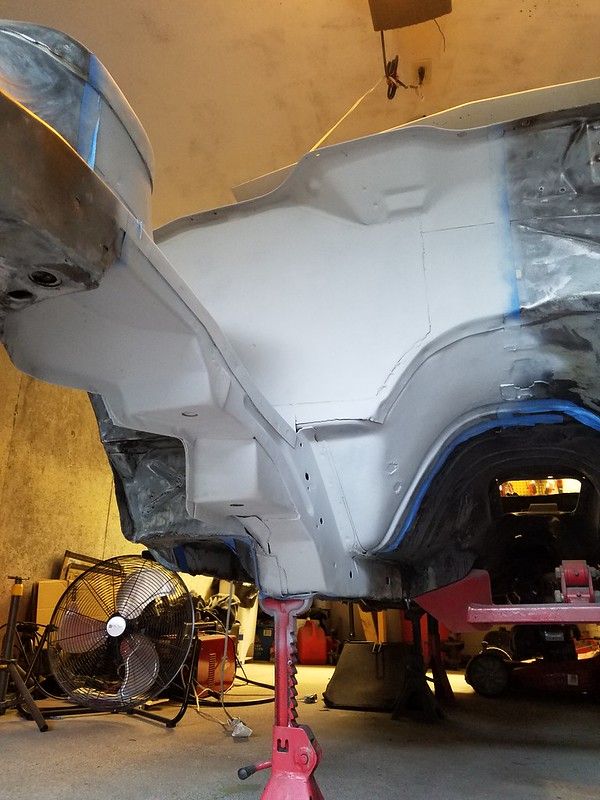
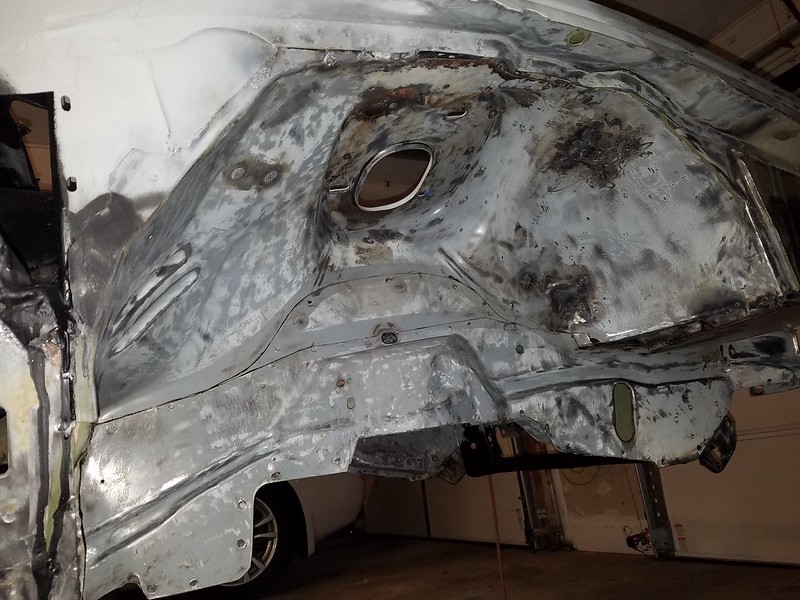
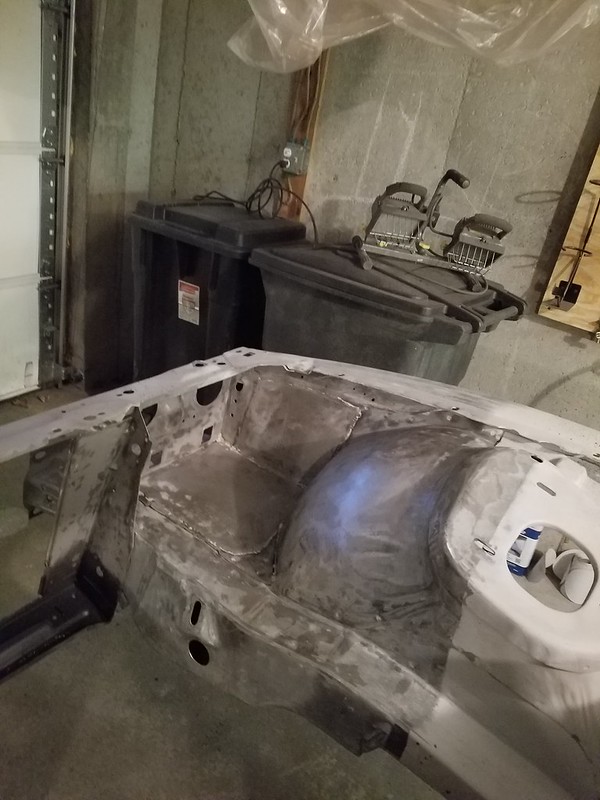
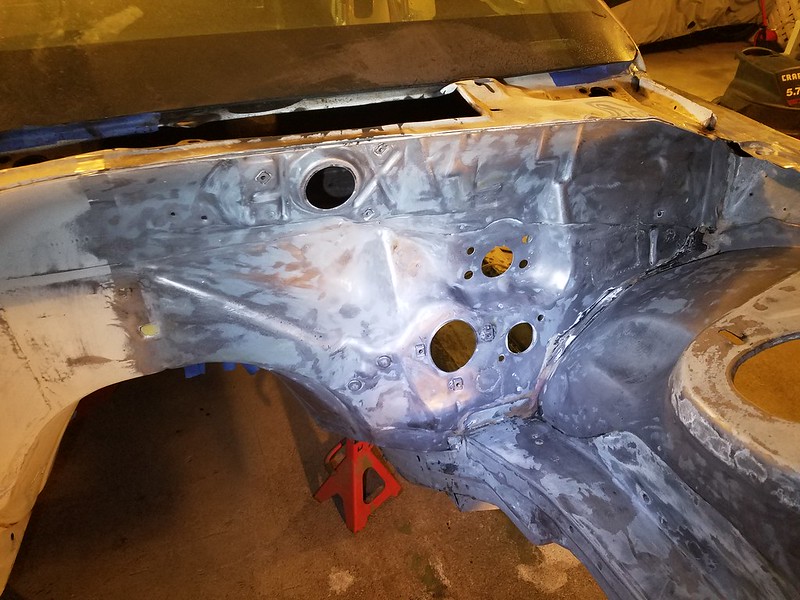
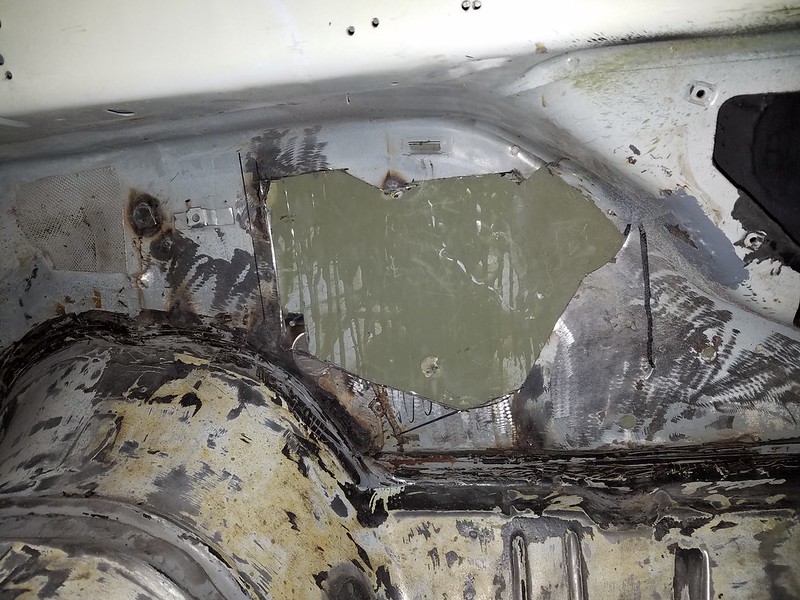
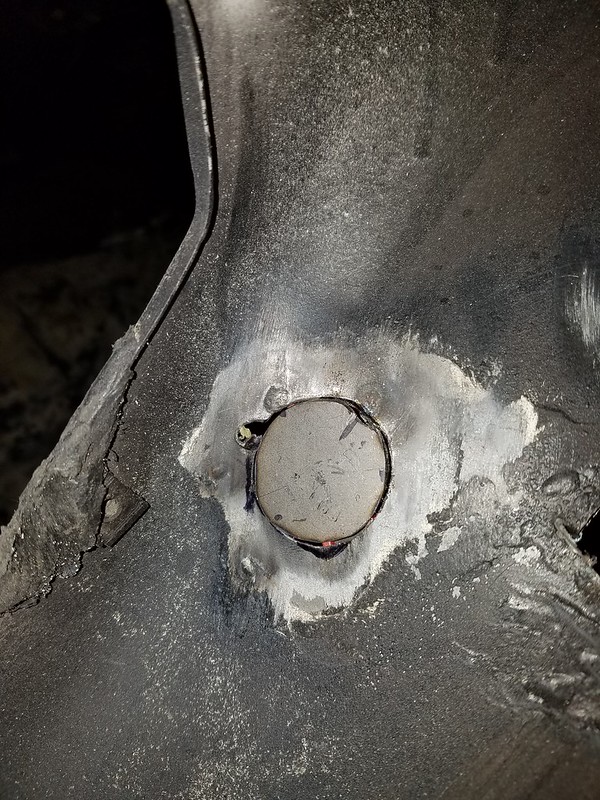
Run a bead with the MIG gun along side that long seam on the engine side of the wheel arches. It will save you a from having to use as much filler. You can see the seam I'm talking about in the top of this picture. In the thread you made I was talking about putting epoxy primer down asap. This picture illustrates a reason for it. I live in the dessert but as you can see in the picture that doesn't stop surface rust from forming. I had to regrind and sand a bunch of metal to remove this surface rust. It had rained and even though I had two tarps over the car the rust started from the 100% humidity that occured after the rain while it was evaporating. A similar issue will happen to you if you have an unheated garage in the winter and then turn on the heater on. Condensation and humidity.
Re: My 91 Z28 build. 17 years in the making... Finally going to do this right
Hey Tibo -
Thanks for the advice. I don't have a heated garage but it is in the basement of my house. To heed your warning, I have put a dehumidifier in the garage running 24/7 to keep water out of the air. Should help. I don't have a compressor that can feed a spray gun yet. So there might be some time before I can lay down paint.
My current plan is to get the entire front clip down to metal, spray 2K epoxy primer out of cans. I have 4 I think. This will stop any rust. This will also buy me time to get a bigger compressor, and have the garage wired up for a 240V outlet. All takes time and most of the front clip is already exposed metal.
After the compressor is in, I can then spray the surfacer, apply the ULTRA body filler you mentioned, then spray surfacer again followed by paint and clear. See any issues with this plan? Not ideal, but I have to live with my timeline the best I can.
Re: My 91 Z28 build. 17 years in the making... Finally going to do this right
You can use a 110 volt air compressor, that's what I did mine with. I just couldn't be overly ambitious with the amount of surface area I wanted to spray at once. With a 20 gallon tank and using Eastwood's hvlp low cfm concours pro I could spray a coat on a pair of doors or the hood or two fenders and a bumper before the compressor needed to refill the tank. So entirely doable but a higher voltage compressor would have been faster and would have a longer life because it wouldn't have to work as hard.
Re: My 91 Z28 build. 17 years in the making... Finally going to do this right
It would probably be a lot cheaper if you just bought a gallon of epoxy and brushed it on. You're gonna sand it and go over it with high build right?
Also another thing you can do is find another used 110v compressor or even just a tank and link them. I've got 2 30 gallon 110s linked and it does great.
Re: My 91 Z28 build. 17 years in the making... Finally going to do this right
Yes I will be spraying high build as well, but I already have the cans of 2K aerosol epoxy primer. So I am going to use them.
Eastwood says you can apply body filler right over the Epoxy.
I figure I will get down to bare metal, spray the epoxy over the entire front clip, then follow up with body filler, followed by high build primer. Then spray single stage or base coat. Not sure yet. Leaning towards single since I have zero experience.
Re: My 91 Z28 build. 17 years in the making... Finally going to do this right
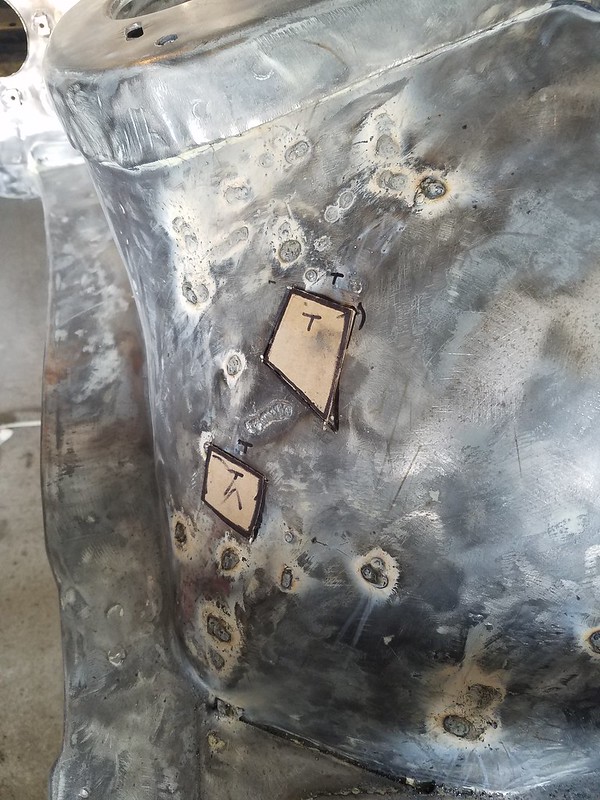
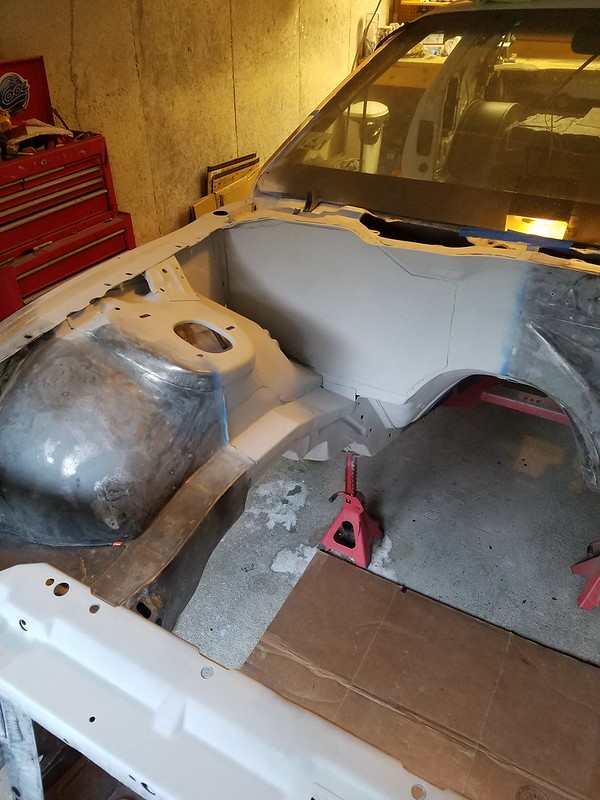
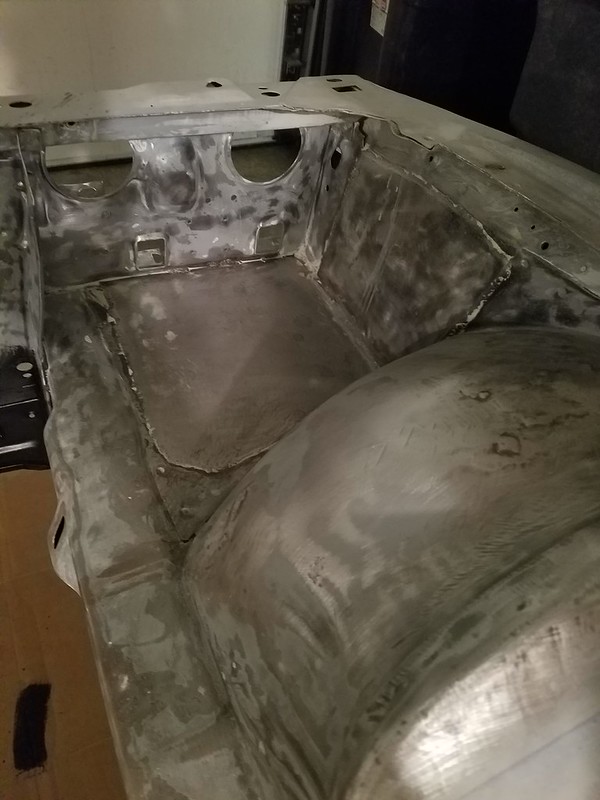
OK so I prepped the first of 4 sections to be stripped carefully. I broke the front clip into sections for my own sanity. I need to know where to stop so I can get a certain amount of work done per session.
This is what the blue tape represents.
I want to get at least one coat of 2K down ASAP to prevent rust. Dehumidifier going 24/7 to slow the rust. Seems to be helping a lot.
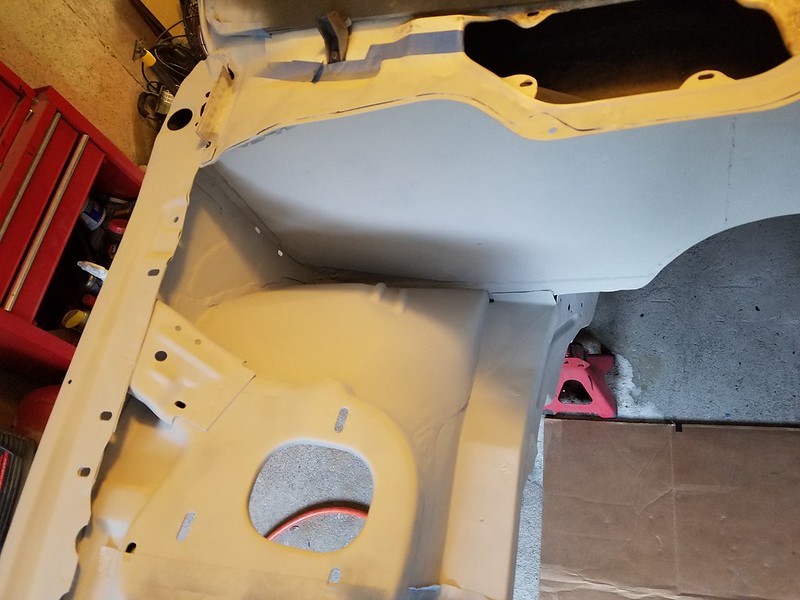
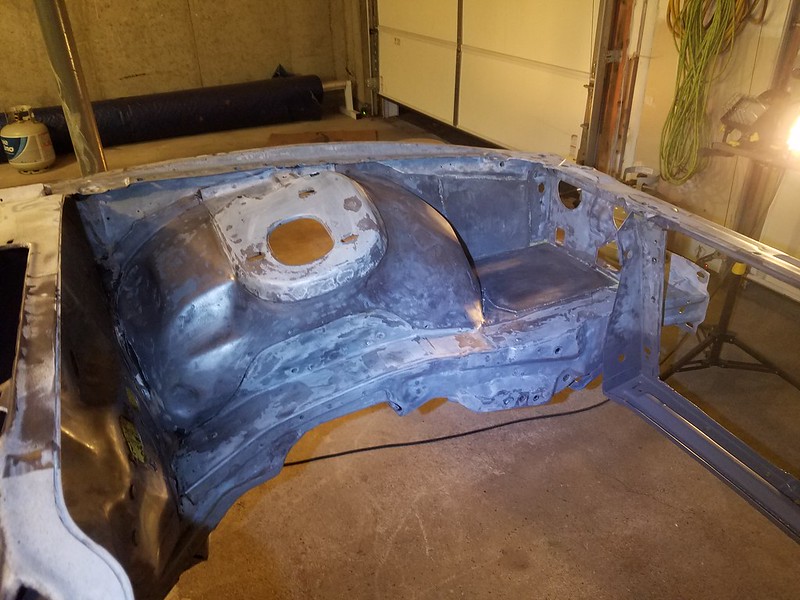
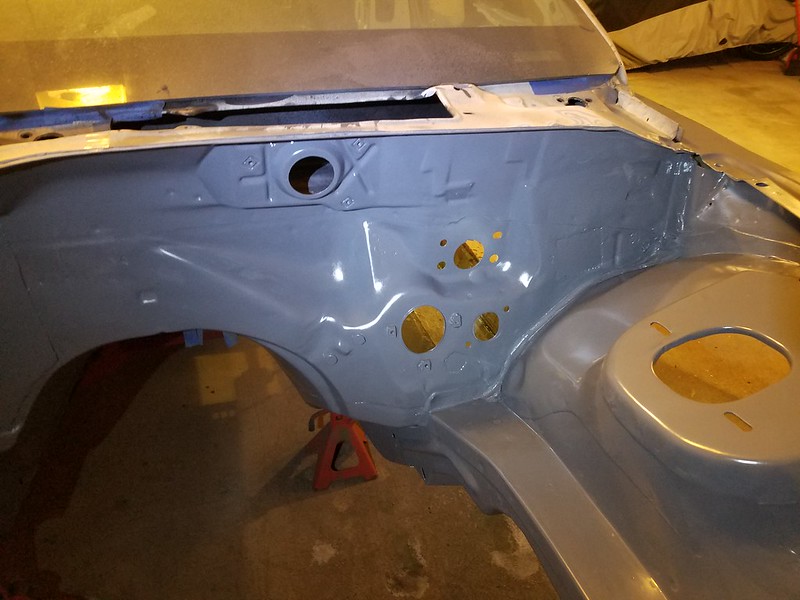
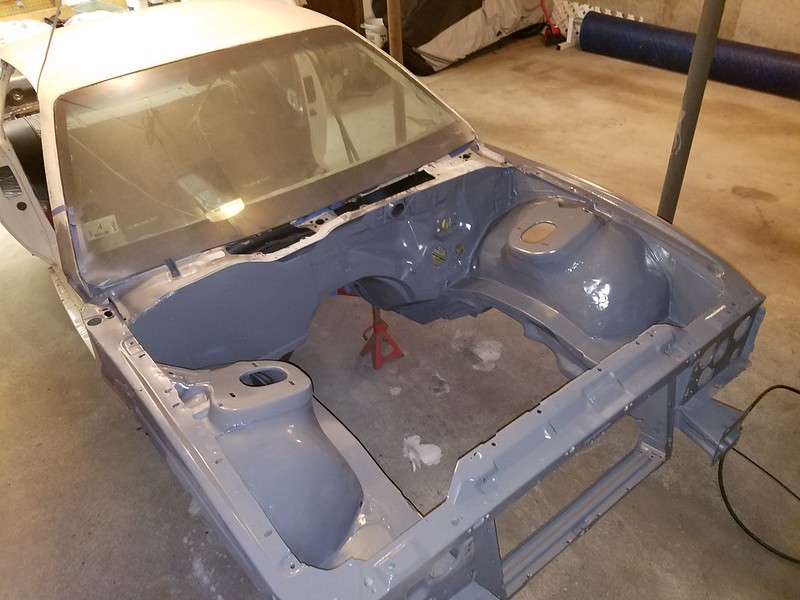
So 1 can of Eastwood 2K Epoxy Primer allowed me to coat what you see below. Not really 2 full coats, but more like 1.25. I just needed to get something down to prevent rust. before spraying I used 80 grit and 120 grit to give the metal some tooth. Then I sprayed the entire area with Eastwood Fast Etch. Then wiped it all down with Eastwood Pre Painting Prep. Followed by compressed air to remove some fibers from rags.
Anyways here is how it sits now.
I have decided not to both with as much panel smoothing as I was in the first place. There will be very little filler under the hood. Just enough to help hide the added firewall panel and some to hide the battery tray transitions. Minimal stuff.
This should work ok with a stripped third gen. I would add extra bracing to make sure it doesnt roll back over. I think a member here did the same thing. Bolt to the bumper brackets.
Re: My 91 Z28 build. 17 years in the making... Finally going to do this right
Just watched a couple more vids like this. 100% what I am going to do. I will tack in the SFC with the car on jack stands, then build these end cap things and get the car on its side to strip and paint the floors. Can't wait!
Re: My 91 Z28 build. 17 years in the making... Finally going to do this right
Originally Posted by dennisbernal91z
Just watched a couple more vids like this. 100% what I am going to do. I will tack in the SFC with the car on jack stands, then build these end cap things and get the car on its side to strip and paint the floors. Can't wait!
Sure beats lying on you back for hours at a time scraping and sanding.
I can see doing this with a truck cab also.
Re: My 91 Z28 build. 17 years in the making... Finally going to do this right
Yeah, its pretty amazing. Only thing a rotisserie would be better for would be to roll the car around to media blast then roll back in.
I don't have a compressor large enough to run a blaster, and even if I did, I wouldn't have anywhere to roll the car too that would be suitable.
Sorta random side note, I am watching "Zed Sled" YouTube vids to watch Kevin Tetz restore a second gen. Even though I don't have all the great tools and skills he has, there are some good tips and tricks peppered in there. Each vid is about 20 minutes I think. Good to watch while eating lunch or something.
Sold some of my Procharger parts last night so I couldn't work on the car. Tonight I hope to get started on the second quadrant. Would be great to have it all coated in the first coat of epoxy be the EOW. We will see.
Re: My 91 Z28 build. 17 years in the making... Finally going to do this right
Yeah I have watched the Zed Sled project. Kevin does a good job. I use to watch him on the show "Trucks". He has many years of experience.
I like the tip of using a vacuum cleaner to remove dust from body filler instead of compressed air. Gets the dust out of the pin holes.
Re: My 91 Z28 build. 17 years in the making... Finally going to do this right
Small update:
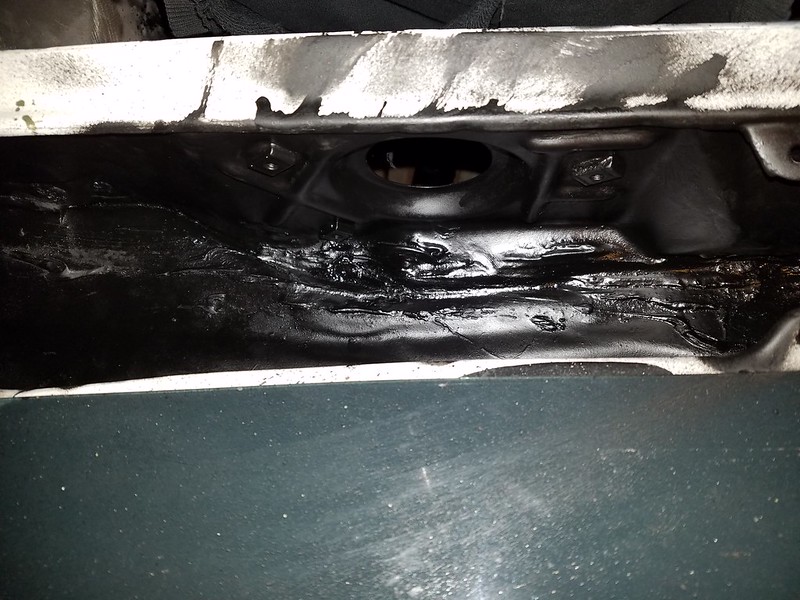
I thought I would spend an hour or so cleaning up the inside of the cowl wiper cavity for paint to seal it all up since there are some custom firewall patches that have their back sides facing in there.
Well I was super wrong, it took my all Saturday. Like 6 hours!
I started by welding a couple small holes shut. Screw holes I will not be using. Then grinded my welds down. Then sanded the inside of the area with 80 grit. That sucked.
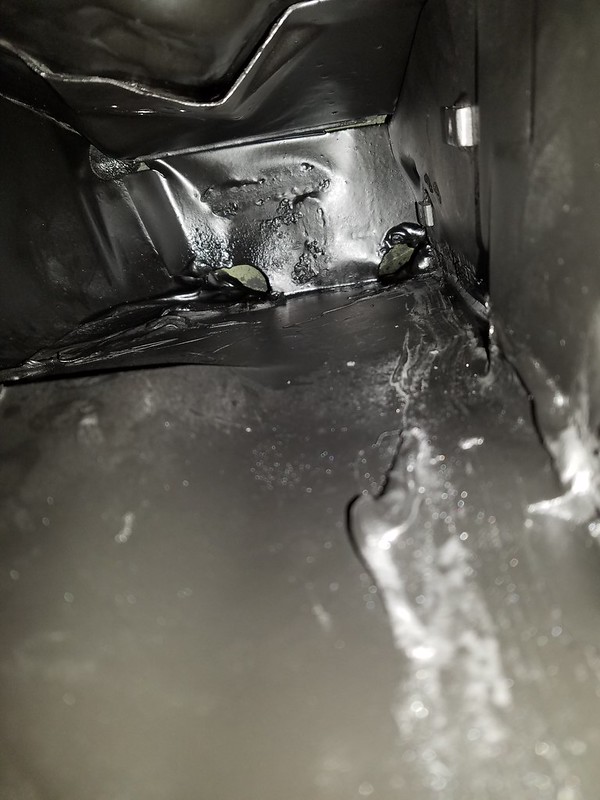
I also found some rust in there, basically the backside of the metal that makes up the dash mounting surface. So decided to spray the entire area in Eastwood Fast Etch. Followed by Eastwood PRE.
Then sprayed the entire area in two coats of Eastwood black internal frame spray.
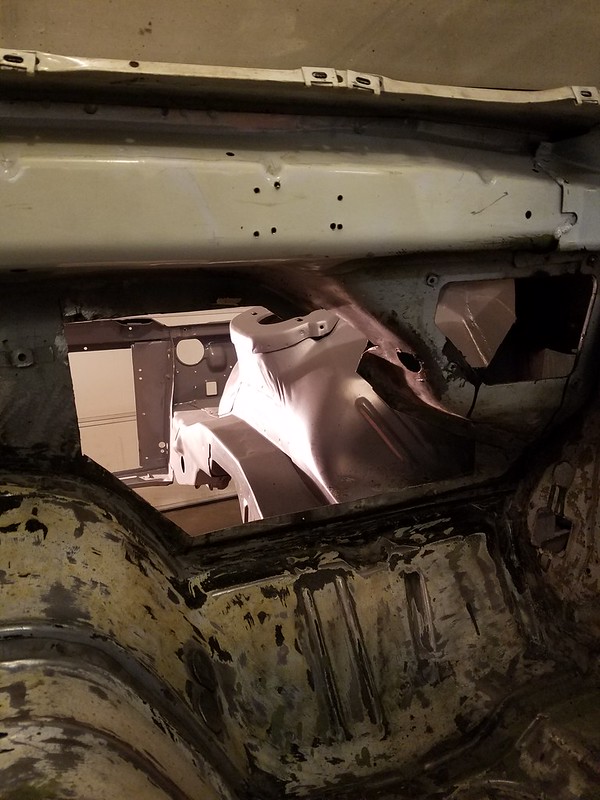
Images were taken with my cell in the cowl area where the wiper motor sits (sort of).
Looking to the DS.
Straight down.
Passenger side.
Re: My 91 Z28 build. 17 years in the making... Finally going to do this right
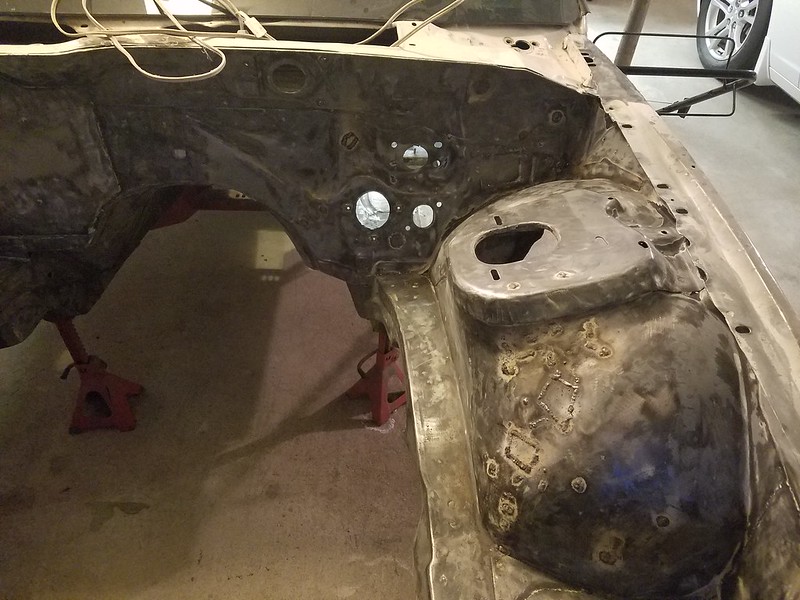
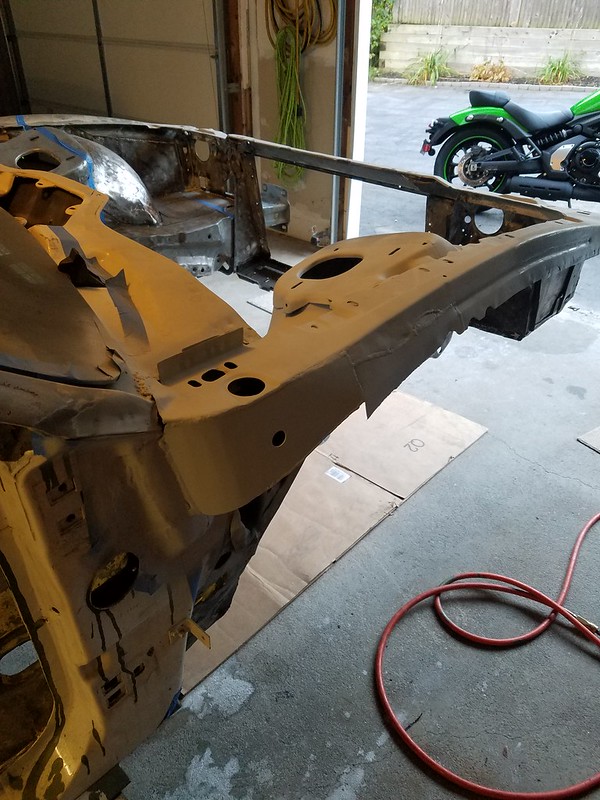
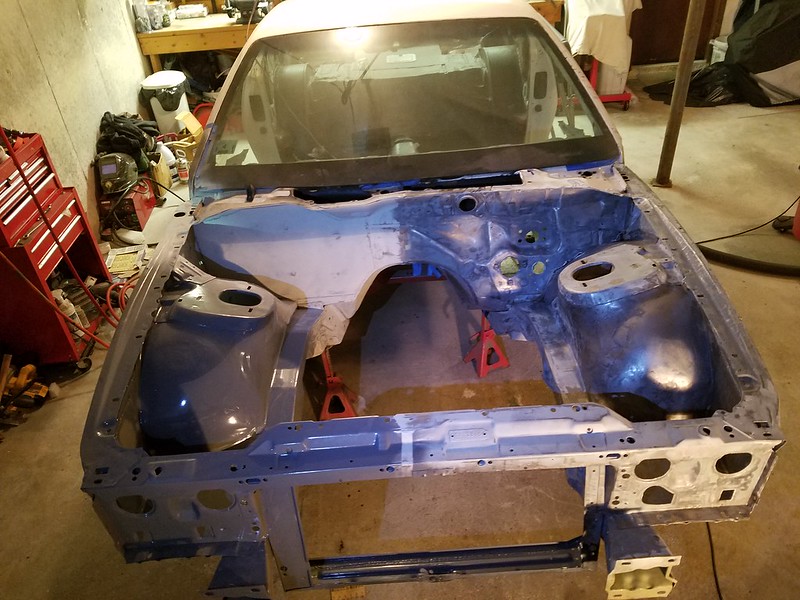
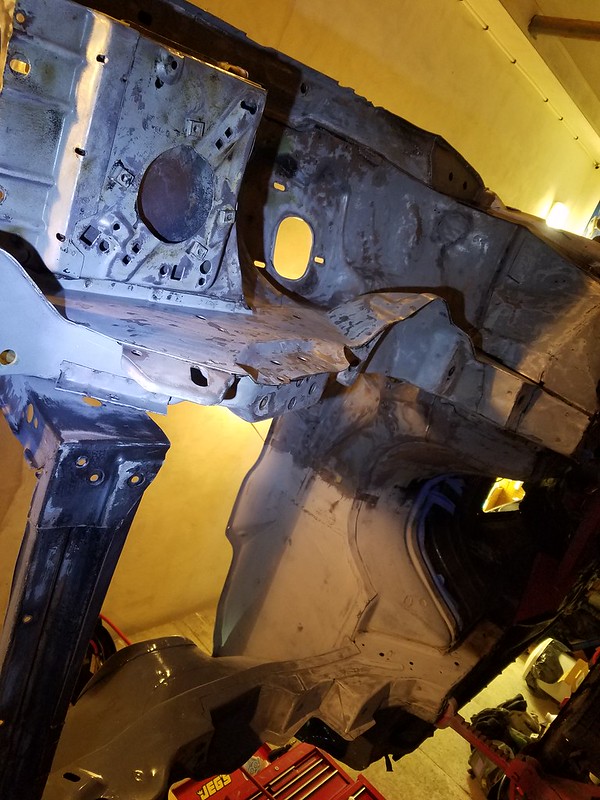
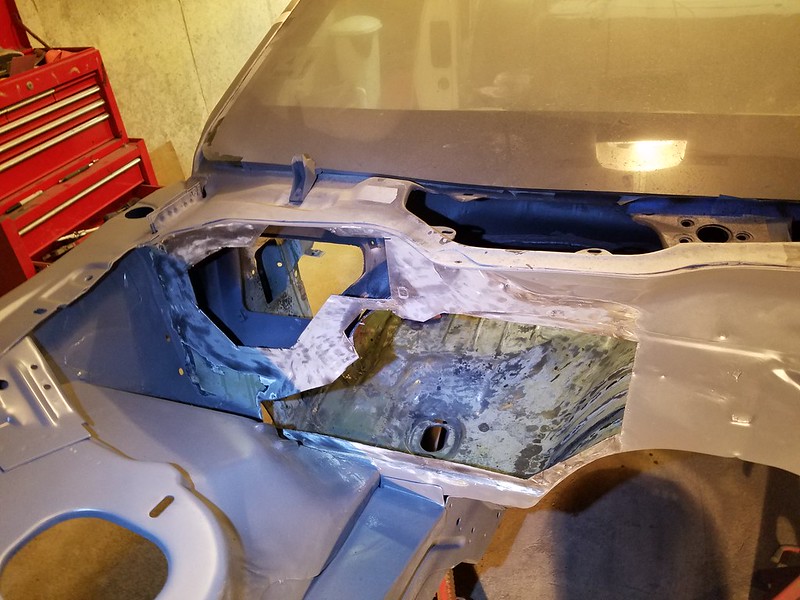
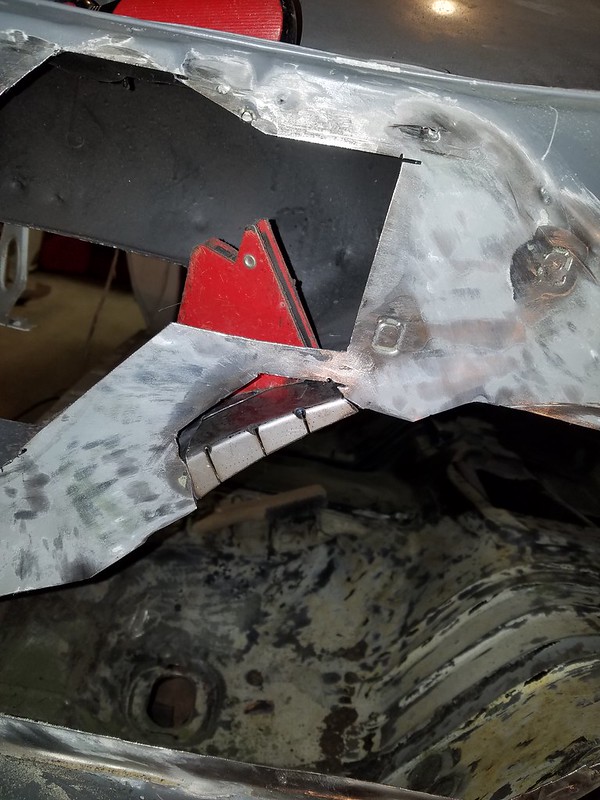
Griffin LS swap 19 x 31 universal combo unit test fit. left side of core support vertical brace trimmed slightly. Needed more cleanse on the passenger side tube outlet. Looks ok now. Shot from below. You can see I already started to trim the core support. Center section is cut. Rust and horrible old brackets were welded there. Happy that cancer is gone.
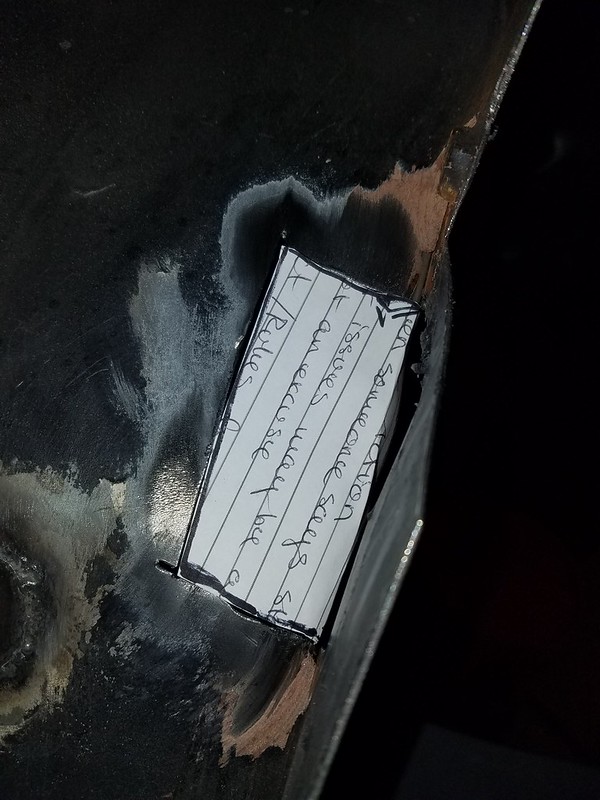
All the blue tape represents metal I am considering cutting. What do you guys think? Should be ok.
going to add bracing once all stock metal is out of the way.
Last edited by dennisbernal91z; 10-04-2017 at 07:00 AM.
Re: My 91 Z28 build. 17 years in the making... Finally going to do this right
Cut out whatever you want to cut out as long as you weld back in sufficient bracing. The metal there is maybe 20 gauge and I'm sure you'll weld in something more than 20 gauge.
Re: My 91 Z28 build. 17 years in the making... Finally going to do this right
Hey Tibo - Yeah, I have plenty of 16 gauge left so I will use that.
I plan to cut it all out tonight and then start making a lip that will be welded to the cut face, if that makes sense.
I just want to make sure the corners look OK since the stock sheet metal has all kinds of holes and folds. I will try to weld in patches to make it look as "factory" as possible.
I really want to get between the two sheets too. There are the side pieces that fold inward, and the center section welded on top of the side folds. Between these two folds, I want to ensure there is no rust. I plan to pry them apart before welding the flanges on and try to clean out between then the best I can. Maybe spray some weld thru primer in there.
Re: My 91 Z28 build. 17 years in the making... Finally going to do this right
I also plan to build one small bracket per side to keep the unit in place.
Some like this:
I will build press pads for it at the top of the core support lined with rubber tape. Then fabricate a top hold that will keep the top steady as well. Don't want this thing going anywhere.
Re: My 91 Z28 build. 17 years in the making... Finally going to do this right
16. I have decided to split the part into two pieces. I will pick up a Harbor Freight 18" sheet metal brake tonight. This should make it easy to fab the parts I need to finish the install + I am sure I will find other uses as I progress thru the build.
Re: My 91 Z28 build. 17 years in the making... Finally going to do this right
Yeah, 16 gauge even with pulsed tig for a 24" long weld is a lot of heat for the material. Plus you would need a metal cutting circular saw or a dead straight freehand jigsaw cut. You could clamp one half of it to the work bench and then use a 1/8" x 24"x 1" piece to bend it 90 degrees.
Re: My 91 Z28 build. 17 years in the making... Finally going to do this right
Hey man, I'm enjoying keeping up with your progress. I'm hoping to do something similar with MY car at some point. I need some quick fixes in the meantime, and after being down a year for the 383/TKO build, I'm not ready to tackle this level of work with mine just yet. I'm watching all those Eastwood, Kevin Tetz, Zed sled vids too though!
I'm actually considering a second car to do this work to though. Just don't know if I'd take it back as a full resto, or make it a full custom build!
Re: My 91 Z28 build. 17 years in the making... Finally going to do this right
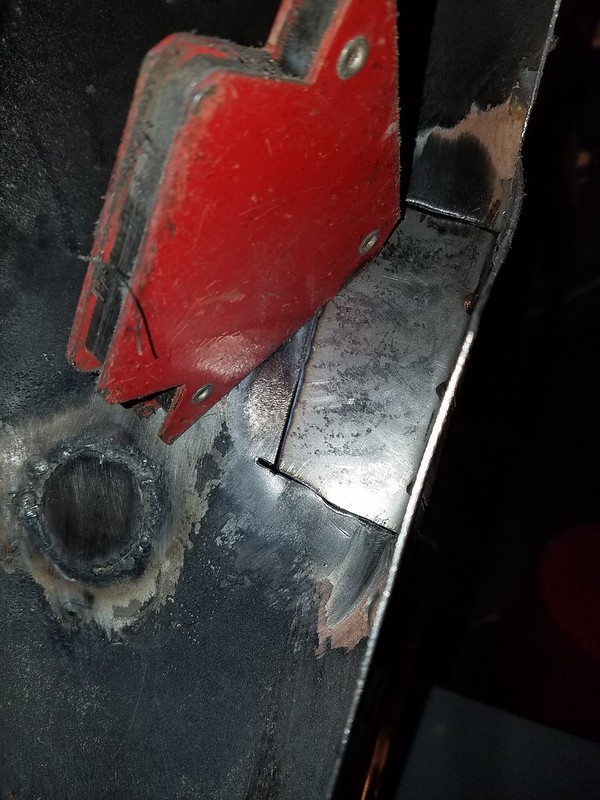
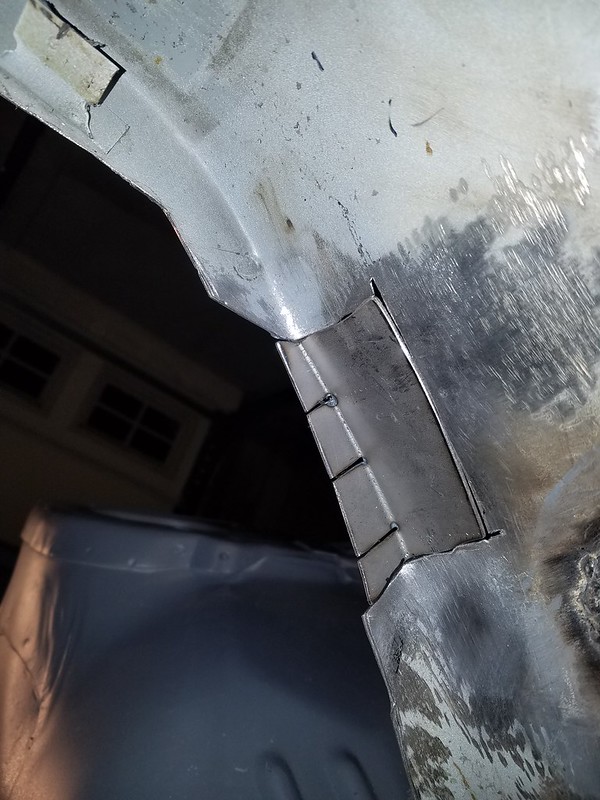
Core support update. Tried using this HF 18" metal brake. Didn't work at all to bend 16 gauge steel. Returned it and fabricated the parts on my trusty bench vice. PS tacked in place fitment checking. Same with DS. Shot of the major work complete.
Re: My 91 Z28 build. 17 years in the making... Finally going to do this right
All welded, and cleaned up ready to anti rust paint that will go on before epoxy primer to help prevent rust. Eastwood rust encapsulator. Nice because it is thin so it will run between the side sand lower panels. Will sand accessible areas later before applying epoxy primer. Two coats DS PS
Re: My 91 Z28 build. 17 years in the making... Finally going to do this right
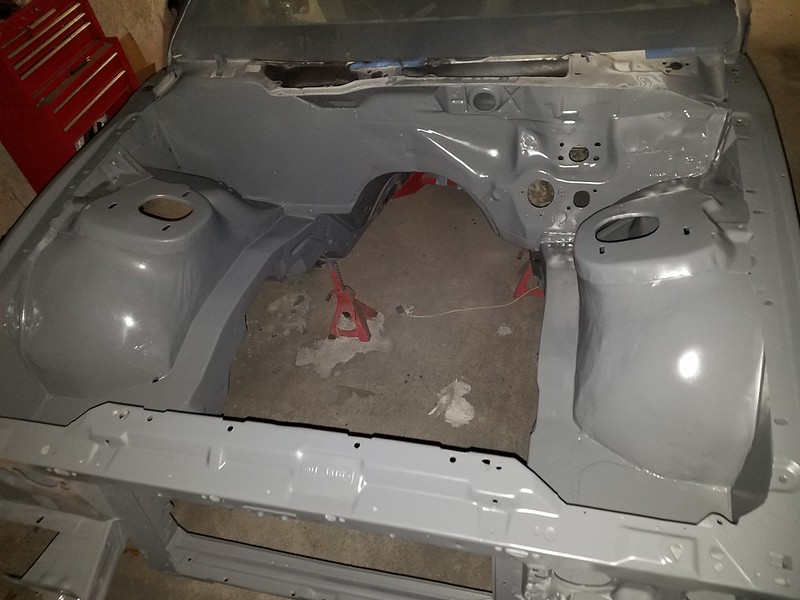
Minor update, almost done cleaning up the wheel wells and the engine bay. Hope to have the entire front clip sprayed in epoxy primer in the next couple weeks.
Since I don't have a compressor big enough to run a sand blaster, and I don't want to deal with sand everywhere in my garage I am left with good old fashioned elbow grease and sand paper for places I can't get my wire wheel. I then spray fast etch on rust to convert it back to steel, the paint.
Here are some "almost" ready images in progress.
Spent about an hour in this corner getting it to look OK. After primer I will be adding a bit of filler to smooth things out a bit. (Not a show car clearly)
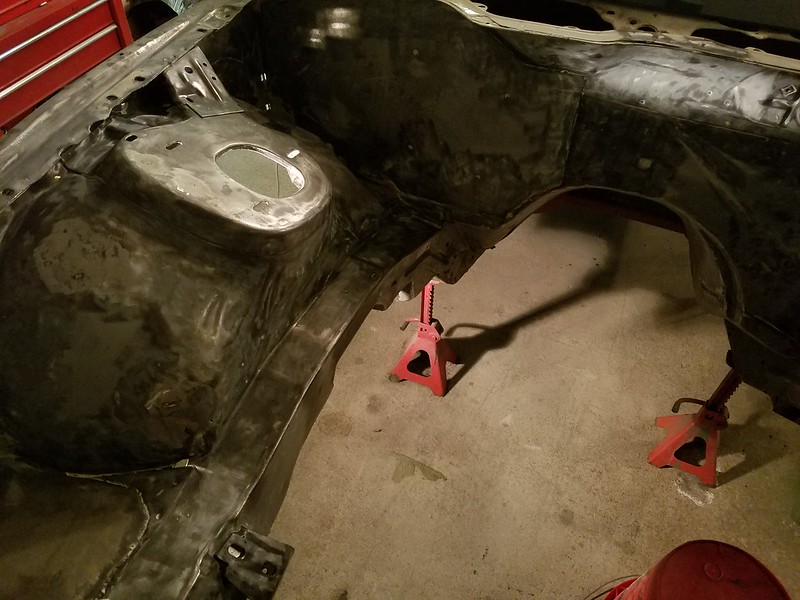
Here is the PS front wheel tub, almost done.
Re: My 91 Z28 build. 17 years in the making... Finally going to do this right
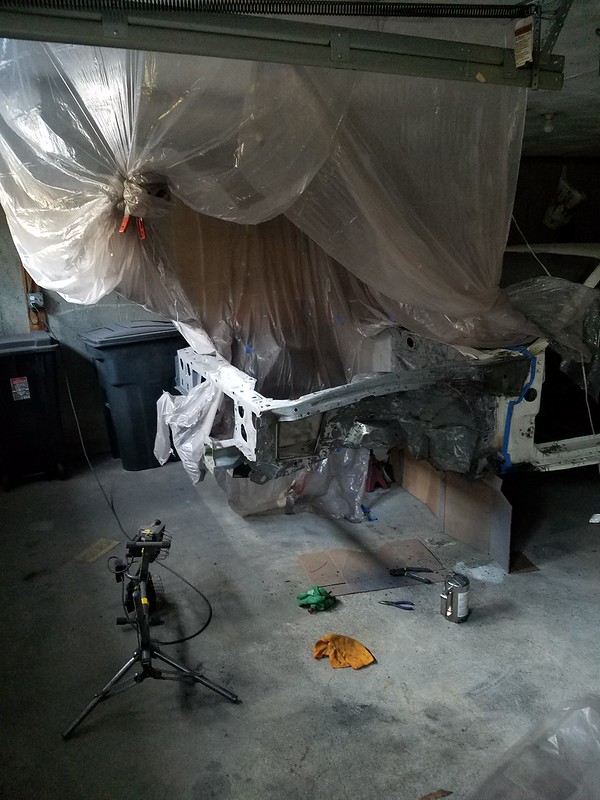
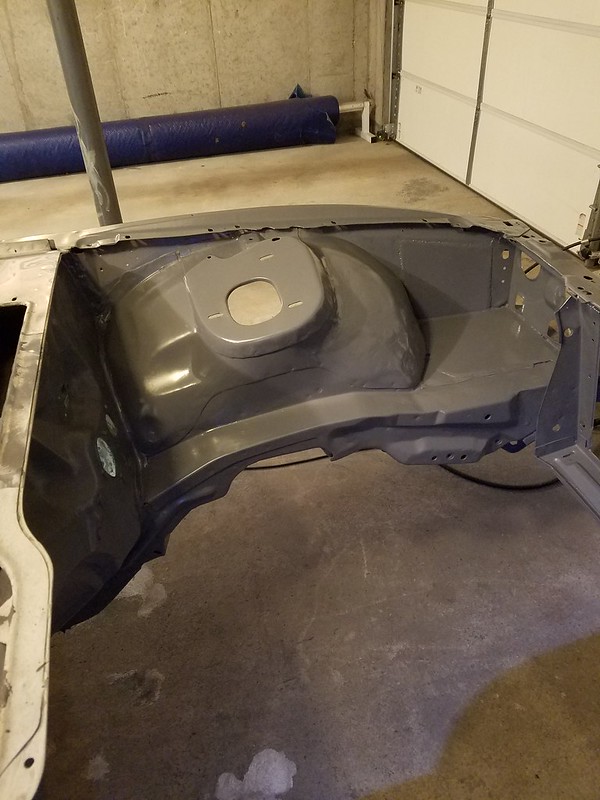
FINALLY done with the primer of the front clip. I looked back thru my old photos and I started this 2.5 years ago!
My media blast setup. I used plastic on the ground to help gather up the media. The plastic curtains helped keep dust/media localized.
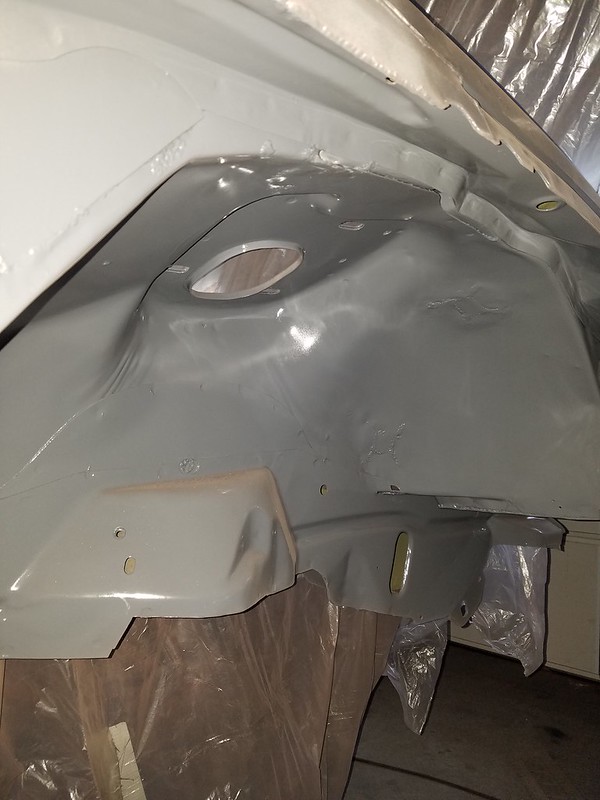
Here is the front corner blasted and ready for a final wipe down and paint. This was my first time using any kind of paint gun. Very intimidating for me.
After painting the first corner, things seemed to be going well. Did 2 coats. The white coat is the 2K paint from the can. I end up going over this with 2 coats of the gray out of the gun later.
Then I moved on to media blasting the other sections of the engine bay/ front clip.
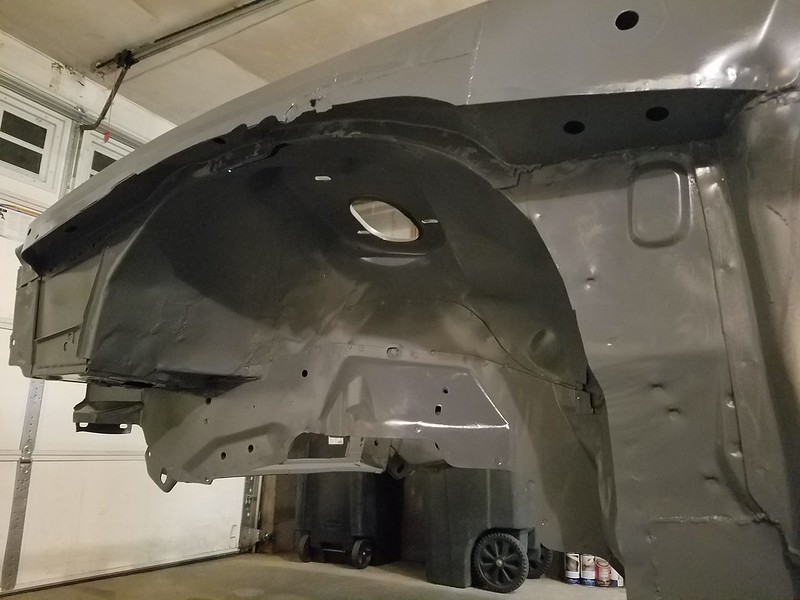
As well as the firewall.
Quick shot showing that all this work also was done for the "frame" and wheel wells. Battery tray still needs some sorting out. That 4" hole used to be for the intercooler piping. Think I will just spray some internal frame spray in there later and call it good.
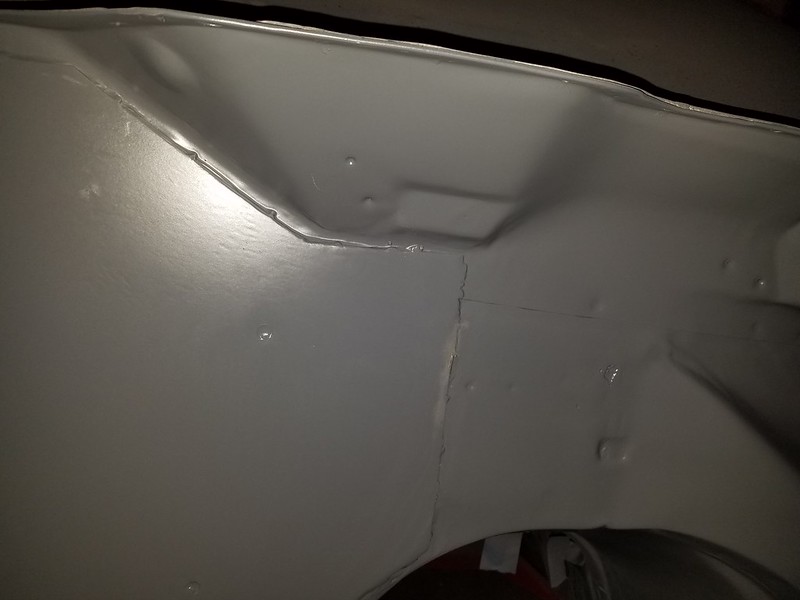
Finally some finished product images. The patches will be smoothed over slightly with filler before I do base coat. All in all I am VERY happy with the results.
Re: My 91 Z28 build. 17 years in the making... Finally going to do this right
instro84: thanks for taking a look.
I will try to do more updates as I feel like now that I have all the compressed air I need, media blasting capability, AND the ability to lay down paint, I should keep pressing ahead fast to keep the momentum going before it gets SUPER cold out.
I decided the next area to tackle was the inside of the fire wall. Fixing a whole bunch of dumb a$$ things I did in the past. Stupid teenager me was a real piece of work... This will take a while to fit up.
I apparently just tacked the smooth out filler panel on the firewall and never fully welded it in. I also left all kinds of junk behind it, held in with caulking and other crap. Either way, time to start cutting out all the junk and get down to good metal. Then patch my way back up and paint. I feel I will be doing this for every section of the car as I go.
Inside the car. All the cutting and cleaning I could do for one night. It was REALLY bad before this work. At least now I can see the filler panel and can start to asses how to ensure it is tied into the structure well.
I know I have reached the edge from the inside since I can see that my cutting has started to melt the fresh epoxy primer in the engine bay. I will has to re-spray this entire area.... Expected since the inside was so messed up.
Re: My 91 Z28 build. 17 years in the making... Finally going to do this right
After much thought and looking at the firewall I decided the right way to do things it so remove my "band-aid-" solution cover panel and start over...
Here you can see all my old patches cut out. Sucked cutting thru all the fresh epoxy primer.
View from the inside.
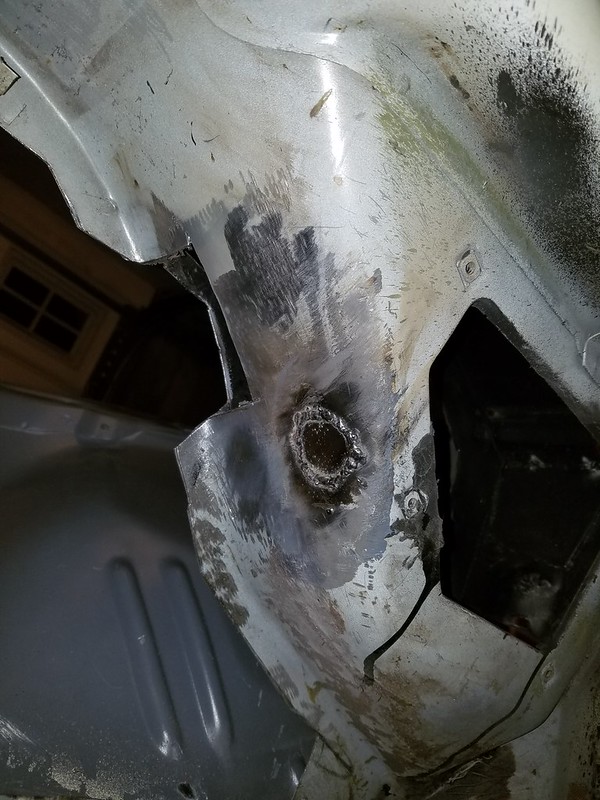
Now with all the cancer removed it was time to start patching up holes. This small hole was drilled by me over 10 years ago when I was trying to hide my coil in the inside of the firewall... or something like that.
Re: My 91 Z28 build. 17 years in the making... Finally going to do this right
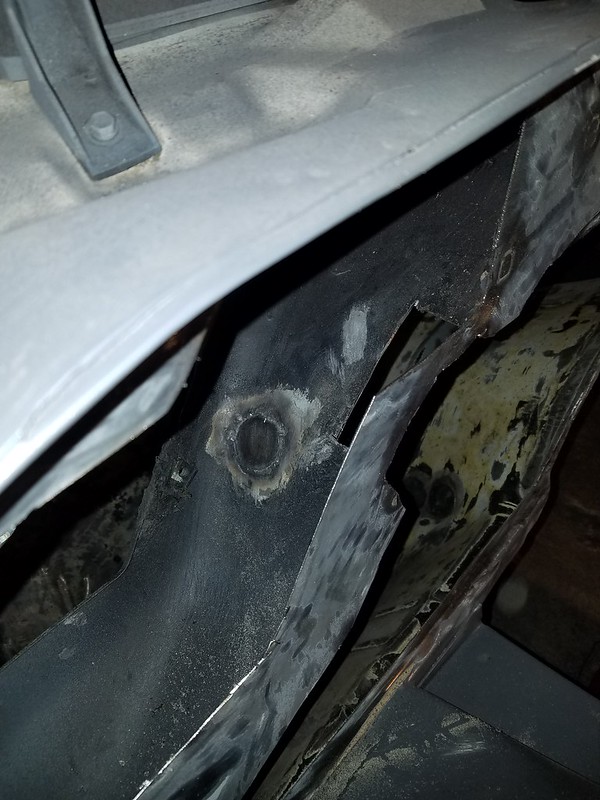
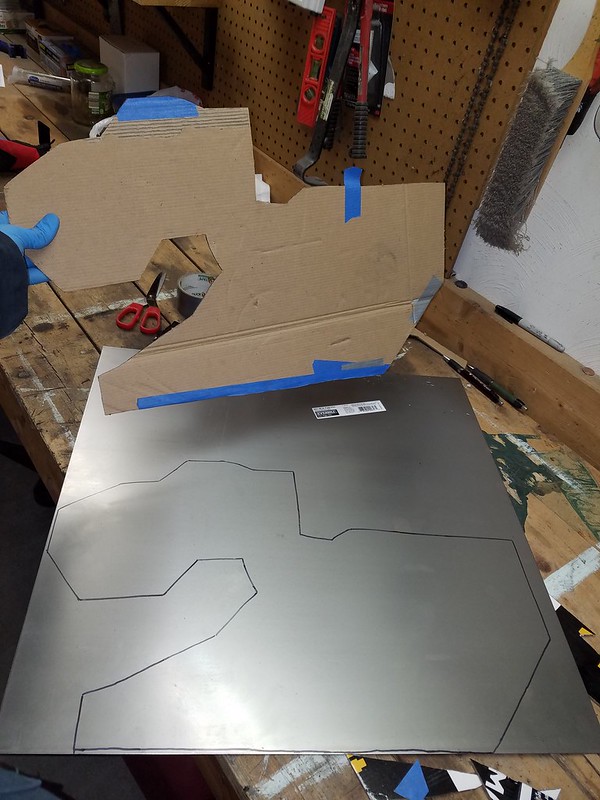
On to the next patch. Most challenging patch I have ever made I think.
This is a strange hole since it is a panel that is in between 3 cavities.
Kind of hard to see. Will make sense in further images.
Paper template.
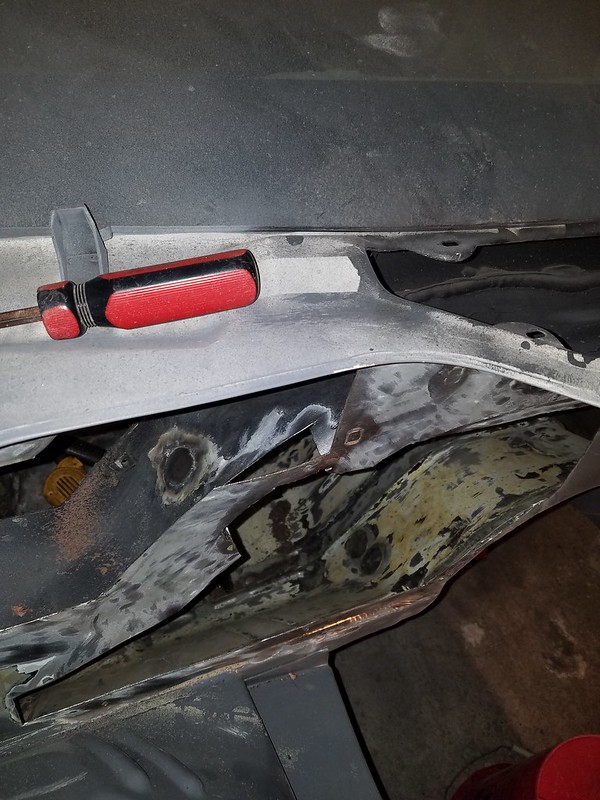
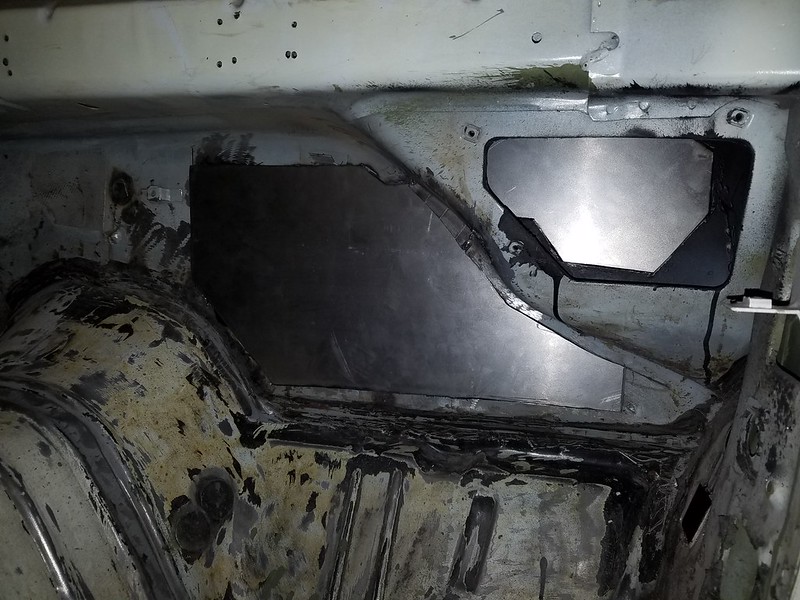
View from inside the wiper cavity.
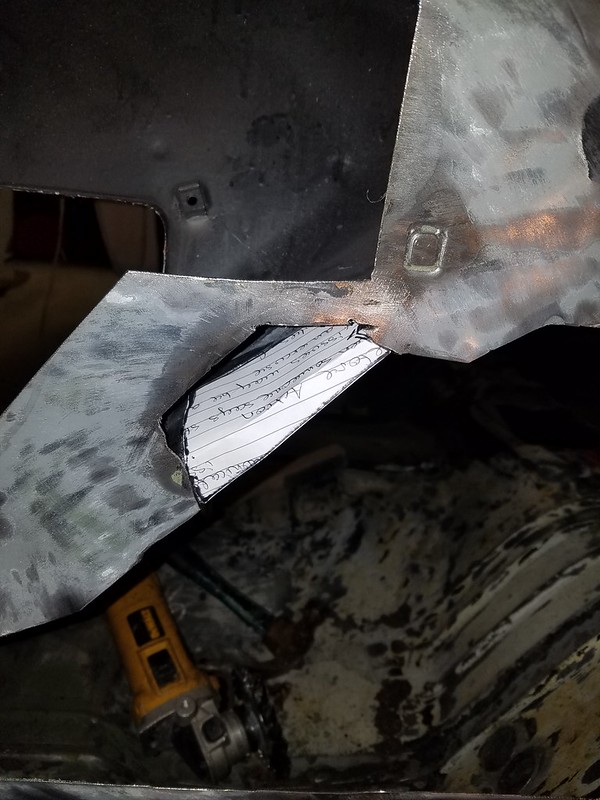
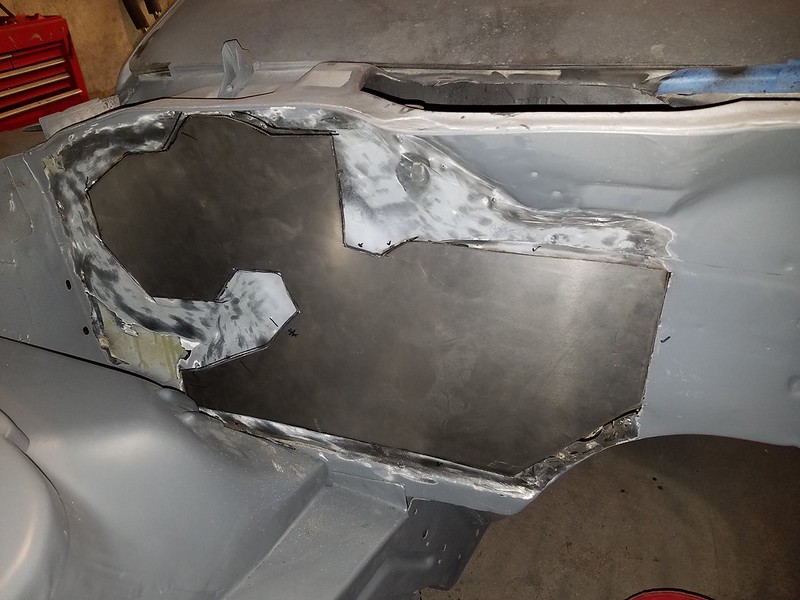
Patch just about fitted for welding. Took my over an hour to shape this darn piece.
Shot from inside the wiper cavity.
Finally a shot from inside the car. Slits are to allow the metal to curve to the shape of the wiper motor cavity.
Tonight I will finish weld this in and grind what I can smooth. Then move onto the two big panels. Should be easier since they are flat. Fingers crossed.
Re: My 91 Z28 build. 17 years in the making... Finally going to do this right
Hey Dennis, very nice work on your project. I hope to be able to fabricate and weld like you are doing some day. Just need to save up for the equipment! I'm pretty local to you in Mass... hope you are staying warm!
Re: My 91 Z28 build. 17 years in the making... Finally going to do this right
Hey garage, thanks for taking a look.
Can't get much work done on the car with these temps!
That is why I am finally getting around to breaking down my motor and other parts for sale. Should have my K-member and A-arms up for sale soon.

 08-07-2017, 06:28 AM