When you click on links to various merchants on this site and make a purchase, this can result in this site earning a commission. Affiliate programs and affiliations include, but are not limited to, the eBay Partner Network.
Tech / General EngineIs your car making a strange sound or won't start? Thinking of adding power with a new combination? Need other technical information or engine specific advice? Don't see another board for your problem? Post it here!
Dude you hijacked my thread! Are you also building an 89? You should start another thread with your build goals. I think there are more pics of your car than mine now. :-)
Man, no one really uses this site anymore. I was interested in your build too. How's your project coming along? I'm still chasing down a ECM power issue.
Well I guess if this is my thread I should be posting to it even if no one reads it...
Lots of little things going on. Floundered around with ebay "mild steel" and as I should have done from the beginning gone with Columbia Mandrel stuff which I finally did and simplified my welding 101 life.
Got the Burhhart master cylinder some time ago, still sitting nicely in the box. This will go in without the vac can and with some twisting of brake lines.
And got a bunch of little fittings for oil supply and return. The planets did align, allowing the nut to fit into the fuel pump hole...
And with a couple precisely drilled holes in the block off plate will allow the pushlock hose to drain oil back.
Next up is getting the downpipes to Y-pipe setup done, having to redo it after cutting and attempting to use non-mild pipes with my flux core.
Looking out for a wide band and a fast or megasquirt or something as inexpensive as possible for the tuning.
Yeah looks good. Yeah building the way I did mine, it is almost too advanced for power and efi tuning. I too am looking at someway to improve the efi system.
Got the PS DP mocked up. Kind of squirly getting that 3" pipe past the frame then around the LCA mount. I didn't want any flanges showing so it's a long pipe.
What brand were those header/t3 flange? Basic set off eBay? Looks good, yeah it gets tight when you go down around subframe. I would like to put one of those turbo setups on my 89 formula
What brand were those header/t3 flange? Basic set off eBay? Looks good, yeah it gets tight when you go down around subframe. I would like to put one of those turbo setups on my 89 formula
I actually have run a belt with and without accessories, even the tensioner. Just use a tape measure and measure. So I mean that passenger side brackets a B word lol. I might just buy a header turbo kit. I run a pretty strong 305 in my 89, and I would like to keep it and spruce it up. I want to advance the cam so it builds some more torque.
Doh that downpipe is just about touching the rear spark plug...
I'm reworking it to fit away from the framerail, away from the spark plug, away from the bellhousing, away from the rear A-arm mount, low enough to pass under the lowest position of the a-arm, and tucked up under the body b/c I hate seeing that pipe from the side.
I hope this is the trickiest part of the piping. It definitely is taking the most time to mock up.
Oh yeah and I suggest sticking with a name brand like Project89 suggest Fragola. Here are some no-name cheaper nice looking fittings. Then you try and put them together and find out they are either not drilled or over drilled...
So had a couple hours to make some mistakes over the weekend
* spot welded the new downpipe pieces backwards
* When cutting it apart it fell off the table breaking at other spot welds into two more pieces.
* Re-spot welded it back together slightly incorrectly. Slightly enough so it would not bolt up to the turbine flange.
* spend a half hour trying to figure how to get the curvy DP in place between the PS LCA mount and the flange on the trans. Would not go in from the top or bottom when it had before. What? I finally got it into place after almost giving up. Then when I let go of it it fell right out clean as a whistle.
Oh Yeah I forgot to mention now that I've made dozens of chop saw cuts of my 3" mild steel donuts, straight and curved Columbia River mandrel pipes I now have a nice inventory of weird shaped pieces to finish mocking up both hot sides without having to go back to paper tube mockups. That and I've made enough mistakes mocking up that I'm getting better at it. Sometimes I sit there pondering how to do it when I should just try something and see how it goes.
So had a couple hours to make some mistakes over the weekend
* spot welded the new downpipe pieces backwards
* When cutting it apart it fell off the table breaking at other spot welds into two more pieces.
* Re-spot welded it back together slightly incorrectly. Slightly enough so it would not bolt up to the turbine flange.
* spend a half hour trying to figure how to get the curvy DP in place between the PS LCA mount and the flange on the trans. Would not go in from the top or bottom when it had before. What? I finally got it into place after almost giving up. Then when I let go of it it fell right out clean as a whistle.
You have no idea how much time I wasted trying to mock up pipes using the many misc pipe pieces I had cut. If I had just gone right to the paper tube and tape.
Also cutting curved and straight pipe can yield some unexpected results depending on how the cut is done. Like round ends suddenly become oval. All part of the learning process I suppose. Just need patience and lots of it.
Here is the finished DP to Y mock-up. It barely touches K member in one spot and the PS frame rail in another. Before I start the finish welding I'm going to see if I can fix that.
I see I've been working on this since last June. Seems like I've been working on the pipe longer than I've had the car (~ 6 years now)
Last edited by TallTim; 05-23-2016 at 04:15 PM.
Reason: update
Here is the finished DP to Y mock-up. It barely touches K member in one spot and the PS frame rail in another. Before I start the finish welding I'm going to see if I can fix that.
I see I've been working on this since last June. Seems like I've been working on the pipe longer than I've had the car (~ 6 years now)
for a first timer thats pretty darn good man, hopefully u can get it all finished up for the summer
It looks good, sometimes it sucks not being able to work on our cars. We have to balance life, work, families and wife time.
Y pipe looks great. Being able o hide them makes it more of a sleeper. Especially if you are building a more street able version. For mine, it's strictly a drag car, while my 89 is the cruiser, I am planning my next build though. Great work keep it up.
Welding is better with flux less wire and CO2 or other variety. The weld pool is better with gas and more stable with a cleaner weld and has very little splatter back.
* Made a light rig from $6 16 ft of LED tape off ebay. Its attached to the ceiling not the car.
* Bought a couple extra long spark plug wires to reach around to #1 and 2.
* Made my first braided line to reroute the trans cooler lines up to the rad.
* Made the push loc oil supply hoses
* Made the push loc oil return hoses
* bought the copper header gaskets and steel reinforced valve cover gaskets.
* bought long as possible header bolts and valve cover studs/wings/nuts
I'm just stalling. I really need to get the exhaust welding done.
Nice build. How was dealing with Columbia river? Soon here I am going to be tackling my exhaust and have been looking at their stuff. Did you see the discounted 25 dollar boxes? They have several different boxes to choose from.
Thanks. Very happy with CR and would probably buy that box if I was just starting. Seems like a good price. My mild pipes were nicely bent, coated with light oil and packed in craft paper.
The welding is moving ahead now despite my horrible technique. I think to test for leaks I will seal the ends of the sections with plastic bags and put some compressed air in and dunk it in the pool.
Today did some more mocking up to check fits. I would like more drop on the DS oil drain line. It runs under the crossover charge pipe which is basically horizontal. But everything seems to match up and the clamps should have enough grab.
Capping off unused vac lines, installed the long #1 and #2 sp wires, installed the rad fans, installed the new short belt.
Concerned the big fat wiring harness bundle below the wiper motor almost touches the ds log. That is no bueno and will melt straight away.
Also gotta figure out battery placement and get going on the brakes.
Seems like a long to do list left but I noticed that parts are starting to go back in the car rather than come out.
When my wife heard I pulled the AC she could not believe it "just to make the car have better pipes" . I asked for budget to reinstall it but the compressor location...
if u extend the ground wires comming out of the harnnes u shoudl be able to move the wiring down out of the way , silver heat tape around the wires will also protect them , ill have to look threw my pics and see how i dealt with it on my car for ya , but i also removed 60% of those wires , since i had a megasquirt
Oh yeah and I suggest sticking with a name brand like Project89 suggest Fragola. Here are some no-name cheaper nice looking fittings. Then you try and put them together and find out they are either not drilled or over drilled...
These are 2 different fittings. One on left is jic, one on right is orfc, (o-ring face seal)
Usual delays, time and money. I spent over a month in Phoenix when my Dad went unexpectedly into intensive care at the beginning of September and we lost him at the end of the month.
I'm quite frustrated over the welding situation, mild steel is good for learning but it's been sitting long enough to surface rust all over which I cleaned off and lightly rattle canned bbq black. However not on the inside of course. I watched another welding video which taught me the inside of the seam to weld should be as clean as the outside.
There is a custom mandrel shop not far which I would love to go to and end my misery but no $ for that at the moment.
So bear with me, I'm not giving up, just going at a barely noticeable pace.
At least she's not costing me money just sitting there.
Also at least I'm enjoying watching the TGO parts for sale daily email and other threads I've subscribed to.
Cheers.
sorry to hear that
dont worry about the rust on the inside just weld it all up
OK first weekend of lower temps here in South Florida so I got right to it and started learning how to weld again! Then the auto-dark helmet stopped auto-darkening so I got only a bit done. Hopefully tomorrow with a charge in the sun I will be back welding.
The helmet recharged and I got some more welding done today. I am probably 75% done welding, and looking ahead to making sure the welds don't have pinhole leaks (which they do a lot).
I mentioned before I was going to dunk the pipes in the pool to look for leaks but that's too complicated and messes up the pool. I need a quick way to find a leak, weld it shut, then find the next one without leaving the bench.
I rigged this up tonight. With a layer or two of duct tape at each end it creates a good enough seal. The other end I drilled a small hole which I can cover with my finger to build a bit of pressure. Works great found many holes
Yessir. Just a little bit of air pressure. Though at this point if I could get the pipes to hold pressure I would wear the injury like a badge of honor....
* welded two O2 bungs in
* cut and sealed the vapor canister pipe under the car.
* brought the wiring harness up over the wiper motor to keep it away from the log
* extended the wires down to the torque conv and speedo.
* rethought and bought new T fittings for under the dist for the oil feeds.
* started tightening down the fuel lines, radiator hoses.
* started planning how to install the manual master cyl and lines.
Hopefully get it started within the month. Holidays are great for time off but we're swamped with out of town family this season so I'm not sure how much time I'll have.
Thanks to Project 89 for ongoing support and commentary behind the scenes.
This weekend I went for a first start in about a year and a half. I've got the hot side hooked up and ready for an idle test.
In the garage had good fuel pressure (see the new fp gauge on the rail?), so push back to the driveway for the start and no fuel pressure. Uh...
Jumped the relay, still nothing. Got 12v to the orange wire and a good ground at the connector. Got the 2 sec "on" signal from the ECM when the key is turned.
Replaced the Walbro about 4 years ago, maybe have 500 mi on it. Guess it went bad.
Will get under and put volts on the connector by the tank, otherwise it looks like another pump replace.
Project89 you are going to send the 65# inj when I am ready, what fuel pump should I get a 255?
Cold side not installed yet, Still have the MAF in, the BOV's to connect and oh yeah a master cyl.
OK another month gone by dealing with the fuel pump. Here's what it looked like when I pulled it out.
Ok so I learned my lesson about gas with ethanol in it. This pump is four years old.
The pump intake screen was not clogged by the gooey rubber or the deteriorated fuel sock but even with 12v applied directly to it it would not spin.
Now a Walbro 255 is in and ready to give it a start hopefully this weekend.
Have been distracted this month by receiving a free 2000 Caravan we got running by replacing the broken timing belt, a fuel injector, two pullys, water pump, water pipe, and crank timing gear. It has 294K on it but runs great now.
Last edited by TallTim; 03-02-2017 at 05:52 PM.
Reason: details
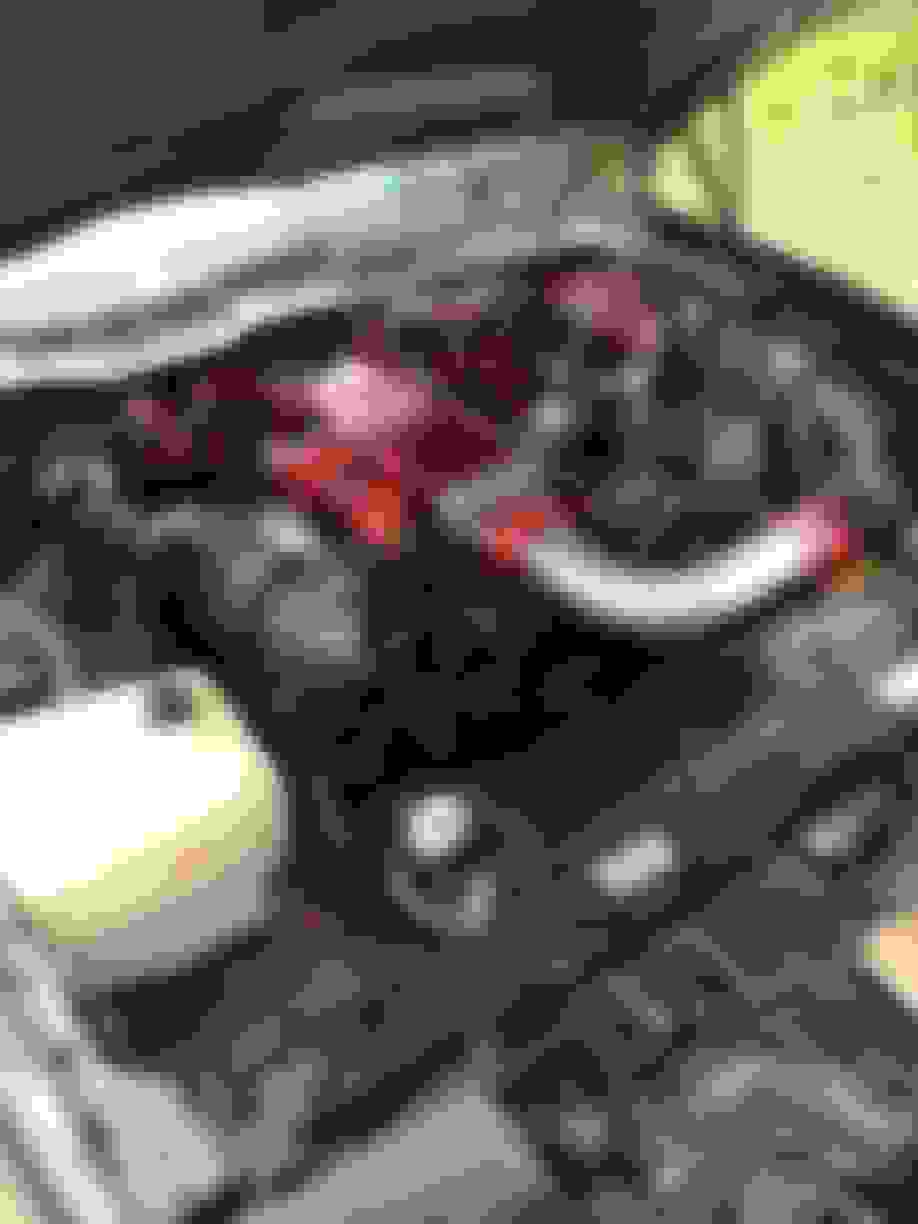
Of course ethanol doesn't eat just the fuel pump. So here's the fuel rail torn down and cleaned up and the leaky orings replaced and FPR cleaned out. Some fuel injectors were lazy, pumped a couple cans of cleaner through them, hopefully reassembly this weekend for the first start in going on two years.
Working on installing the new master cylinder and getting decent at bubble flaring for the back brakes and inverted double flares for the front. Also got a Wilwood prop valve installed and welded a simple bracket to support it off the master.
Next will be to bleed them and get the car driving a bit before finishing up the cold side.
 02-15-2016, 07:10 AM