When you click on links to various merchants on this site and make a purchase, this can result in this site earning a commission. Affiliate programs and affiliations include, but are not limited to, the eBay Partner Network.
Quick update, I've been driving the wheels off this thing!
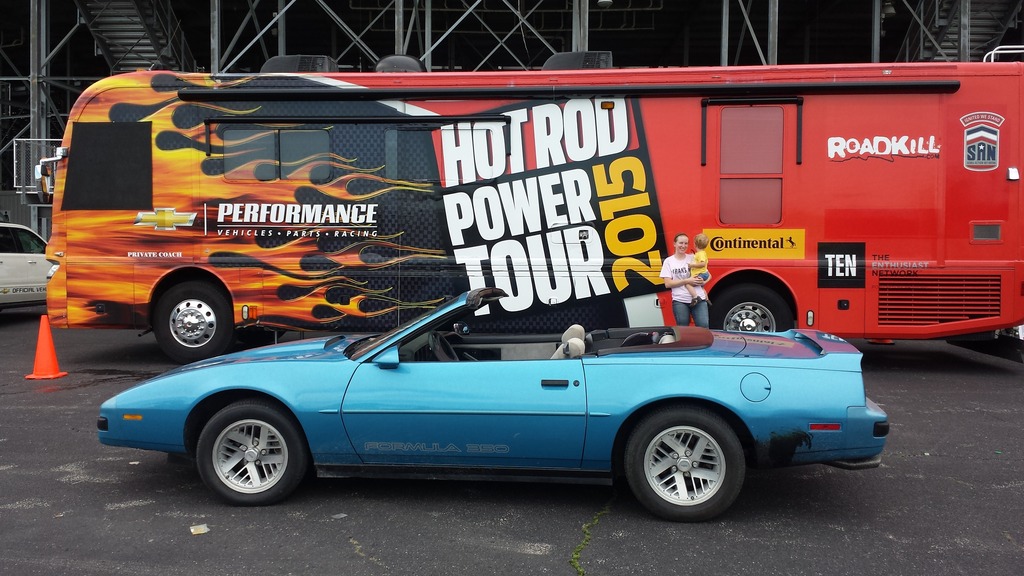
Since my wife is off in the summer and the power tour went right by my house, I had her bring the ole vert down to one of the stops and pick me up on the way when I got off work.
She didn't quite get the gas cap on all the way, some gas splashed out and turned the rubber and tar to goo. lol
Great pic of my wife, son (his 1st HRPT) and one of our cars!
What is with the "kinda-sorta" side skirts on this car? Is that on all convertables? Is it just an ASC thing? Is it supposed to act as some kind of an air foil?
got it. extra structural rigidity on account of it being a convertible.
btw, did you see the 17"s on my Formula? (if not, see Avatar Pic).
the idea to go with those wheels (and the conclusion that those would look better on my car than, say R15s) was, in large part, inspired by your slick top.
Hey TTOP350, how did you clean the 1LE calipers, they looked very nice compared to the starting look.
Did it in a big shop sink/tub.
*I used rubber gloves and eye protection, should also use some kind of respirator* its nasty.
Muratic acid for cleaning brick from Menards. Put it in a squirt bottle, scrubbed (wood handle/nylon Bristle brush an small wire brush) and squirted and scrubbed an squirted until they were clean.
Then rinsed with baking soda water and dried w a air gun and in the sun.
Did it in a big shop sink/tub.
*I used rubber gloves and eye protection, should also use some kind of respirator* its nasty.
Muratic acid for cleaning brick from Menards. Put it in a squirt bottle, scrubbed (wood handle/nylon Bristle brush) and squirted and scrubbed an squirted until they were clean.
Then rinsed with baking soda water and dried w a air gun and in the sun.
Had some tires that needed to be dismounted so I got the truck out, loaded the tires up and drove it a half mile to my local auto shop. (good pic of the bad original bumper paint)
Not much to update, have been driving it and finally put on the inner subframe connectors. I think I like the outers better (won't work on vert) but these did help a little bit.
Makes me feel better about the one I've had on the shelf for a few years now. I really did intend to use it, but it really just didn't fit very well in the car. Had the overflow tank out, and A/C condenser disconnected and it still barely fit. Didn't really seem to fit up to the inner fender opening or the 'battery tray' very well either. I fully intend to get around to it eventually, but I have to reroute the wiring harness for the passenger's marker light, along with the charcoal can, etc...
Makes me feel better about the one I've had on the shelf for a few years now. I really did intend to use it, but it really just didn't fit very well in the car. Had the overflow tank out, and A/C condenser disconnected and it still barely fit. Didn't really seem to fit up to the inner fender opening or the 'battery tray' very well either. I fully intend to get around to it eventually, but I have to reroute the wiring harness for the passenger's marker light, along with the charcoal can, etc...
They do look cool, I'll give them that.
Yeah, you have to reroute the relay, ground wires and the marker light wire routing.
I have the instructions for 89 an up if you need me to scan them. It has a cutout so you can locate and drill the holes for the upper 2 mounting bolts.
I've been thinking we need to have a page with vintage instructions if it wouldn't be a copywrite issue?
Post up a pic of a fully installed unit please....
Post up a pic of a fully installed unit please....
There is a SLP box installed in the blue 89 and the black 89 in the pictures but lacks the details in in the instructions, like moving the charcoal canister, lengthening the vac line, electrical and the other electrical stuff.
Yeah, you have to reroute the relay, ground wires and the marker light wire routing.
I have the instructions for 89 an up if you need me to scan them. It has a cutout so you can locate and drill the holes for the upper 2 mounting bolts.
I've been thinking we need to have a page with vintage instructions if it wouldn't be a copywrite issue?
Instructions will not be a copyright issue, luckily.
I'd like to see those 89+ instructions as I hope to need them some day
Yeah, you have to reroute the relay, ground wires and the marker light wire routing.
I have the instructions for 89 an up if you need me to scan them. It has a cutout so you can locate and drill the holes for the upper 2 mounting bolts.
I've been thinking we need to have a page with vintage instructions if it wouldn't be a copywrite issue?
I've got a set of scans for the 85-87 CAI, but I'd like to see the 88-92 manuals, and the dual CAI manual. I wouldn't think the copyright would be an issue, back in the day the instructions were all posted publicly on Summit and SLPs website. Can't imagine anyone would care.
On my Formula I plan to eventually install the single. The dual is going on the Green Bird. With that car it's no big deal to relocate the battery, and charcoal can... Still debating how I want to deal with the upper rad hose. Think you mentioned before the kit used a chrome waterneck and a 70's Pontiac upper hose? Thinking I want to mod the waterneck to simulate the hose routing used on the Firehawk to keep the look cleaner.
Pic is a members car from this board, you can see how SLP routed the hose for 85-87 TPI cars because of the V-belts and A/C compressor. The part number of the hose 71394.
I'll scribble down the part number for future reference. When I reach that stage of the project, I'll probably just want to get it running, but ideally I'd like to keep the hose under the cold air intake. Did the Firehawks use the stock hose? Kind of getting off the topic of the thread, sorry.
I'll scribble down the part number for future reference. When I reach that stage of the project, I'll probably just want to get it running, but ideally I'd like to keep the hose under the cold air intake. Did the Firehawks use the stock hose? Kind of getting off the topic of the thread, sorry.
NP with getting off topic a bit, takes a long time to melt my snow ;-). Yes, the Hawks used the factory hose. Pretty sure this routing was used to work with stock TPI and who knows what/why.
I've always assumed SLP didn't want to R&D a waterneck that that would bolt on the TPI intake, and angle down under the belt like the one on the T-ram. I'd expect the waterneck bolts on the TPI intake being fore/aft would put the front bolt under the waterneck outlet. Hmm...
Been wondering if the dual cold air will require chopping the upper rad hose support off the fan shroud. Looks like the T-box would come close to contacting it. Figuring out exactly how I want to deal with all these little details are a large part of why I've never gotten the dual cold air installed on a car. But hey, if I need to hack a hose hanger, and live with a radiator hose alternator reach around, and a battery shut-off switch, it's no big deal on the Birdo El Dirto.
Pic is a members car from this board, you can see how SLP routed the hose for TPI cars. The part number of the hose 71394.
OK, we all have different opinions on what looks good, etc - but for me, I just could not live with that horrible after thought of an upper radiator hose....no freekin way !!!


 06-09-2015, 09:05 PM


 OK, we all have different opinions on what looks good, etc - but for me, I just could not live with that horrible after thought of an upper radiator hose....no freekin way !!!