When you click on links to various merchants on this site and make a purchase, this can result in this site earning a commission. Affiliate programs and affiliations include, but are not limited to, the eBay Partner Network.
Re: My 91 Z28 build. 17 years in the making... Finally going to do this right
No my welder can't run shielding gas. Please point to an article or book that explains how it is weak. I would like this thread to not run off track into weld style and strength, but if you have legit data that could be useful to me and others please post.
From all I have read flux core is messy, not weak.
Re: My 91 Z28 build. 17 years in the making... Finally going to do this right
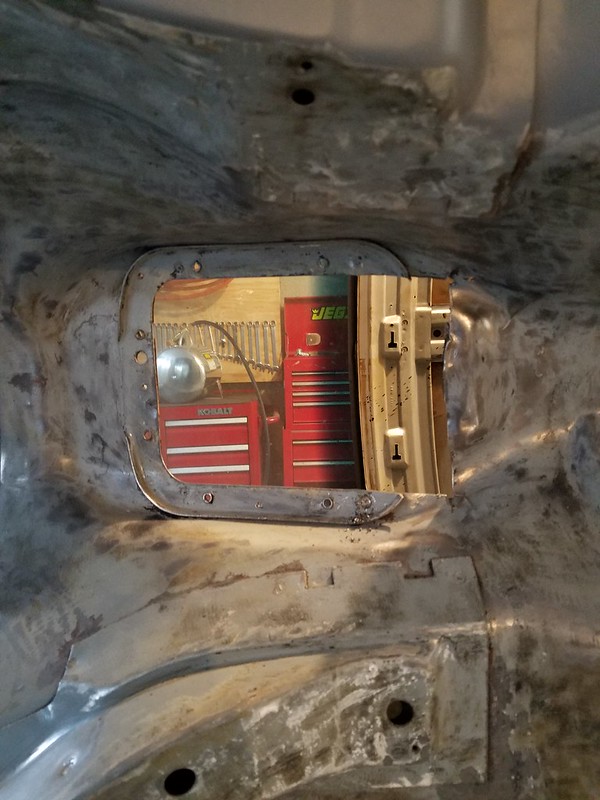
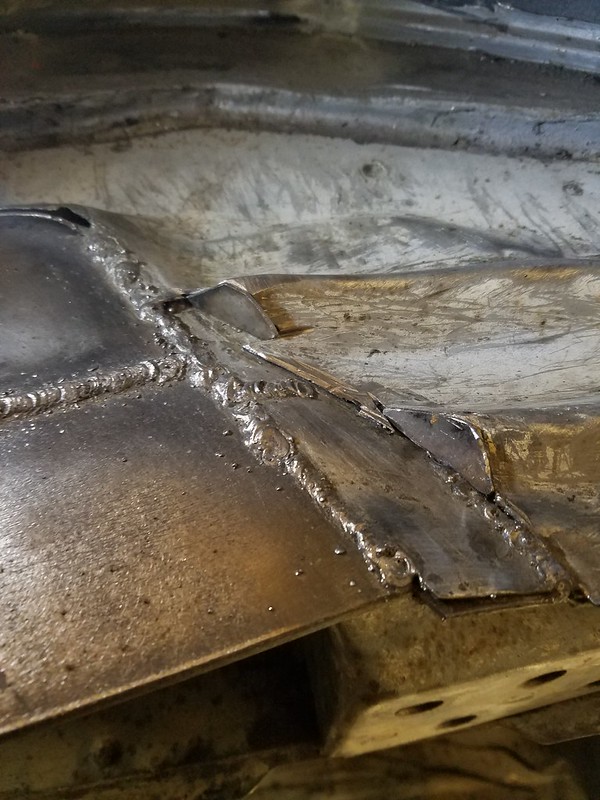
The LS3 and T56 will be in some new location with regards to the trans tunnel and I wanted to finish the underside coating so I figured the best idea for now was to close up the hole and repair all the hacking I did when I was a kid.
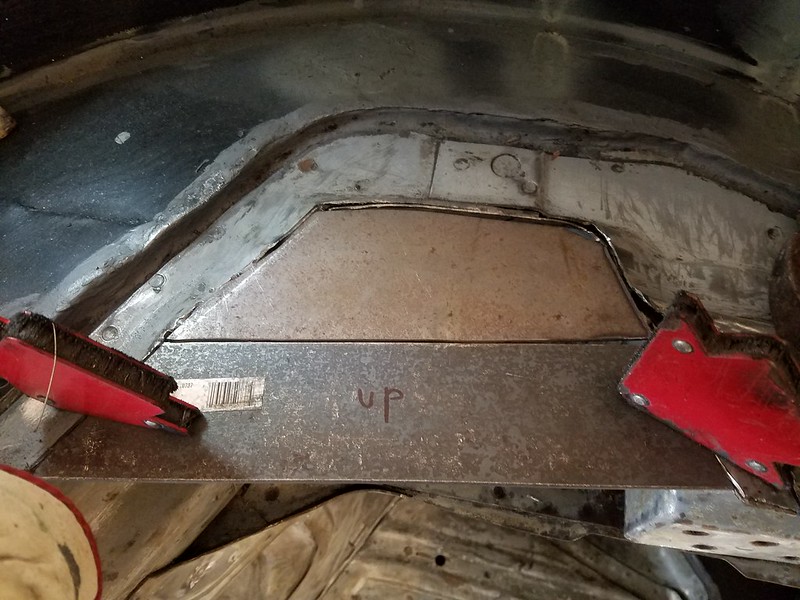
Hole to fix.
Re: My 91 Z28 build. 17 years in the making... Finally going to do this right
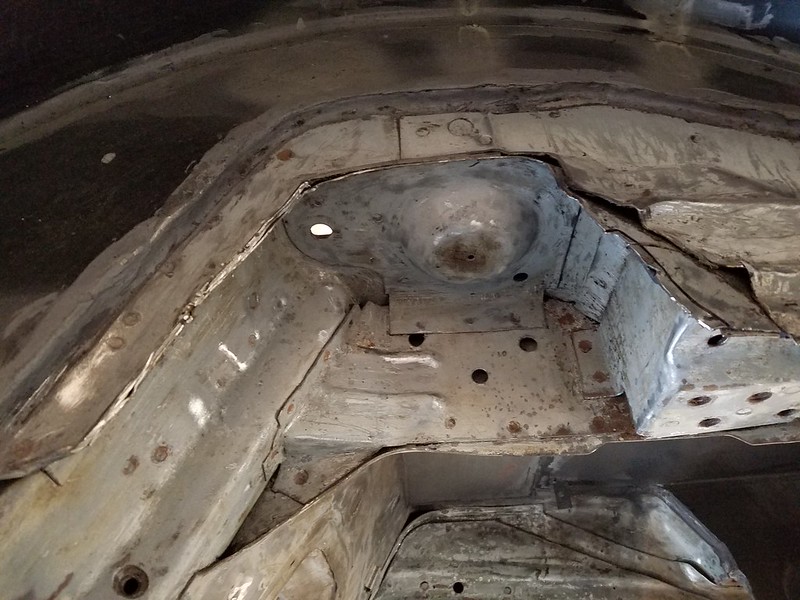
Time to close off the rear frame arches finally.
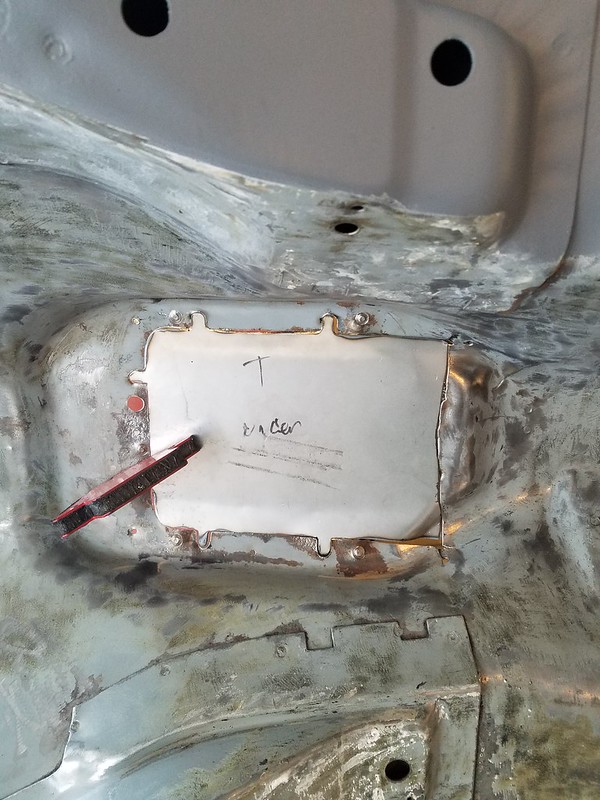
Hole prepped for patch fitment.
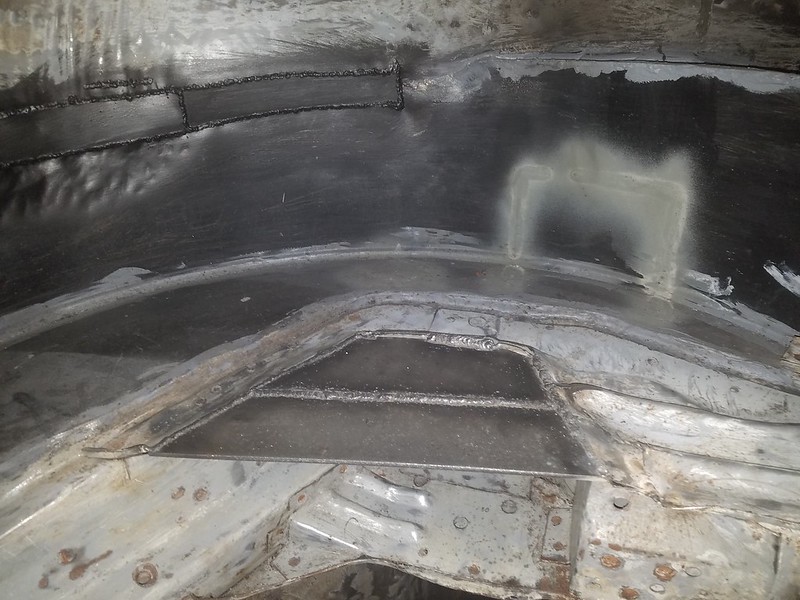
Patches made from some 1/4" steel plates.
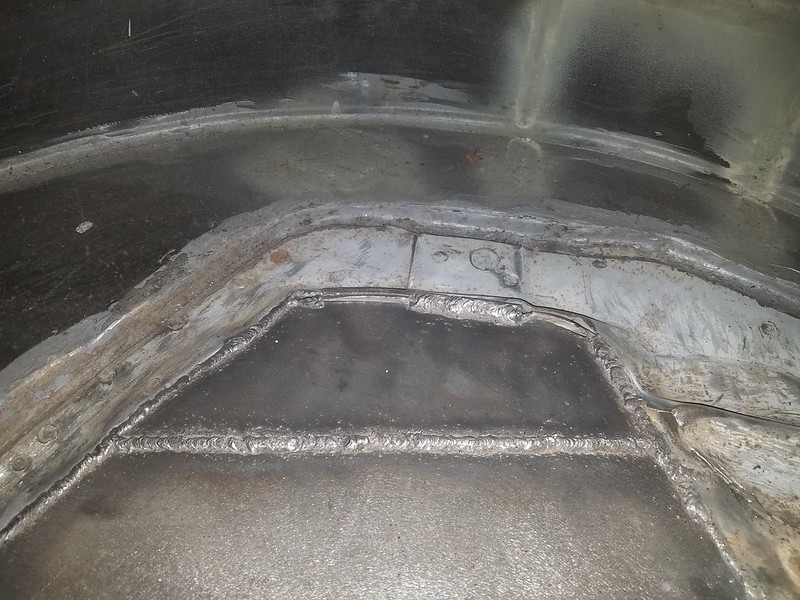
All welded in.
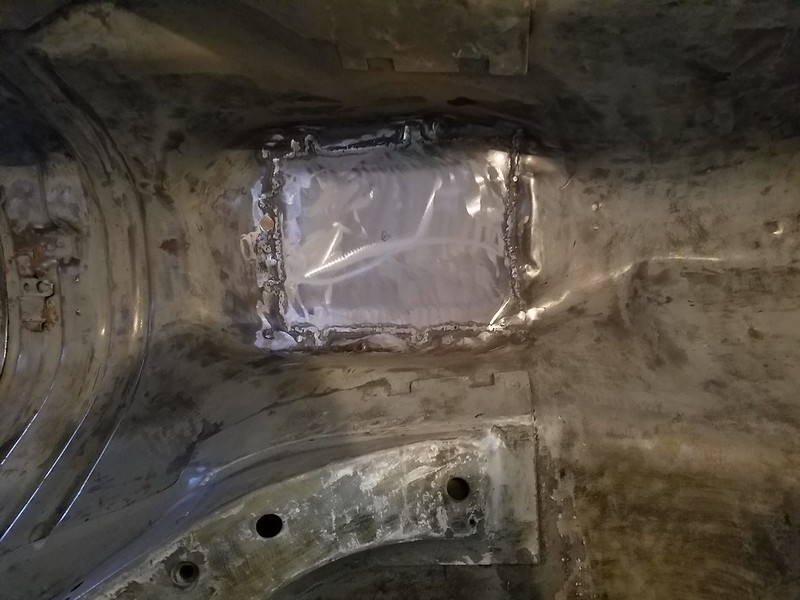
Shot showing the muti layers of steel in this area. Makes it hard to weld. Going to leave it like this and use seam sealer for the rest of the gaps after paint.
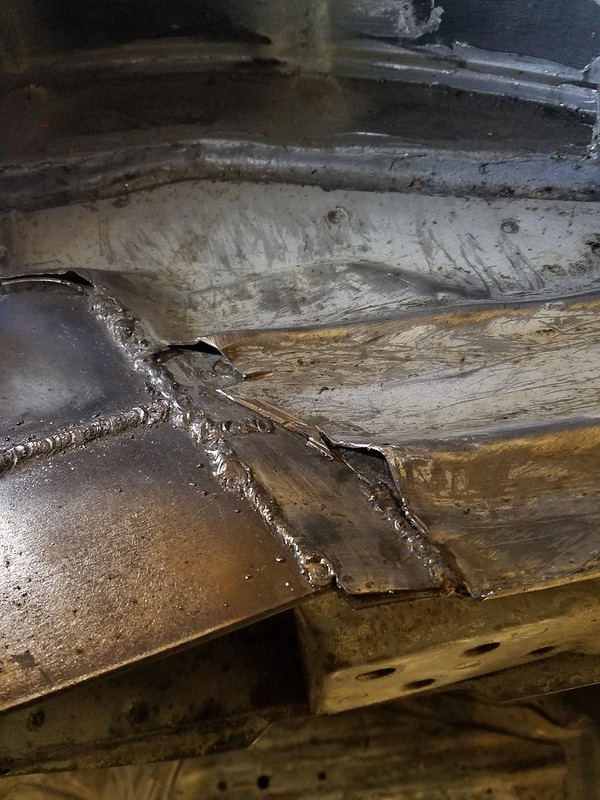
Small holes and sheets of steel that need to be tied in.
Tinny filler panels made.
I welded them in and then repeated on the PS of the car. I will update when I can get more images.
Re: My 91 Z28 build. 17 years in the making... Finally going to do this right
Originally Posted by scooter
Who says flux core wire welds are "brittle"? That can't be true at all, since all stick welding is flux shielded so....
its brittle, its not intended for use in a vehicle, its and industreal aplication such as ark welded, its the sheilding and rate of cooling that creats the issue
Re: My 91 Z28 build. 17 years in the making... Finally going to do this right
Originally Posted by morrow
its brittle, its not intended for use in a vehicle, its and industreal aplication such as ark welded, its the sheilding and rate of cooling that creats the issue
Without some sort of documentation supporting that I am going to call BS that is "not intended for use in a vehicle". I did some searching and couldn't find anything to support that claim
Re: My 91 Z28 build. 17 years in the making... Finally going to do this right
The most malleable welds are welds that are heated up slowly and cooled slowly which is what Oxy-Acetelyne is. Oxy-Acetelyne also requires no shielding. Unfortunately it also causes lots of warpage on thinner metals and is somewhat dangerous which is why most people have abandoned it in favor of processes that contain the Heat Affected Zone much better. Flux-cored welding is the same principle as MIG welding and it's performed in the exact same fashion and they've both been an accepted practice for decades. There are a few differences in the welding technique of Flux-cored vs MIG and if the welder doesn't know them they're Flux-cored welds can suffer from porosity or slag entrapment. Is that why you think the flux core isn't allowed? Some weld joints for certain applications will not allow for MIG or Flux-cored because of the penetration vs the thickness of metal so they call for TIG or maybe spray transfer/arc, Is that why you think Flux-cored isn't allowed?
Re: My 91 Z28 build. 17 years in the making... Finally going to do this right
im not saying its not allowed per say, im saying its brittle, but yes thats a couple reasons, as well as cits rate of cooling causes a more brittle weld when used on sheet metal or other thin materials. i have a few books somewhere ill have to dig up, ones on metallurgy and ones specifics of each procedure for welding different thicknesses and different scenarios
Re: My 91 Z28 build. 17 years in the making... Finally going to do this right
Still ticking...
Massive delay in the project due to a divorce, move and now I bought a C7 Z51 as a new daily so I am getting used to that.
Car is still on rotisserie, now at my new house. Work will start up again soon in a more major way. Stay tuned. Now that I have the vette, chances are this car will become more of a crazy show piece (air ride, etc...)
Re: My 91 Z28 build. 17 years in the making... Finally going to do this right
Originally Posted by dennisbernal91z
I bought a C7 Z51 as a new daily so I am getting used to that.
I'm curious if you had seen that car's (C7) sticker price drop as a result of the new C8 mid-engine corvette becoming available. Many people's opinions seem to be that the C7s and higher end C6's will see a big sell off as a result of prior owners selling them to purchase a new C8.
Re: My 91 Z28 build. 17 years in the making... Finally going to do this right
My plan was to wait for the C7 prices to drop after the C8 hits the streets. Then I learned that the C8 will only be offered with a dual clutch. This made me nervous because I thought this might make the low miles M7 C7s prices go up, or not fall. Especially Z51s.
I searched and found an amazing deal that I could afford, so I dropped the hammer.
Re: My 91 Z28 build. 17 years in the making... Finally going to do this right
FINALLY back at it.
Long delay adding a second full bathroom to my house myself.
Anyways, picking up where I left off. Coating the entire body in 2k epoxy primer. First coat on the final (PITA) rear section done. Second coat going on today. Progress feels amazing.
Just before. Sooo much sanding and scrapping to get all the OEM undercoating off. Then Fast Etch, then clean, clean, clean before painting. Still drying.
Re: My 91 Z28 build. 17 years in the making... Finally going to do this right
Time for an update. Work is happing on a much more regular basis now.
Time to finish all internal welding. This involved adding the harness attachment bung to the cross bar. Hole drilled.
Bung fit into place before welding.
I also got around to finally removing the windshield. Folded it up into thirds and tossed it. Able to clean up a few rusty areas under the glass now.
Last edited by dennisbernal91z; 01-13-2021 at 12:49 PM.
Re: My 91 Z28 build. 17 years in the making... Finally going to do this right
How the car looks spun back around after doing a nice thick coat of epoxy primer over everything on the inside. Now to finish off non-critical exterior areas.
Engine bay can finally have its smoothed out firewall panel primed. Prepped and ready to go.
Rear rotisserie removed so that I could access the tail light and rear frame rails for priming. Sanded with 120grit and ready to go after A LOT of blowing dust off and out of the garage.
Re: My 91 Z28 build. 17 years in the making... Finally going to do this right
Here you can see the interior after a long time coming, all patches redone and metal work done (for now), in primer.
You can also see the braces I made to accept the rear passenger shoulder seat belts that are welded to the mini tubs.
Smooth out panel primed. Filler work to come next before it gets another coat of primer. Gonna do my best to keep the engine bay SUPER minimalistic so that smooth firewall really comes thru.
Nothing exciting but the primed rear tail light section. Nice to see these easy to ignore areas getting attention.
Re: My 91 Z28 build. 17 years in the making... Finally going to do this right
Next step is to sort out my fender situation. Aftermarket fenders are known to be garbage so I decided it is best to try and fix the pieces I have.
One was badly damaged when the car slipped off a hydrolic jack in the rain, trying to push the car around by the jack.... 2013 me made some stupid choices.
Below you can see the main damage. Note that the car's lower mounting ear for the fenders rotted away so when I had a shop paint the car back in 2006 they tack welded the fenders in place...smh...
Time to fix this. Problem was I don't even know what these mounts look like or where they go. That is why I wanted new fenders since I knew these mounts were mangled up on the fenders.
After a few hours of my very first time metal working using some HF hammer and dolly, combined with vice grips, pliers and screwdrivers, I got the damage fairly sorted.
Once it is all sanded down and primed, then filled, it will look good. Also, you won't be able to see any of this under the GFX.
With the mounting ears correct enough on the fenders, I can now see where this lines up on the body and weld on some attachment points. No more tack weld!
Re: My 91 Z28 build. 17 years in the making... Finally going to do this right
Added the fender attachment points. Made from double layered 16 gauge. Also removed the tack welds from the car and fenders that used to what held on the lower attachment points. Can finally move onto SFC. Need to measure car for straightness first. Plan to weld in BMR outer SFCs and add more bracing tabs to tie them to the floor along their length. Not 100% sure how I will do this exactly, but I do know I won't just be relying on the front and back attachment points. PS DS
Re: My 91 Z28 build. 17 years in the making... Finally going to do this right
A bunch of images of the SFC install. You can see the added plates to tie into the rocker seam. Think I am going to scuff them and paint them with epoxy primer so they blend in with the rest of the underside.
Pic
Re: My 91 Z28 build. 17 years in the making... Finally going to do this right
Final shot before prep and paint on the SFCs. I'm going to scuff them up and paint them with the sane epoxy primer, along with 30 small touch ups the floor needs before flipping it back and starting on the interior.
Surprise: gonna do something I have never seen done on a third gen.... stay tuned!
Re: My 91 Z28 build. 17 years in the making... Finally going to do this right
Day one of dash design. Cut out everything I'm not using. Dakota digital dash stand in, in place. Seats are back ordered till late June so sitting on a bunch of moving blankets to figure out how far in to set them. Currently 32" from my eyes. Can anyone check their car, is 32" about right?
Re: My 91 Z28 build. 17 years in the making... Finally going to do this right
Seats will be Corbeau RXX in black.
Dash will Dakota Digital VHX-1023 in black.
Steering column will Ididit with tilt in black.
Steering wheel will be Billet Specialties (still deciding) either gunmetal or bronze.
No radio, no AC.
Vintage air windshield defrost and floor heater.
Custom fiberglass door panels and dash pad and all interior plastics to cover fuel cell trunk and mini tubs.
Re: My 91 Z28 build. 17 years in the making... Finally going to do this right
Starting to lay out dash after cutting out old gauges and vents. Developing an action plan here is a job in itself. I've never done anything like this.
After some brainstorming I think the plan of attack will be customize the dash pad first. This gives a good reference line for the dash. I also picked up some materials to start making block off plates. MDF.
Car will not have a radio so speaker grills are being shut along with upper vents. Car will have defrost and floor heat from Vintage Air.
Re: My 91 Z28 build. 17 years in the making... Finally going to do this right
Dash pad fabrication. Sanding dash and masking speaker block out plates. Will be running Vintage Air windshield defroster and floor heat. 3 season show car. Inserted MDF into dash to build up vent delete area.
Re: My 91 Z28 build. 17 years in the making... Finally going to do this right
Another shot of vent depression delete. Window defrost vents closed too. Plan to have windows open most of the time. You can see the defroster vents temporarily hot glued in place. Under side with healthy application of short strand filler to lock everything in place.
Re: My 91 Z28 build. 17 years in the making... Finally going to do this right
Didn't take a pic of the dash with MDF block off plates and filler, but I am sure you get the idea from the underside and previous pics.
Felt installed and stapled down. Lools fairly decent just like that, haha. Here you can see some of the dozens of staples keepimg the felt on. It is also held on with spray on adhesive.
Re: My 91 Z28 build. 17 years in the making... Finally going to do this right
Resin applied to felt Fiberglass cloth applied over another helping of resin, then more resin on the cloth. Pic is after initial sanding of final resin. First few applications of filler to get the realy low spots of the glass smoothed out.
Re: My 91 Z28 build. 17 years in the making... Finally going to do this right
"Rundo" applied. Mixture of filler and resin. Something like 60% filler. Applied with a brush. Just about dry Showing inside Rundo application
Also some additional filler here.
Re: My 91 Z28 build. 17 years in the making... Finally going to do this right
Filler panel for center vents Dash coming along. Slowly making filler plates and brackets as well as fabricating the left side of the dash to mirror the right.
Re: My 91 Z28 build. 17 years in the making... Finally going to do this right
Corbeau seats! Getting close to test fit time so I can design the center console and door panels. Brackets DS didn't fit. In my opinion donor car they used to design them was messed up. My car, to the best of my knowlgde is straight and crash free. PS and DS dims match for mounting studs. Corbeau has a different dim for front DS spacing. This is wrong. After a call to them, concluded that drilling out mount hole for 2 holes by 1/16" will do it. It worked.

 11-04-2018, 11:20 PM


") BS that is "not intended for use in a vehicle". I did some searching and couldn't find anything to support that claim
BS that is "not intended for use in a vehicle". I did some searching and couldn't find anything to support that claim