When you click on links to various merchants on this site and make a purchase, this can result in this site earning a commission. Affiliate programs and affiliations include, but are not limited to, the eBay Partner Network.
So I finally decided to start a build thread for a couple different reasons...
one to keep me moving on it
two to get info & advice from you guys since TGO is new to me.
and three, so others can see the progress and parts I'm using.
My goal here is to build a reliable, stock appearing, comfortable daily driver that can be driven anywhere. I'm hoping to have this finished and on the road by mid next summer.
I'm not a bodyman/painter, so that will be the most expensive & probably time consuming part of this project. Mainly because the car will be repainted RED.
As you can see from the original post, I'm finishing what someone else started.
....progress & pics to come
Look forward to pics...take your time and do things right the first time. I've cut corners before, only to be bitten in the behind later and spending twice the $$. Good luck!
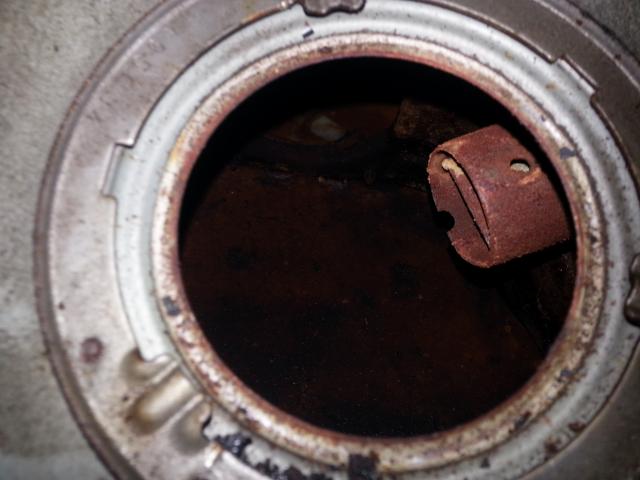
First job is to just get it running to see what I have here. PO said it had only been sitting for a year. But I thought it might be a good idea to drop the tank and see what condition it's in.
I'm glad I did....
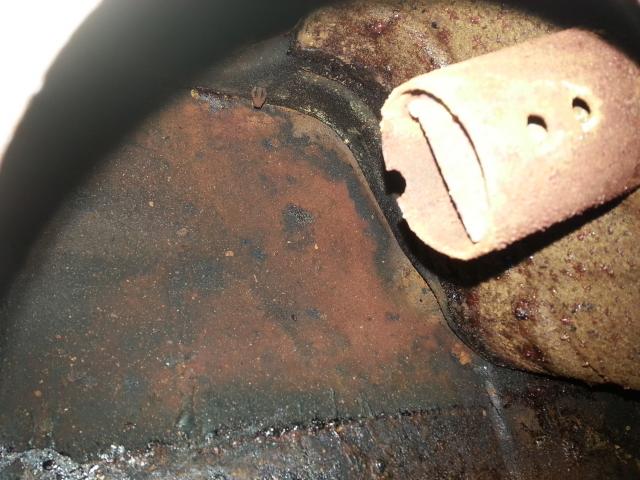
I don't think I've ever seen a tank this gummed up before.
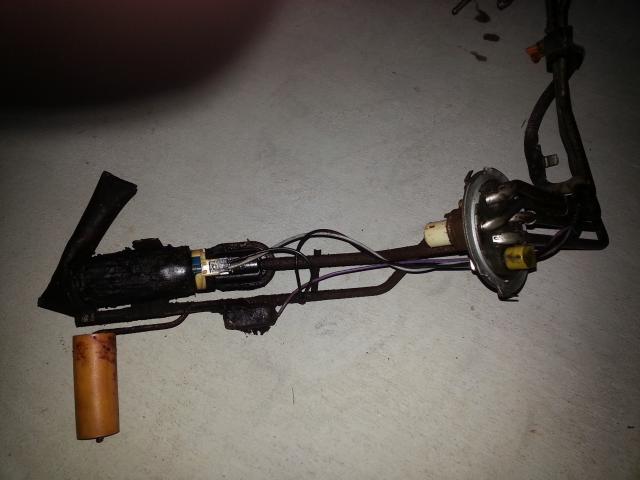
A shot of the sending unit...
I wonder if this has anything to do with the reason the PO was going to go with a carb. Maybe he didn't know it was this bad either and thought something was going on with the TPI.
Started to clean this up but wanted to make sure the sender would work properly before I do. Does anyone know how to check it?
I put an ohm meter across it but its reading between 200-300k ohms. I wasn't expecting that.
Yeah, I knew 0-90 was typical of older stuff, but I hadn't never really tried to measure one so wasn't sure if that 0-90 actually meant thats the resistance you could read right off the sensor....evidently it is, and mine is crap.
Haven't been able to work on the car between T-giving & Christmas but did get a couple hours in yesterday...
Dropped the rear to get the tank back in. Still very pleased I've found no rust in this car so far.
Is winter over......?
Been working on a couple other projects and need to get back on this, got the rear cleaned up and coated with por15. Top coated semi-gloss. Did the LCAs, panhard and brace.
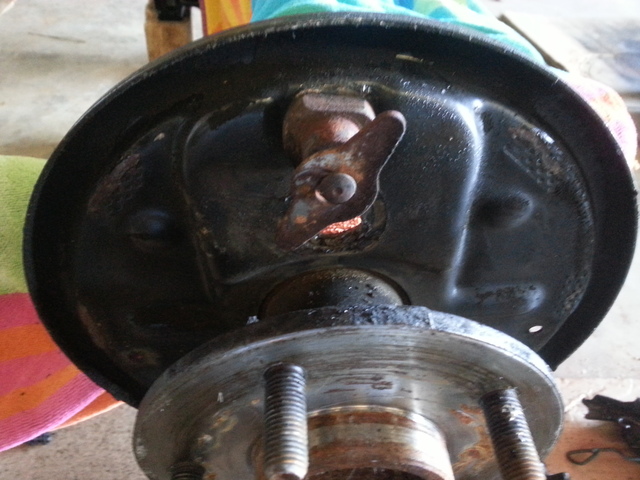
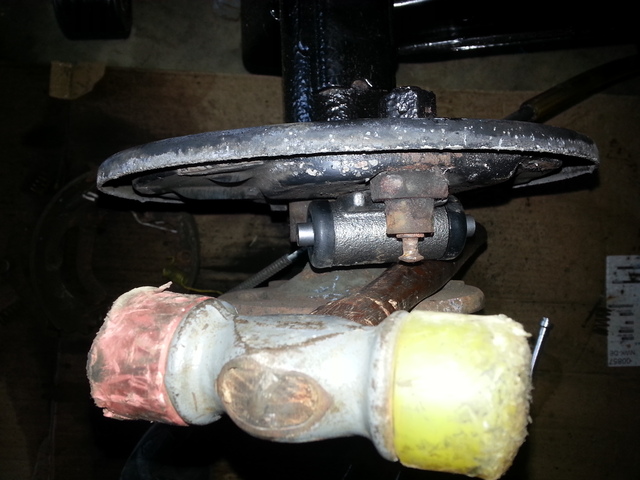
Was going to do the brakes later, but when I went to roll it back under the car, one wheel wouldn't turn....
axle seal leaking
and this is after 2 cans of brakekleen
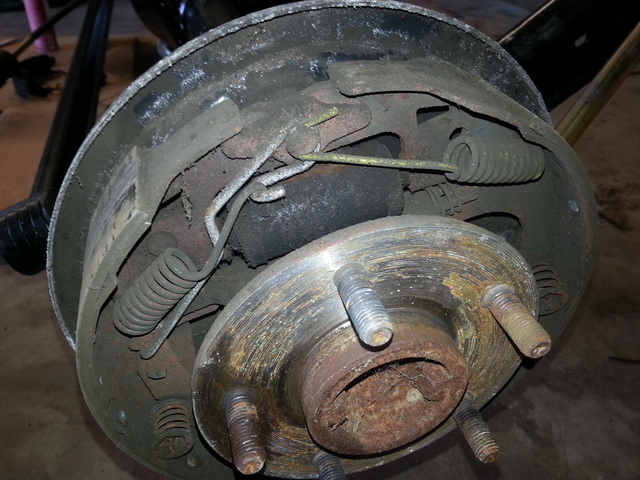
and this was the clean side...HA
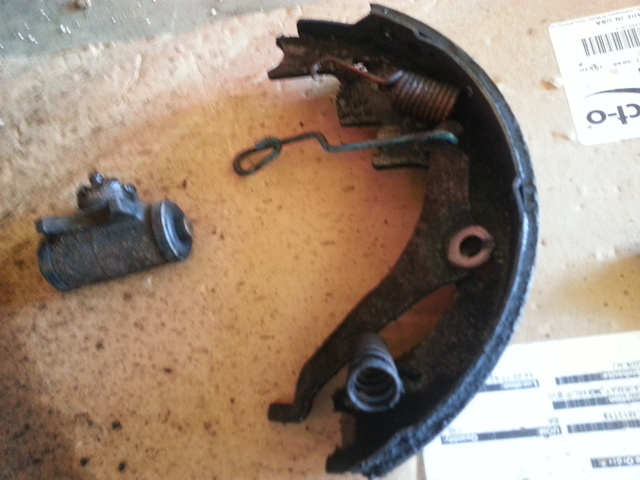
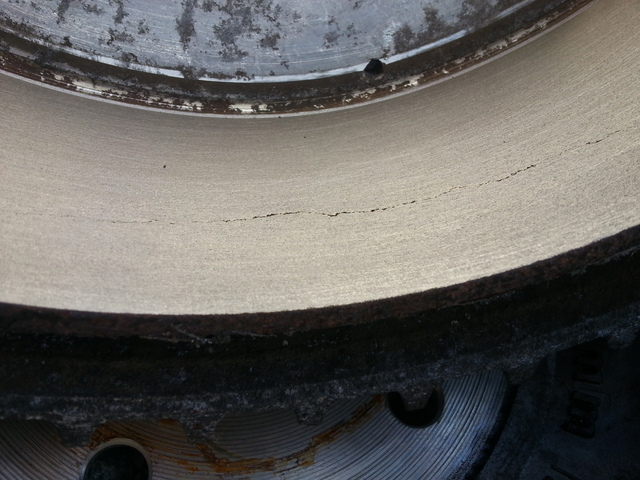
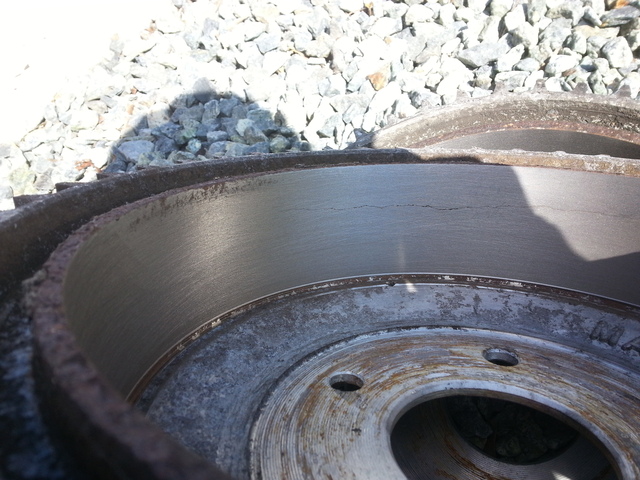
and it gets better...had the drums turned and found this
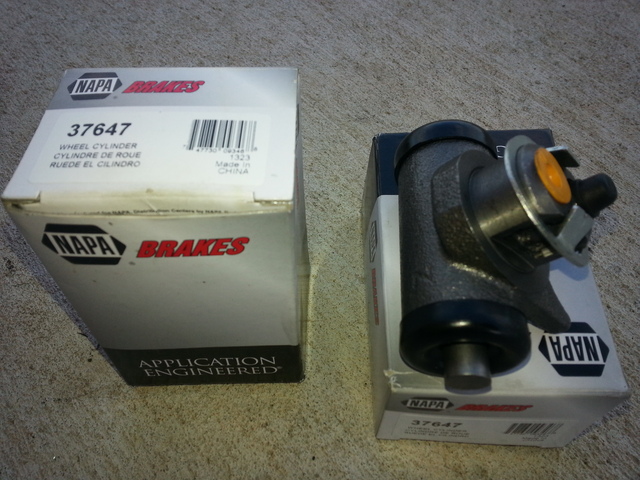
Went ahead and installed the new wheel cylinders while waiting on new drums..
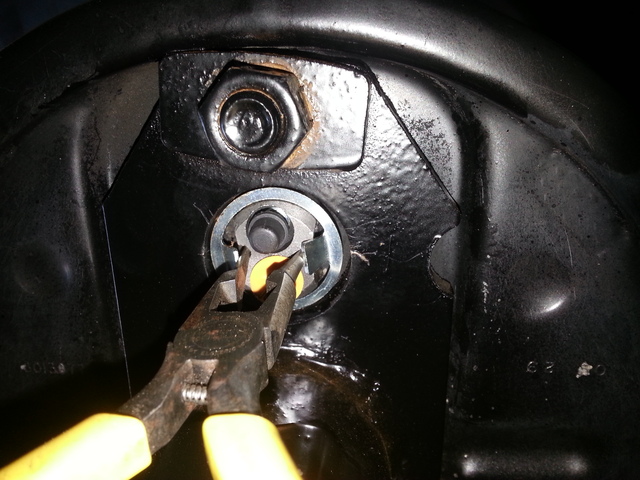
Since I don't have 3 hands, I found another use for my hammer handle. It held the cylinder tight against the backing plate so I could push the spring clip in from the back side
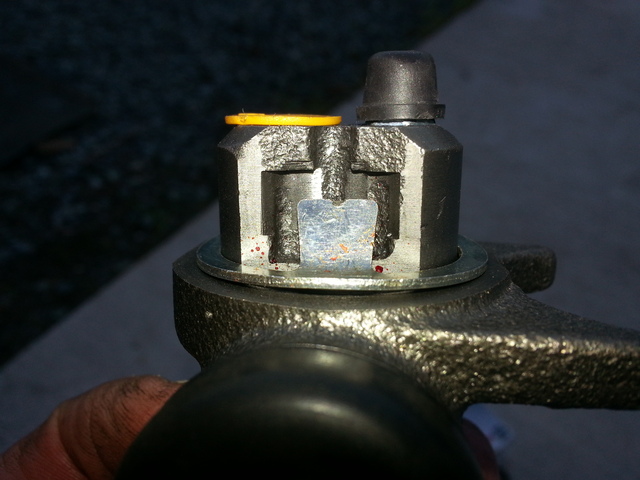
And as typical with some replacement parts, something was wrong. The new cylinder & clip wasn't holding tight against the backing plate.
The plate metal isn't very thick....or not this thick anyway.
I pulled it back out and you can see how much space there is were the tabs lock on the back side of the cylinder....thats waaaay too big a gap
so I put the old clip back in....much better
Heres both clips. I think even tho 25 years old, the old clip is a better spring metal than the new
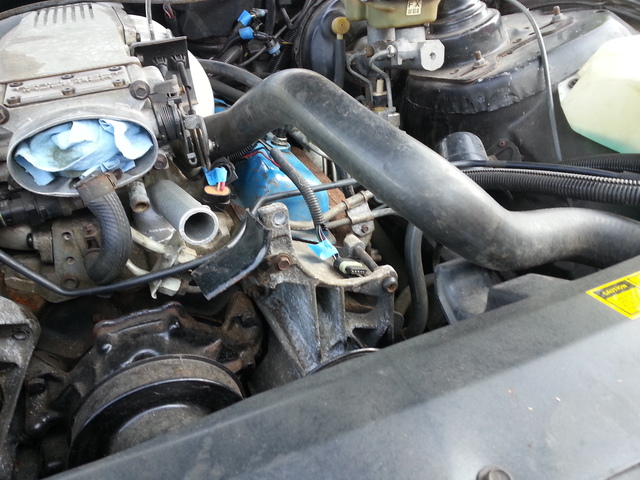
Got the TPI out of the back and set it on. It was missing the Thermostat housing and I couldn't find one fairly quick from CL or classified here, so I ordered one from Autozone. Hope its good enough quality.
Guess the upper hose is for the carb setup.
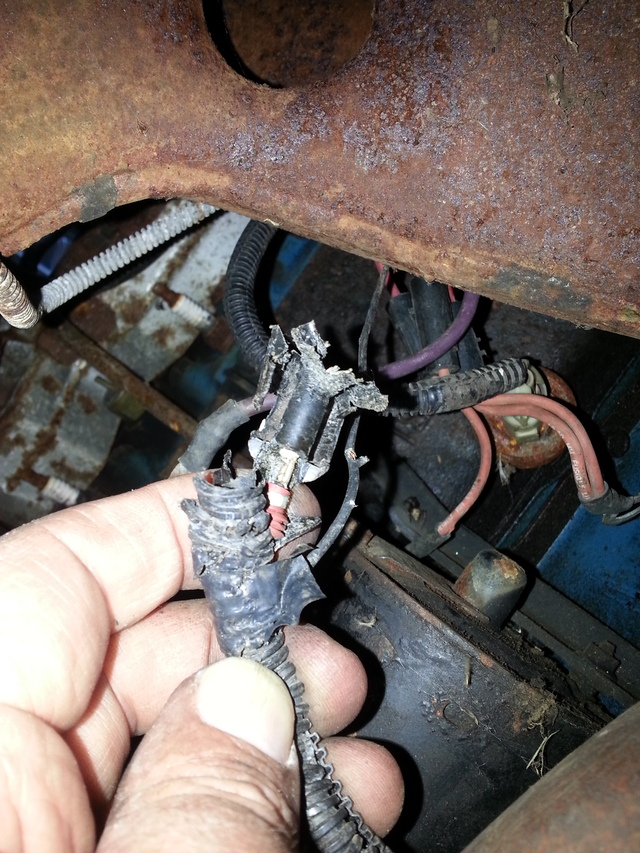
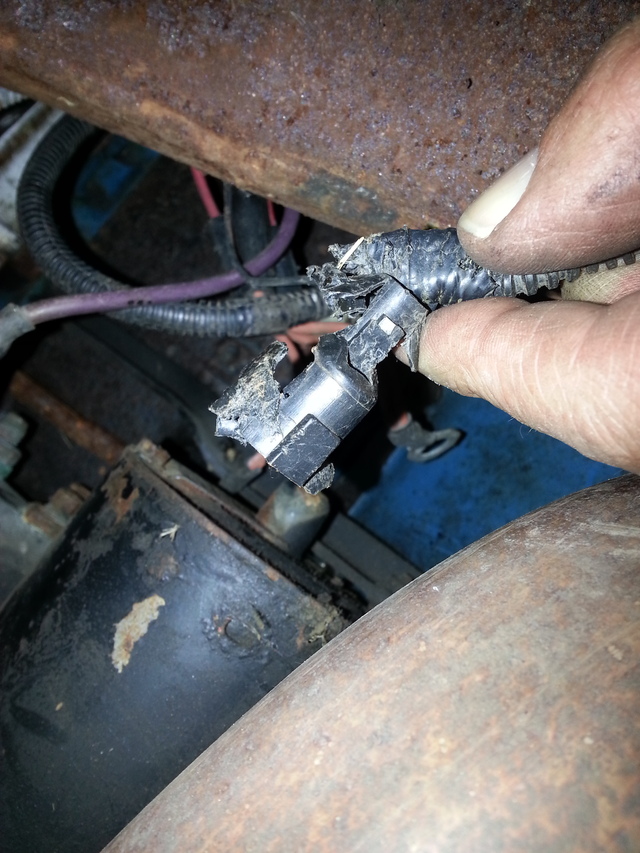
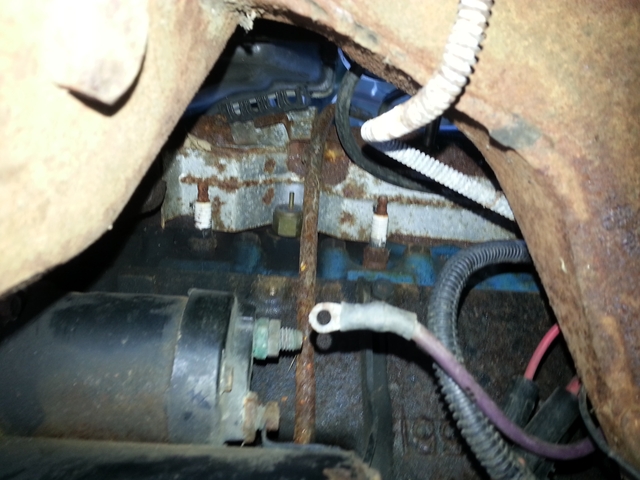
Working on laying out the harness and I found a mangled up connector. Hopefully someone could guess what it is. Its a single black wire that looked to be some type of weatherpac connector. Just because I can see the rubber grommet around it on the back side.
Heres a couple pics. Also there's a brass looking fitting up on the head between the spark plugs in one pic. Does this burnt connector go there. Does anyone know what it is?
Working on laying out the harness and I found a mangled up connector. Hopefully someone could guess what it is. Its a single black wire that looked to be some type of weatherpac connector. Just because I can see the rubber grommet around it on the back side.
The remains of the connector looks like it is for the fan switch.
Originally Posted by KCG
Also there's a brass looking fitting up on the head between the spark plugs in one pic. Does this burnt connector go there. Does anyone know what it is?
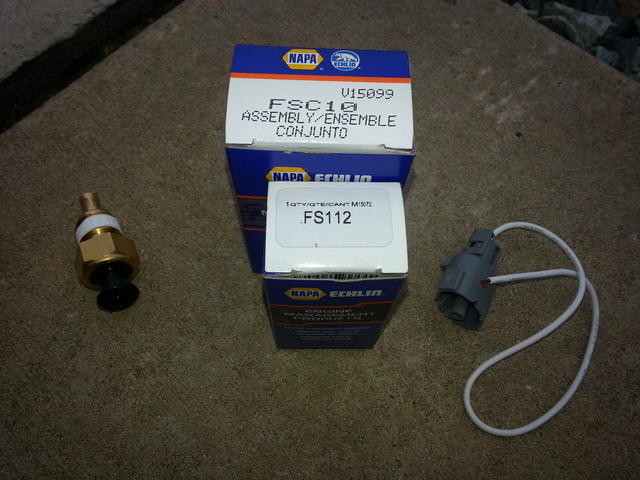
The sensor is the fan switch. And it is jacked, too. It should have a mushroom spaced piece of plastic for the wire/connector to grip.
Here are the "correct" parts for your car:
Or get a newer style from Summit. Although, this specific part looks more like to fit an NPT threaded hole in the intake, vs at the head. I search on "gm fan switch".
Thanks MoJoe,
The original looking one from Summit says up to '88...makes sense, this is supposed to be an '86 block.
Is this single wire going to the ECM or is this a ground to activate a relay for the fans?
Also, There's another temp sensor in the drivers side head. Is that one just for the gauge ?
So, I got the sensor & connector at Napa.
Stock temp range.
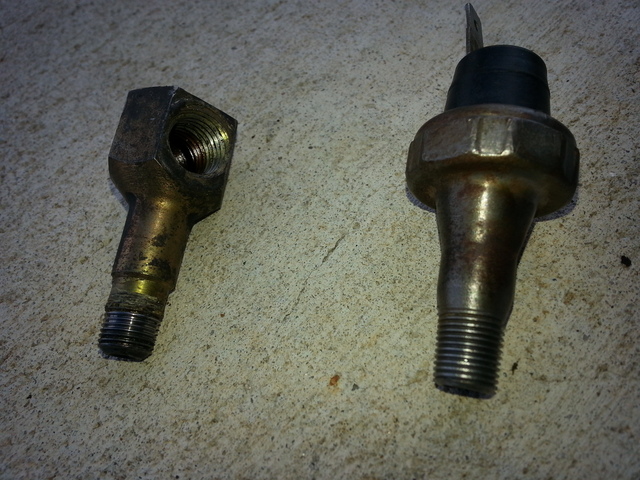
Next, is this 90 on back of the block where I would expect the OPSU to be.
I have a pic of it and one from a carbed engine. Of course the connector style looks like it wouldn't clear the TPI. So...should I just plug this 90? Looks like there's a OPSU down on the side of the block right above the oil filter.
And just to clarify a little....I'm just doing what I need to do to fire this thing up and check out the engine to see if its good or not. Once that decision is made, everything will be blown apart, cleaned up & painted.
The Oil pressure sensor in the back of the block is for the gauge. The oil switch for the ECM is above the oil filter. If you just want to fire the engine, block it off for now.
The Oil pressure sensor in the back of the block is for the gauge. The oil switch for the ECM is above the oil filter. If you just want to fire the engine, block it off for now.
ok, thanks. I'll search around for what should be plugged in to that 90.
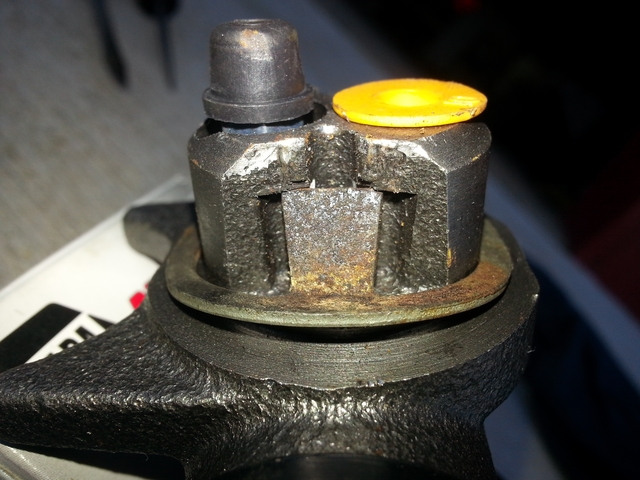
Hand cranked the engine over to set #1 at TDC before I dropped the dist in.
No timing pointer...
Theres a tube right behind the water pump. Its looking down at the balancer. Whats it for? You can just barely see the yellow mark on the balancer in this picture.
Thanks Dave and everyone else who's offered advice and knowledge on this so far.
Like I said earlier, I'm new to third gens and appreciate the feedback.
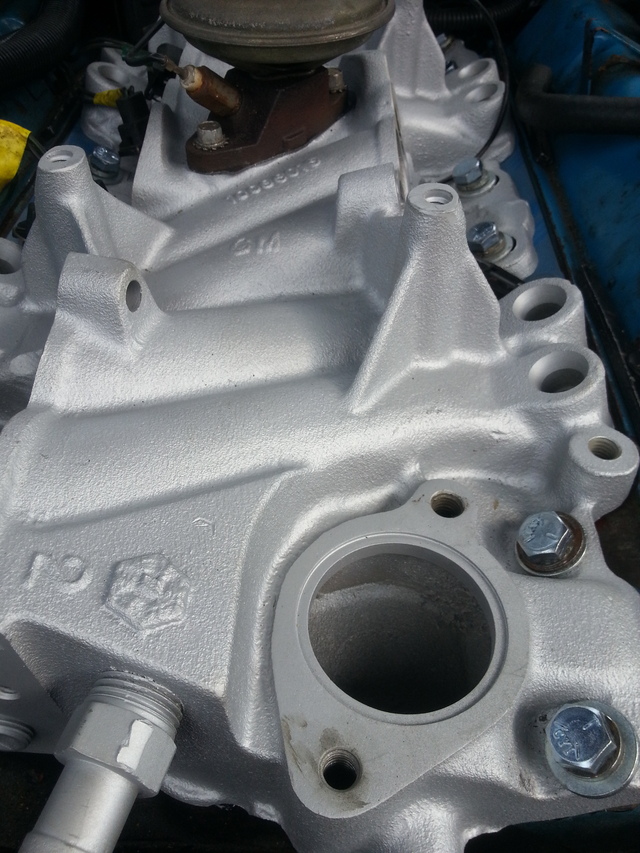
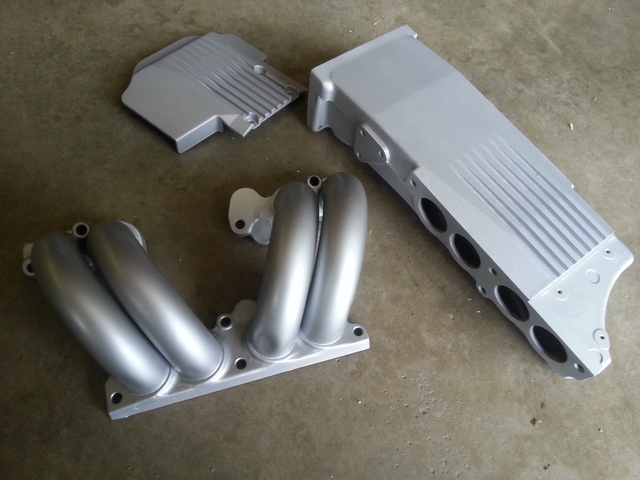
In my Newb thread, I showed a pic where someone hogged out the two center intake bolts but didn't do the passenger side. So I just decided to take it all apart and clean it up some.
Took it to a machine shop to have it glass beaded and asked them to clearance the other two holes. For some reason the metal didn't like it. It looked terrible when I got it back. So I used some soap & water on it, let it dry and painted with Duplicolor Hi-temp silver.
I think it turned out pretty well.
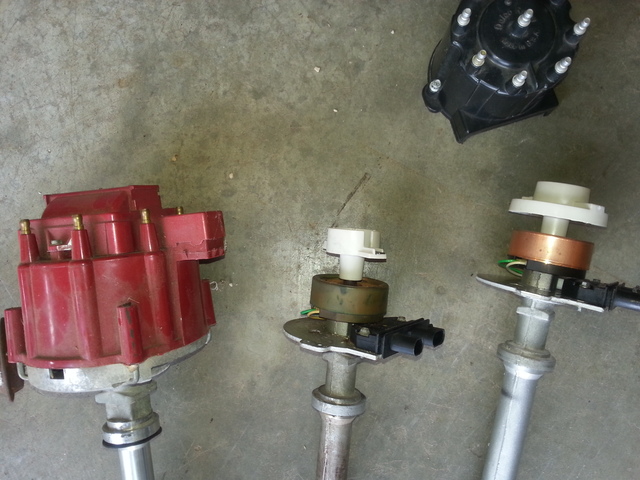
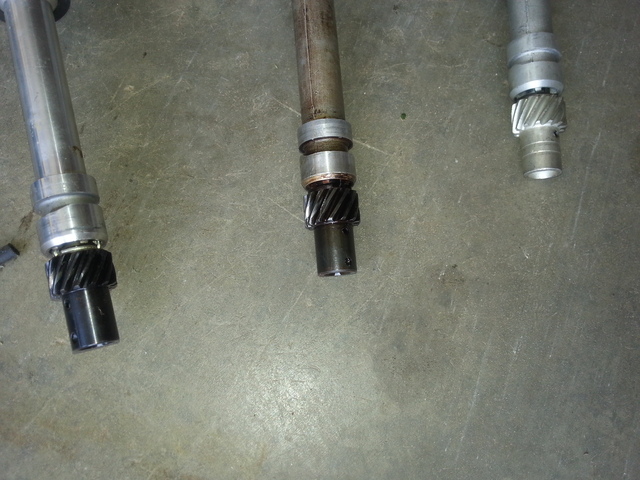
Again, this is supposed to be a '86 block. So do I need to change the dist gear? Here's what I have. The big cap with coil on the left is from another project. The gear looks very similar to the one in the center that came with the car. I assume its from the '89 engine. small cap, separate coil. The one on the right came with a GM Ramjet 350 setup that we purchased at a swap meet but never used it. Obviously different gear.
Which one should I use in this '86 block?
Searched here & Chevy thunder for a picture of what I think is the egr solenoid.
Does the hose from the egr valve connect to the bottom port in this pic?
I have a 2wire plug for the electrical connection on the right, but all the other vacuum lines/ports on this solenoid I have no idea.
So after some more researching, it looks like the solenoid I posted above is for the EGR. There's supposed to be a small piece of foam, like a breather/filter stuck on there. I believe the 2 ports on the other end go to the EGR valve and a vacuum port on the TB. Still trying to figure that out.
Wanted to keep moving on firing this up even without the EGR connected. In the thread above I asked about a missing piece of wire harness. Turns out it is available. Its from the MAT
Got it together and hit the key. Heard the fuel pump run....a good sign. Cranked it over but didn't even attempt to fire.
Pulled the fuel rail off and and no fuel being sprayed. Bad injectors.
Another thread I started on this with some good info...
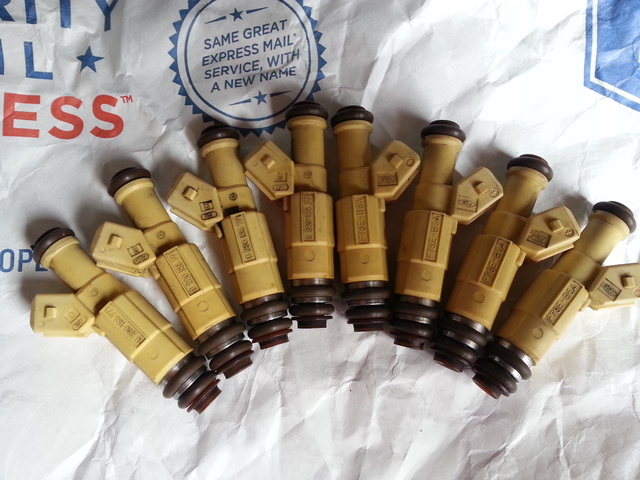
SO heres my replacement injectors. Bosch III 19 lb
After talking with South Bay Injectors about their services, I learned the Bosch isn't an exact replacement. I took their advice and doubled up the orings on the bottom as you can see in the pic. They used to send all their refurbs out this way but recently designed a spacer to make the Bosch a direct replacement for the factory injector. It only uses 1 oring on the bottom instead of 2. Put it all back together with 24 new orings and had one leaking.
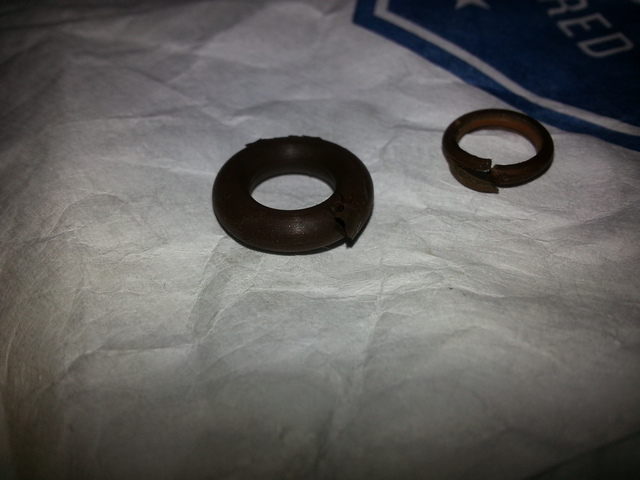
Found this when I pulled it out.
The small one goes at the very top and is only there to hold the larger one in place. Bought a small assortment at the local auto parts store to get that one.
ok, So how many types of liquid could possibly leak from this car....
gas, oil & water?????
I've got all 3
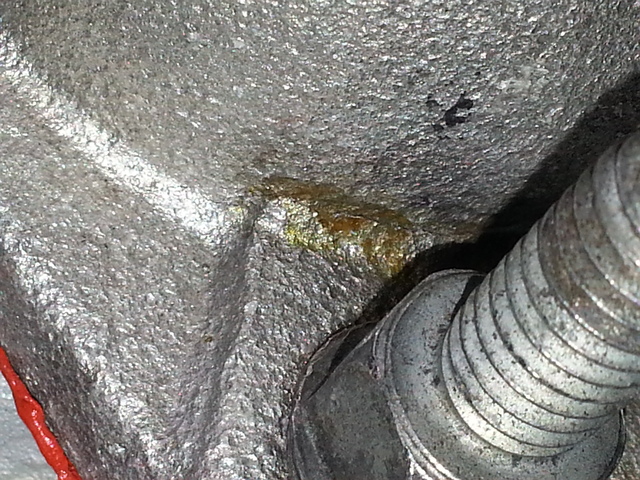
injector above, and now this autozone Tstat hsg. Zoom in if you can't see it.
Looks like my oil leak is from the 90 (post#28) I plugged on back of the block for the oil pressure gauge.
Easy enough fixes, but time consuming.
Took the cracked T-stat housing back to Autozone to get my money back. The gentlemen said he was pretty sure the one in stock now is actually cast and a much beefier unit. Sure enough it is. Still from china, but it works. No leaks this time.
Got a new 1/4" NPT plug and some sealer for the oil leak. Good to go.
Fired it up again. Sounds rough. Only have exhaust to the cat.
I've got to read up on this ECM. I believe once I'm close with the distributor, that it adjusts timing its self? Does anyone know or have a good read for me?
I could move the dist back and forth. The idle would change but then adjust down no matter which way I moved.
Hitting the throttle, big hesitation before gaining rpm. Sounds like its running on 4 cylinders.
I've already replaced cap, rotor and plugs. Need to get wires next anyway just because.
Replaced the wires. I don't think it really helped but had to do it just because of the unknowns here.
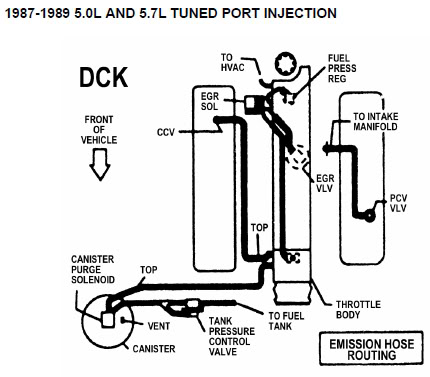
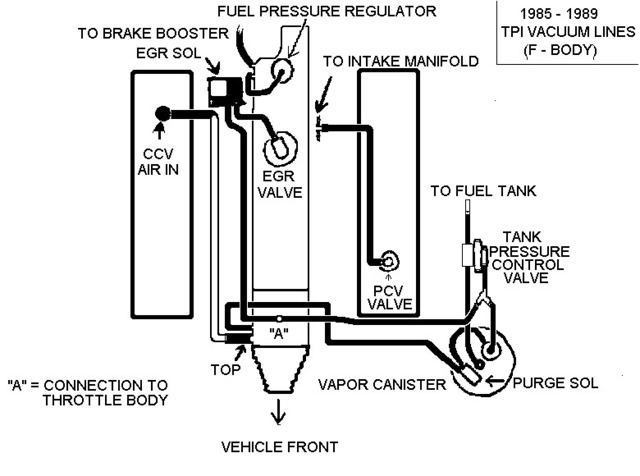
I think I have the vacuum lines figured out. I've found some contradicting diagrams online but I believe the first one is correct for 87-89 TPI and the second one for 85-86 TPI.
If anyone suspects different, please let me know.
Replaced all the vacuum lines with new and tried again. It cranks several times before trying to start. It does eventually start, but very slow and misses pretty bad still.
Checked the fuel pressure on the rail. 42.
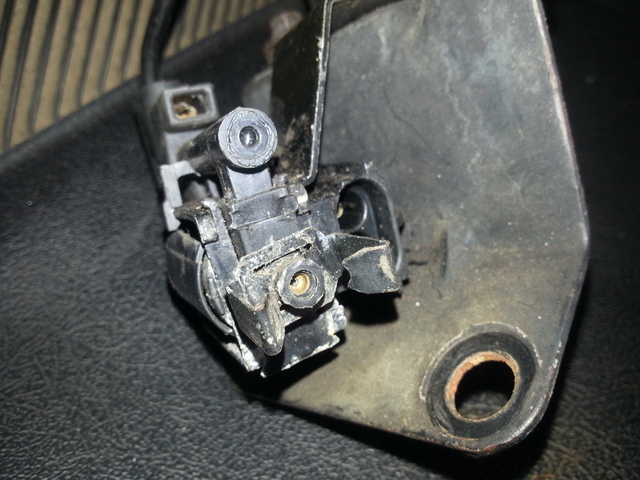
While I had it running, I tried the heater controls and I only have defrost. Sign of no vacuum to the control so I read. It almost sounds like theres a leak in the dash when I move the control.
Anyone had one of these apart?
First pic is when I pulled it out. Second pic is when I moved the wheel, it seperated some. Is that ok?
I think I have the vacuum lines figured out. I've found some contradicting diagrams online but I believe the first one is correct for 87-89 TPI and the second one for 85-86 TPI.
Thefirst looks like Firebird = Evap can on passenger side. While the second is Camaro = evap can on driver side.
As for the housing separating.. not a problem if you don't mind a vaccuum leak.
Thefirst looks like Firebird = Evap can on passenger side. While the second is Camaro = evap can on driver side.
As for the housing separating.. not a problem if you don't mind a vaccuum leak.
Agree the first is a Firebird version, but the second routing is different. It shows the line from EGR solenoid to TB having a T inline and that line going to the charcoal canister.
My 89 is routed like the first.
The line going to the canister is not shown, but its split off the rear port on the plenum with a check valve(?) and the HVAC.
Would the Firebird/Camaro have those differences? I've read plenty of people saying simply, the canister & battery are placed on opposite sides.
After posting these pics, I re-seated the vac lines in the dash and started the car. Now everything works....vent, heat , def. And I can't hear any leaks here, so...I don't know. Is it broken?
Been a while since updating this thread, but I've continued to work on the car as time permits.
I ended up plugging the line for the HVAC till I can get the control fixed. I found another thread showing that you can drill a hole and bolt this thing together to keep it sealed. I'll post the link soon as I find it again.
Back to the engine, It wasn't running that bad but still had big off idle hesitation and a slight miss. Not knowing a 100% what shape the used injectors I bought were in, I decided to purchase a refurbed set from Southbay. Next I followed this procedure to set idle. It has helped the idle quality and bog quite a bit. Running good enough now to move on. https://www.thirdgen.org/tpimod2/
Drove it around enough to find out the heater core is leaking inside the car.
The cars running well enough to move on to the interior. I plan to pull the engine & trans anyway to get underhood cleaned up and painted. I'll get the heater core then.
Pulled the interior except for the door panels. Found a couple pieces that are cracked beyond repair and need replacing. Need a new dash pad. The dash itself is in good shape. The vents flop around so I pulled those out. Need some new foam or a few layers of tape to tighten them up.
Correct (pin would be better description). I bought a metric o ring kit (Dorman 799-450) at O'Reillys ($7 or $8). It did not have the correct size for the smaller pin but used one on the larger pins.

 10-27-2014, 08:17 PM
 progress & pics to come