
Project Procrastination '91Z LS1/T56/currie 9" w/PICS
 07-04-2017, 08:29 AM
#401
Senior Member

Thread Starter
iTrader: (4)
Join Date: Oct 2008
Location: Niles, IL
Posts: 857
Likes: 0
Received 5 Likes
on
4 Posts
Car: '91 LS6/T56/9"
Engine: LS6
Transmission: T56
Axle/Gears: Currie 9"/4.11, detroit truetrac
Re: Project Procrastination '91Z LS1/T56/currie 9" w/PICS
The front rotors were ugly:

Cleaned them with a wire wheel, then sandblasted, then painted:

Same with the calipers:

Cleaned them with a wire wheel, then sandblasted, then painted:
Same with the calipers:
 07-04-2017, 01:10 PM
#403
Re: Project Procrastination '91Z LS1/T56/currie 9" w/PICS
Same here. I'll switch to google photos. I thought it was a simple agree to new terms, then I thought it was a joke, $40 a month or $400 a year?! What they did was blackmail. I hope they disappear like Myspace. I'll download all my pictures again but not erase them from their server, I'll leave them their to take up space on their precious server
07-04-2017, 01:29 PM
#404
Senior Member
Thread Starter
iTrader: (4)
Join Date: Oct 2008
Location: Niles, IL
Posts: 857
Likes: 0
Received 5 Likes
on
4 Posts
Car: '91 LS6/T56/9"
Engine: LS6
Transmission: T56
Axle/Gears: Currie 9"/4.11, detroit truetrac
Re: Project Procrastination '91Z LS1/T56/currie 9" w/PICS
Duplicolor engine enamel gloss black. Most of my stuff I sandblast, but just a scuff pad is plenty. Spray paint gets a bad rep because people don't use it properly, just like POR. If you take a few extra minutes, the results will last many years.
07-04-2017, 01:44 PM
#405
Senior Member
Thread Starter
iTrader: (4)
Join Date: Oct 2008
Location: Niles, IL
Posts: 857
Likes: 0
Received 5 Likes
on
4 Posts
Car: '91 LS6/T56/9"
Engine: LS6
Transmission: T56
Axle/Gears: Currie 9"/4.11, detroit truetrac
Re: Project Procrastination '91Z LS1/T56/currie 9" w/PICS
Same here. I'll switch to google photos. I thought it was a simple agree to new terms, then I thought it was a joke, $40 a month or $400 a year?! What they did was blackmail. I hope they disappear like Myspace. I'll download all my pictures again but not erase them from their server, I'll leave them their to take up space on their precious server
Google photos is cool, but not ideal for forum hosting. Works just fine though.
07-05-2017, 04:57 PM
#406
Re: Project Procrastination '91Z LS1/T56/currie 9" w/PICS
Same here. I'll switch to google photos. I thought it was a simple agree to new terms, then I thought it was a joke, $40 a month or $400 a year?! What they did was blackmail. I hope they disappear like Myspace. I'll download all my pictures again but not erase them from their server, I'll leave them their to take up space on their precious server
07-08-2017, 02:20 PM
#408
Re: Project Procrastination '91Z LS1/T56/currie 9" w/PICS
If you're looking to get one for small jobs this thing has worked for me and it's only $20.
https://www.tractorsupply.com/tsc/pr...rasive-blaster
I had to modify it a little for it to work correctly but for the money it's great.
https://www.tractorsupply.com/tsc/pr...rasive-blaster
I had to modify it a little for it to work correctly but for the money it's great.
07-08-2017, 07:05 PM
#410
Re: Project Procrastination '91Z LS1/T56/currie 9" w/PICS
The one I have has a pick up tube that siphons the sand from the bottom of the cup. I cut the pick up tube off and I turn the gun upside down so it's gravity fed. Works great.
07-11-2017, 12:56 PM
#412
07-11-2017, 01:12 PM
#413
Senior Member
Thread Starter
iTrader: (4)
Join Date: Oct 2008
Location: Niles, IL
Posts: 857
Likes: 0
Received 5 Likes
on
4 Posts
Car: '91 LS6/T56/9"
Engine: LS6
Transmission: T56
Axle/Gears: Currie 9"/4.11, detroit truetrac
Re: Project Procrastination '91Z LS1/T56/currie 9" w/PICS
Blasted and painted the front steering parts.


Also bought billet tie rod adjusters from UMI.

Hub, dust shiels, caliper bracket blasted and painted.

Front end parts ready to go on.

Also bought billet tie rod adjusters from UMI.
Hub, dust shiels, caliper bracket blasted and painted.
Front end parts ready to go on.
07-11-2017, 01:27 PM
#414
Senior Member
Thread Starter
iTrader: (4)
Join Date: Oct 2008
Location: Niles, IL
Posts: 857
Likes: 0
Received 5 Likes
on
4 Posts
Car: '91 LS6/T56/9"
Engine: LS6
Transmission: T56
Axle/Gears: Currie 9"/4.11, detroit truetrac
Re: Project Procrastination '91Z LS1/T56/currie 9" w/PICS
Onto the 9" rear end.
It's a Currie 9" housing
11" Currie Explorer disc brakes
big Ford housing ends (late torinio style)
31 spline axles
Strange iron center section
4.57:1 gears
Detroit locker
Billet 1350 yoke
Dirty from sitting under my parts car for years:


I tore down the brakes, parking brake assemblies, and calipers to clean them.

Rear rotors were as nasty as the fronts. Like the fronts I decided to say the hell with it and clean them up rather than buy new ones. I'm sick of spending money and an hour with the die grinder, sand blaster, and paint, they're ready:


It's a Currie 9" housing
11" Currie Explorer disc brakes
big Ford housing ends (late torinio style)
31 spline axles
Strange iron center section
4.57:1 gears
Detroit locker
Billet 1350 yoke
Dirty from sitting under my parts car for years:
I tore down the brakes, parking brake assemblies, and calipers to clean them.
Rear rotors were as nasty as the fronts. Like the fronts I decided to say the hell with it and clean them up rather than buy new ones. I'm sick of spending money and an hour with the die grinder, sand blaster, and paint, they're ready:
07-11-2017, 01:32 PM
#415
Senior Member
Thread Starter
iTrader: (4)
Join Date: Oct 2008
Location: Niles, IL
Posts: 857
Likes: 0
Received 5 Likes
on
4 Posts
Car: '91 LS6/T56/9"
Engine: LS6
Transmission: T56
Axle/Gears: Currie 9"/4.11, detroit truetrac
Re: Project Procrastination '91Z LS1/T56/currie 9" w/PICS
Started to clean and blast the housing and center section.

Cleaned up with the currie torque arm mounts cut off.


Cleaned up with the currie torque arm mounts cut off.
07-11-2017, 01:36 PM
#416
Senior Member
Thread Starter
iTrader: (4)
Join Date: Oct 2008
Location: Niles, IL
Posts: 857
Likes: 0
Received 5 Likes
on
4 Posts
Car: '91 LS6/T56/9"
Engine: LS6
Transmission: T56
Axle/Gears: Currie 9"/4.11, detroit truetrac
Re: Project Procrastination '91Z LS1/T56/currie 9" w/PICS
Now I need to weld on the S&W torque arm mount, and the sway bar mounts from UMI.
I ordered the welding jig from S&W Monday.
I'll re-make the passenger side brake line because I don't like the union that was used previously.
The center will NOT come off! I many need to weld a small tab onto it to have something to pry against.
I ordered the welding jig from S&W Monday.
I'll re-make the passenger side brake line because I don't like the union that was used previously.
The center will NOT come off! I many need to weld a small tab onto it to have something to pry against.
Last edited by robguitargod1; 07-12-2017 at 08:04 AM.
07-14-2017, 04:54 PM
#417
Senior Member
Thread Starter
iTrader: (4)
Join Date: Oct 2008
Location: Niles, IL
Posts: 857
Likes: 0
Received 5 Likes
on
4 Posts
Car: '91 LS6/T56/9"
Engine: LS6
Transmission: T56
Axle/Gears: Currie 9"/4.11, detroit truetrac
Re: Project Procrastination '91Z LS1/T56/currie 9" w/PICS
I've been fixing picture links for a few days now. You should be able to seethe trans rebuild now.
07-17-2017, 06:45 PM
#418
Senior Member
Thread Starter
iTrader: (4)
Join Date: Oct 2008
Location: Niles, IL
Posts: 857
Likes: 0
Received 5 Likes
on
4 Posts
Car: '91 LS6/T56/9"
Engine: LS6
Transmission: T56
Axle/Gears: Currie 9"/4.11, detroit truetrac
Re: Project Procrastination '91Z LS1/T56/currie 9" w/PICS
Got the center section off finally. I may drill and tap a small hole in it somewhere to make removal easier in the future. Toyota does this with some of their brake drums and it makes removing them much easier. You just thread the bolt in and it pushes the drum off of the shoes. Same idea here, but haven't made up my mind yet. I may use a gasket in place of RTV. Seems unnecessary.


Blasted and painted the center section:


Here's the paint I used:

Blasted and painted the center section:
Here's the paint I used:
07-17-2017, 06:56 PM
#419
Senior Member
Thread Starter
iTrader: (4)
Join Date: Oct 2008
Location: Niles, IL
Posts: 857
Likes: 0
Received 5 Likes
on
4 Posts
Car: '91 LS6/T56/9"
Engine: LS6
Transmission: T56
Axle/Gears: Currie 9"/4.11, detroit truetrac
Re: Project Procrastination '91Z LS1/T56/currie 9" w/PICS
I needed to remove the existing tabs and weld the BMR sway bar mounts


They're not welded end to end because they're deisgned to also be used on 3.5" tubes.


Then I mounted the S&W welding jig:


They're not welded end to end because they're deisgned to also be used on 3.5" tubes.
Then I mounted the S&W welding jig:
07-17-2017, 07:10 PM
#420
Re: Project Procrastination '91Z LS1/T56/currie 9" w/PICS
That's an interesting welding jig. If you are able to find out what angle the mounting surface is for the center section in relation to the spring perches or LCA mounts I may be interested in borrowing it. When I do my 8.8 frankenstein I had concocted a big jig that mounted the Torque arm and LCA to it so when I weld on the Torque arm bracket I wouldn't screw the factory angle up. Borrowing that may be so much easier!
07-17-2017, 07:17 PM
#421
Senior Member
Thread Starter
iTrader: (4)
Join Date: Oct 2008
Location: Niles, IL
Posts: 857
Likes: 0
Received 5 Likes
on
4 Posts
Car: '91 LS6/T56/9"
Engine: LS6
Transmission: T56
Axle/Gears: Currie 9"/4.11, detroit truetrac
Re: Project Procrastination '91Z LS1/T56/currie 9" w/PICS
The welding jig belongs to S&W. They allow you to rent it here:
http://www.swracecars.com/store/JIG-...0-617-JIG.aspx
Costs $300, then you return it and they refund you $200.
If you use it too let me know before you start because I have some important tips.
http://www.swracecars.com/store/JIG-...0-617-JIG.aspx
Costs $300, then you return it and they refund you $200.
If you use it too let me know before you start because I have some important tips.
07-23-2017, 08:15 PM
#422
Senior Member
Thread Starter
iTrader: (4)
Join Date: Oct 2008
Location: Niles, IL
Posts: 857
Likes: 0
Received 5 Likes
on
4 Posts
Car: '91 LS6/T56/9"
Engine: LS6
Transmission: T56
Axle/Gears: Currie 9"/4.11, detroit truetrac
Re: Project Procrastination '91Z LS1/T56/currie 9" w/PICS
Had the housing and torque arm bracket powder coated. The torque arm comes powder coated. Took them to Last Chance Coatings. Same place that coated the front control arms and spindles on this car.
http://www.lastchancecoatings.com/


http://www.lastchancecoatings.com/
Last edited by robguitargod1; 07-23-2017 at 08:20 PM.
07-25-2017, 08:54 AM
#423
Supreme Member
iTrader: (2)
Join Date: Feb 2005
Location: West Warwick RI, postal code: 02893
Posts: 4,355
Received 61 Likes
on
46 Posts
Car: Building LS3, T56 Z28
Engine: LS3
Transmission: T-56
Axle/Gears: Moser/ 4.11
Re: Project Procrastination '91Z LS1/T56/currie 9" w/PICS
Cost?
I am interested in doing the same now that I have seen your setup.
I was thinking of just 2K primer and paint before.
I am interested in doing the same now that I have seen your setup.
I was thinking of just 2K primer and paint before.
07-25-2017, 04:16 PM
#424
Senior Member
Thread Starter
iTrader: (4)
Join Date: Oct 2008
Location: Niles, IL
Posts: 857
Likes: 0
Received 5 Likes
on
4 Posts
Car: '91 LS6/T56/9"
Engine: LS6
Transmission: T56
Axle/Gears: Currie 9"/4.11, detroit truetrac
Re: Project Procrastination '91Z LS1/T56/currie 9" w/PICS
If you were to paint a housing I'd use POR15. It really is like paintable powdercoat. As long as you prep the surface it's almost indestructible.
Last edited by robguitargod1; 07-28-2017 at 08:14 PM.
07-26-2017, 07:15 AM
#425
Supreme Member
iTrader: (2)
Join Date: Feb 2005
Location: West Warwick RI, postal code: 02893
Posts: 4,355
Received 61 Likes
on
46 Posts
Car: Building LS3, T56 Z28
Engine: LS3
Transmission: T-56
Axle/Gears: Moser/ 4.11
Re: Project Procrastination '91Z LS1/T56/currie 9" w/PICS
Thanks for the info. My rear is about 15 years old but only has 5k miles on it.
I painted it back when I bought it, but I was stupid back then and didn't prep well before the POR15. It peeled in a lot of places.
I plan on almost DD the car once it is complete so maybe a simple GOOD prep and POR15 is the way to go for me. Thanks again.
I painted it back when I bought it, but I was stupid back then and didn't prep well before the POR15. It peeled in a lot of places.
I plan on almost DD the car once it is complete so maybe a simple GOOD prep and POR15 is the way to go for me. Thanks again.
07-28-2017, 08:17 PM
#426
Senior Member
Thread Starter
iTrader: (4)
Join Date: Oct 2008
Location: Niles, IL
Posts: 857
Likes: 0
Received 5 Likes
on
4 Posts
Car: '91 LS6/T56/9"
Engine: LS6
Transmission: T56
Axle/Gears: Currie 9"/4.11, detroit truetrac
Re: Project Procrastination '91Z LS1/T56/currie 9" w/PICS
It looks like photobucket came to their senses because all of my pictures are working again.......
Is everyone else seeing this??
Is everyone else seeing this??
07-28-2017, 08:38 PM
#427
07-29-2017, 10:02 AM
#428
Re: Project Procrastination '91Z LS1/T56/currie 9" w/PICS
 ), has to pay up. My father in-law had explained that to me. He was an advertising executive for an agency that handled the Chicago Cubs and other big stuff, it was interesting theory. The way PhotoBucket did it was so insanely stupid because if you think about it, Photobucket just plastered the internet with anti-photobucket ads. Who would want to advertise or keep an account with them after seeing millions of those?
07-29-2017, 10:06 AM
), has to pay up. My father in-law had explained that to me. He was an advertising executive for an agency that handled the Chicago Cubs and other big stuff, it was interesting theory. The way PhotoBucket did it was so insanely stupid because if you think about it, Photobucket just plastered the internet with anti-photobucket ads. Who would want to advertise or keep an account with them after seeing millions of those?
07-29-2017, 10:06 AM
#429
Re: Project Procrastination '91Z LS1/T56/currie 9" w/PICS
Ten years ago I had one powder coated by an industrial coatings company. They almost exclusively did coatings for companies like caterpillar but as long as I was OK with yellow or semi-gloss black they could slip the item in the line up for cheap. Think they did that rear end for $75. Maybe you could find a company like that.
07-29-2017, 10:56 AM
#430
Re: Project Procrastination '91Z LS1/T56/currie 9" w/PICS
Now the pics are showing for me too.
i just went to check the "how to prep a 3rd gen harness" for ls swaps post. I'm still not seeing pics in that thread.
https://www.thirdgen.org/forums/ltx-lsx/541387-how-prep-3rd-gen.html
photobucket is killing me. I should have saved this info long ago.
i just went to check the "how to prep a 3rd gen harness" for ls swaps post. I'm still not seeing pics in that thread.
https://www.thirdgen.org/forums/ltx-lsx/541387-how-prep-3rd-gen.html
photobucket is killing me. I should have saved this info long ago.
Last edited by Billgluckman; 07-29-2017 at 10:59 AM.
08-07-2017, 07:02 PM
#431
Senior Member
Thread Starter
iTrader: (4)
Join Date: Oct 2008
Location: Niles, IL
Posts: 857
Likes: 0
Received 5 Likes
on
4 Posts
Car: '91 LS6/T56/9"
Engine: LS6
Transmission: T56
Axle/Gears: Currie 9"/4.11, detroit truetrac
Re: Project Procrastination '91Z LS1/T56/currie 9" w/PICS
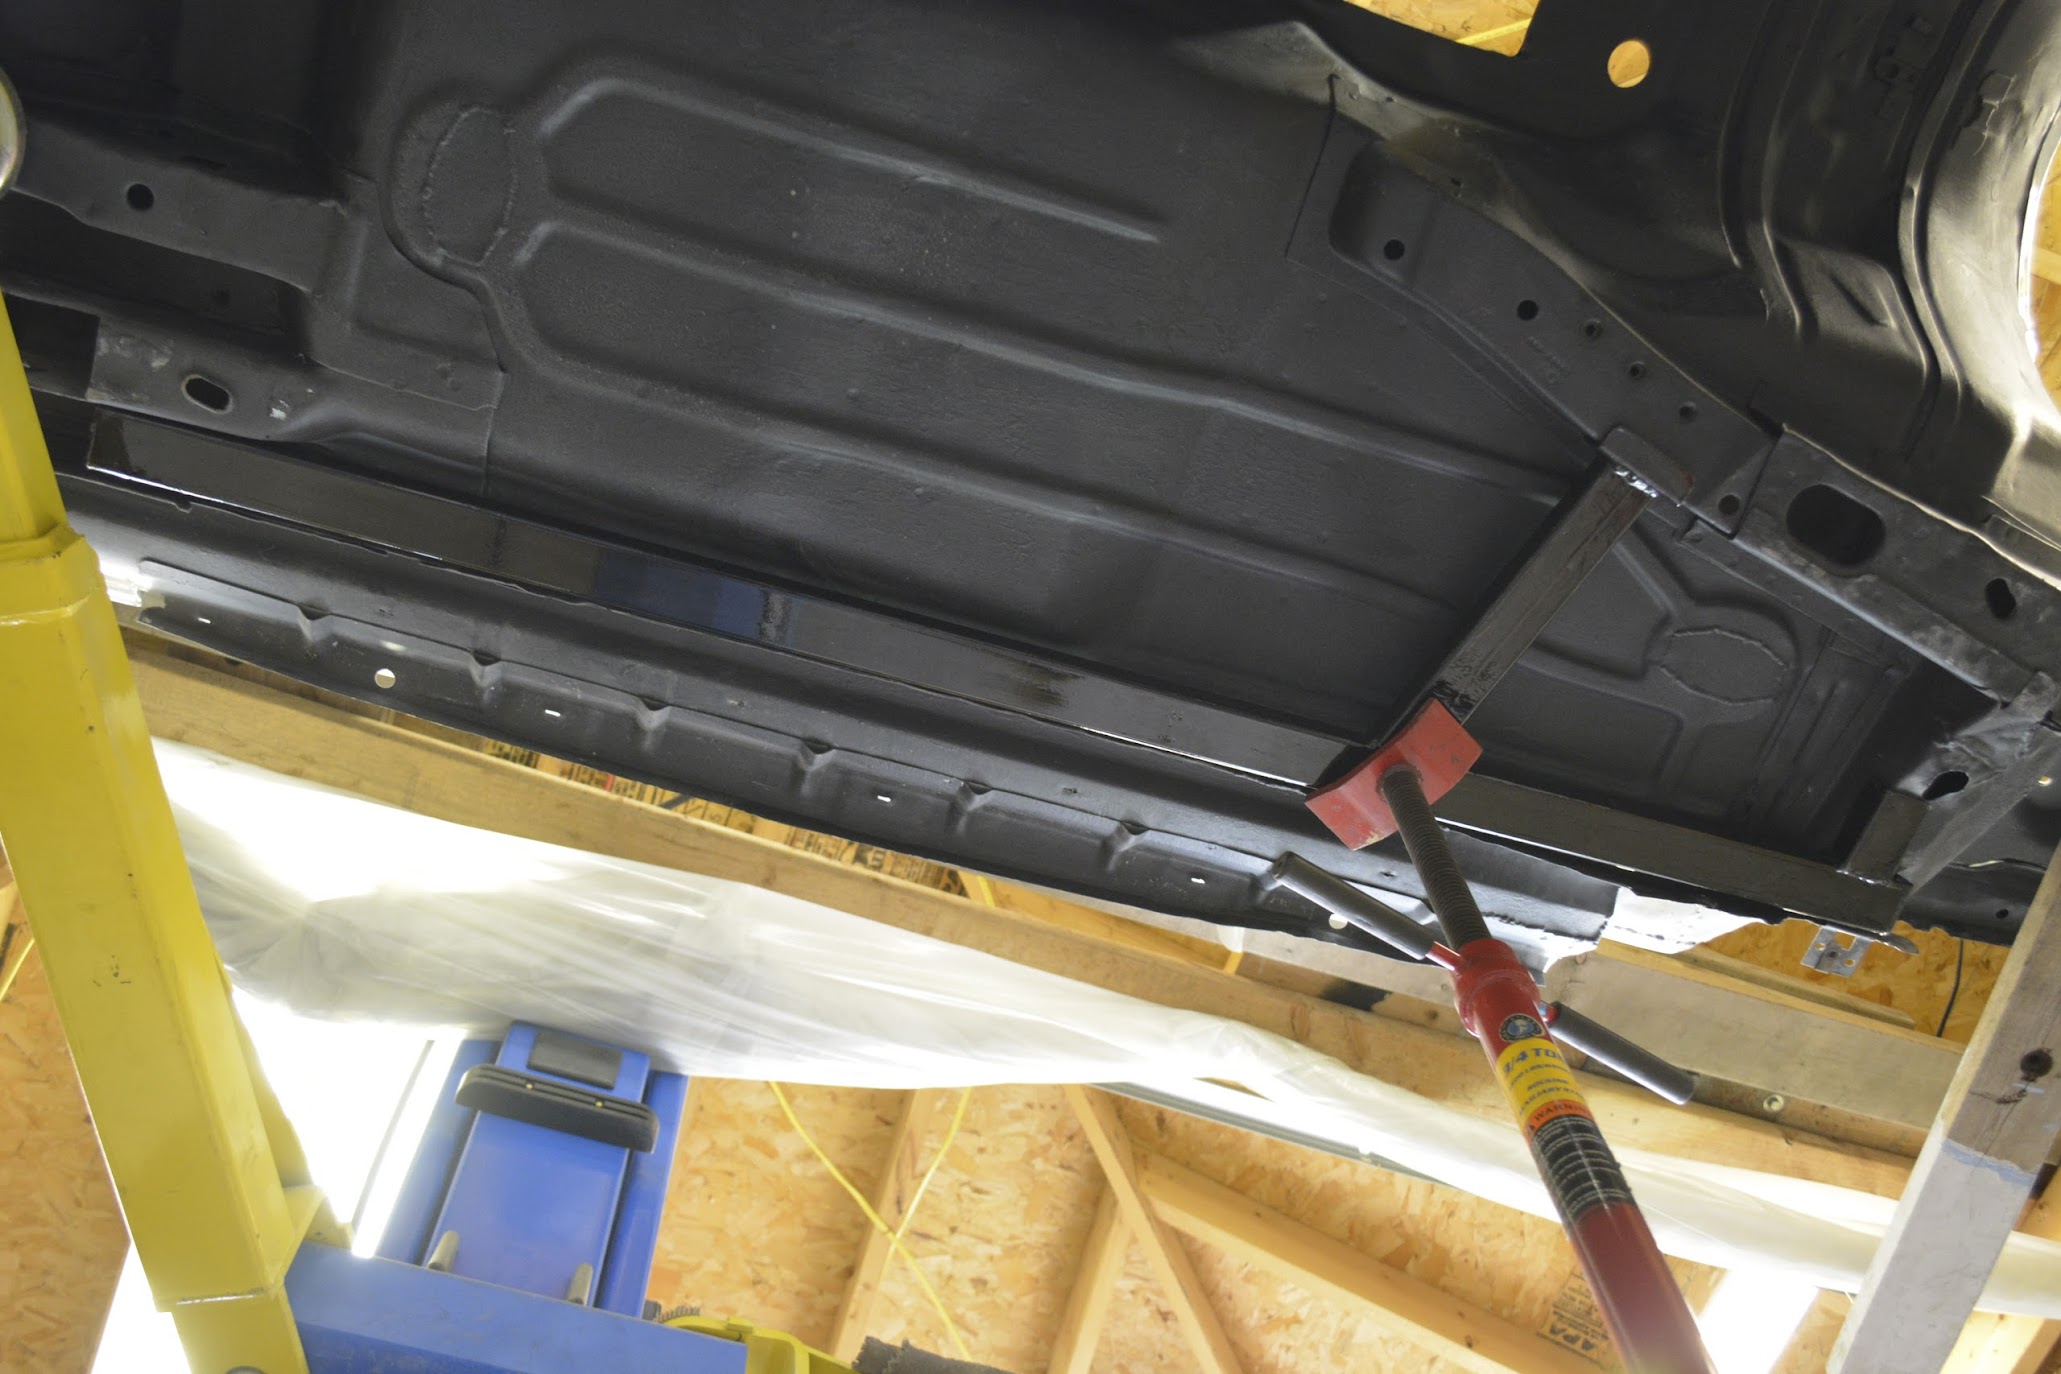
The only thing that wasn't finished from the mini-tub was the panhard bar mount. So I fixed it's mounting holes:


Test fit:


Blasted and primed bare metal:

Welded and painted:

Test fit:
Blasted and primed bare metal:
Welded and painted:
08-07-2017, 07:06 PM
#432
Senior Member
Thread Starter
iTrader: (4)
Join Date: Oct 2008
Location: Niles, IL
Posts: 857
Likes: 0
Received 5 Likes
on
4 Posts
Car: '91 LS6/T56/9"
Engine: LS6
Transmission: T56
Axle/Gears: Currie 9"/4.11, detroit truetrac
Re: Project Procrastination '91Z LS1/T56/currie 9" w/PICS
Next I pulled out the subframe connectors I bought, sanded them down and POR painted them.
Before paint:

After paint and mocked into place:


Before paint:
After paint and mocked into place:
08-07-2017, 07:10 PM
#433
Senior Member
Thread Starter
iTrader: (4)
Join Date: Oct 2008
Location: Niles, IL
Posts: 857
Likes: 0
Received 5 Likes
on
4 Posts
Car: '91 LS6/T56/9"
Engine: LS6
Transmission: T56
Axle/Gears: Currie 9"/4.11, detroit truetrac
Re: Project Procrastination '91Z LS1/T56/currie 9" w/PICS
Then I got the engine/trans/k-member together and installed:


Then I finally for the 10mm Rivnuts (no pics but will another time) and crossmember install:


Then I finally for the 10mm Rivnuts (no pics but will another time) and crossmember install:
 08-10-2017, 03:52 PM
#435
Senior Member
Thread Starter
iTrader: (4)
Join Date: Oct 2008
Location: Niles, IL
Posts: 857
Likes: 0
Received 5 Likes
on
4 Posts
Car: '91 LS6/T56/9"
Engine: LS6
Transmission: T56
Axle/Gears: Currie 9"/4.11, detroit truetrac
Re: Project Procrastination '91Z LS1/T56/currie 9" w/PICS
SOLD. That didn't take long.
Founders rear panhard bar and control arms are for sale:
https://www.thirdgen.org/forums/engi...nhard-bar.html
Founders rear panhard bar and control arms are for sale:
https://www.thirdgen.org/forums/engi...nhard-bar.html
Last edited by robguitargod1; 08-11-2017 at 07:56 AM.
08-16-2017, 04:58 PM
#436
Senior Member
Thread Starter
iTrader: (4)
Join Date: Oct 2008
Location: Niles, IL
Posts: 857
Likes: 0
Received 5 Likes
on
4 Posts
Car: '91 LS6/T56/9"
Engine: LS6
Transmission: T56
Axle/Gears: Currie 9"/4.11, detroit truetrac
Re: Project Procrastination '91Z LS1/T56/currie 9" w/PICS
I began mocking up the rear end today. Installed the Founders adjustable panhard bar, control arms and shocks:

Here's the center section installed:

With the torque arm brackets installed:


Centering the housing with homemade cresent wrench plumb bobs:

Then I started to install the torque arm so I could weld the crossmember in place, and ran into a problem. The rod ends wouldn't thread into the arm. This is as far as they'd go (less than 1 thread):

The thread looked somewhat ugly, but my guess is that they got cut with the wrong tap for some reason. Should be 3/4-16 top and 3/4-16 Left-handed bottom (adjuster):

Here's the center section installed:
With the torque arm brackets installed:
Centering the housing with homemade cresent wrench plumb bobs:
Then I started to install the torque arm so I could weld the crossmember in place, and ran into a problem. The rod ends wouldn't thread into the arm. This is as far as they'd go (less than 1 thread):
The thread looked somewhat ugly, but my guess is that they got cut with the wrong tap for some reason. Should be 3/4-16 top and 3/4-16 Left-handed bottom (adjuster):
08-16-2017, 05:01 PM
#437
Senior Member
Thread Starter
iTrader: (4)
Join Date: Oct 2008
Location: Niles, IL
Posts: 857
Likes: 0
Received 5 Likes
on
4 Posts
Car: '91 LS6/T56/9"
Engine: LS6
Transmission: T56
Axle/Gears: Currie 9"/4.11, detroit truetrac
Re: Project Procrastination '91Z LS1/T56/currie 9" w/PICS
So S&W sent me a replacement that arrived today:

08-17-2017, 07:18 AM
#438
Supreme Member
iTrader: (2)
Join Date: Feb 2005
Location: West Warwick RI, postal code: 02893
Posts: 4,355
Received 61 Likes
on
46 Posts
Car: Building LS3, T56 Z28
Engine: LS3
Transmission: T-56
Axle/Gears: Moser/ 4.11
Re: Project Procrastination '91Z LS1/T56/currie 9" w/PICS
Great progress. And good on S&W. I had not herd of them before but now I will take a look knowing they are easy to work with.
I may have already asked this, but what did you use for your undercoating? I am getting close to that step in my build and want to start to field suggestions.
I may have already asked this, but what did you use for your undercoating? I am getting close to that step in my build and want to start to field suggestions.
08-17-2017, 03:01 PM
#439
Senior Member
Thread Starter
iTrader: (4)
Join Date: Oct 2008
Location: Niles, IL
Posts: 857
Likes: 0
Received 5 Likes
on
4 Posts
Car: '91 LS6/T56/9"
Engine: LS6
Transmission: T56
Axle/Gears: Currie 9"/4.11, detroit truetrac
Re: Project Procrastination '91Z LS1/T56/currie 9" w/PICS
Great progress. And good on S&W. I had not herd of them before but now I will take a look knowing they are easy to work with.
I may have already asked this, but what did you use for your undercoating? I am getting close to that step in my build and want to start to field suggestions.
I may have already asked this, but what did you use for your undercoating? I am getting close to that step in my build and want to start to field suggestions.
08-17-2017, 03:29 PM
#440
Re: Project Procrastination '91Z LS1/T56/currie 9" w/PICS
I have a host of information about finding the cars center line and making it perpendicular and centered. I'll post it up on my thread in a couple days once I'm further in the process on my car. In a nutshell the common way everyone says to center the rear is how you're doing it and that will only center it visually to the exterior. Centering the rear off the fenders will not center it to the suspension. I did it that way first and was off 5/8" or so with the rear end skewed towards the passenger side. When it's centered it should appear to skew towards the drivers side. I found out also that with the rear end (ten bolt) completely centered it should be off the cars center line by 0.40"
08-27-2017, 09:03 PM
#441
Senior Member
Thread Starter
iTrader: (4)
Join Date: Oct 2008
Location: Niles, IL
Posts: 857
Likes: 0
Received 5 Likes
on
4 Posts
Car: '91 LS6/T56/9"
Engine: LS6
Transmission: T56
Axle/Gears: Currie 9"/4.11, detroit truetrac
Re: Project Procrastination '91Z LS1/T56/currie 9" w/PICS
Welded the subframe connectors:


Then painted:

Then started working on the S&W torque arm crossmember. It's removable via a pair of tabs that you wend to your subframe connectors:

Added a bend to the passenger side so it would line up:

Tacked the tabs in place

Weleded in place:

Painted:


Then painted:
Then started working on the S&W torque arm crossmember. It's removable via a pair of tabs that you wend to your subframe connectors:
Added a bend to the passenger side so it would line up:
Tacked the tabs in place
Weleded in place:
Painted:
08-27-2017, 09:03 PM
#442
Senior Member
Thread Starter
iTrader: (4)
Join Date: Oct 2008
Location: Niles, IL
Posts: 857
Likes: 0
Received 5 Likes
on
4 Posts
Car: '91 LS6/T56/9"
Engine: LS6
Transmission: T56
Axle/Gears: Currie 9"/4.11, detroit truetrac
Re: Project Procrastination '91Z LS1/T56/currie 9" w/PICS
I also reinforced the rear of the subframe connectors by bending and welding some 3/16" plate:


Then I finally installed the QA1 adjustable upper spring mounts:


Then I finally installed the QA1 adjustable upper spring mounts:
08-28-2017, 06:16 PM
#444
Senior Member
Thread Starter
iTrader: (4)
Join Date: Oct 2008
Location: Niles, IL
Posts: 857
Likes: 0
Received 5 Likes
on
4 Posts
Car: '91 LS6/T56/9"
Engine: LS6
Transmission: T56
Axle/Gears: Currie 9"/4.11, detroit truetrac
Re: Project Procrastination '91Z LS1/T56/currie 9" w/PICS
It's 5/32" wall 1" diameter tube.
08-28-2017, 07:03 PM
#445
Re: Project Procrastination '91Z LS1/T56/currie 9" w/PICS
Without the bar having anything more inboard to attach to it will probably flex but I doubt it would be enough to change your pinion angle by more than 1*.
One of my future projects is going to be to make and weld some 1/8" L brackets from my inner subframe connectors to the floor pan. Might be easy for you to take some of your left over plate you have and make a quick L bracket.
One of my future projects is going to be to make and weld some 1/8" L brackets from my inner subframe connectors to the floor pan. Might be easy for you to take some of your left over plate you have and make a quick L bracket.
08-29-2017, 07:05 AM
#446
Senior Member
Thread Starter
iTrader: (4)
Join Date: Oct 2008
Location: Niles, IL
Posts: 857
Likes: 0
Received 5 Likes
on
4 Posts
Car: '91 LS6/T56/9"
Engine: LS6
Transmission: T56
Axle/Gears: Currie 9"/4.11, detroit truetrac
Re: Project Procrastination '91Z LS1/T56/currie 9" w/PICS
Agreed. I had mig welded the SFC's on, then needed to do the crossmember, 3/16" SFC reinforcement, and upper spring mounts..........Annnnd my mig ran out of gas........on a Saturday. Nobody's open. I wasn't going to just burn an entire weekend so I went ahead and tig'd everything. SUCH a pain in the *** to tig overhead, but hey. it's done and came out very well.
So I got more gas yesterday, and will add some 1/8" reinforcements to the floor.
So I got more gas yesterday, and will add some 1/8" reinforcements to the floor.
10-16-2017, 08:57 AM
#448
Senior Member
Thread Starter
iTrader: (4)
Join Date: Oct 2008
Location: Niles, IL
Posts: 857
Likes: 0
Received 5 Likes
on
4 Posts
Car: '91 LS6/T56/9"
Engine: LS6
Transmission: T56
Axle/Gears: Currie 9"/4.11, detroit truetrac
Re: Project Procrastination '91Z LS1/T56/currie 9" w/PICS
Been making progress, just haven't posted much lately.
Started with the fuel tank:

Test fit it:

Then sandblasted and painted (POR) the heat shields, tank straps, and fuel filler neck.

Found a manufacturing date on the tank too

Next headache were bumpstops. I cut them off of the parts car:

And welded them in place:


Without them the torque arm mount would crash into the fuel tank! This was a much bigger job than these pictures tell.
Back to the fuel tank. I started by draining the leftover fuel. Simply power the fuel pump with a battery and let it pump the old fuel into a few gas cans. Then I removed the pump/sump and cleaned the tank out by hand with paper towels. Very clean inside:


Then I started installing the racetronix fuel pump
http://www.ws6project.com/user_stor/...s/FPA-001B.jpg
http://www.ws6project.com/user_stor/...lv61inubrh2lr2


Started with the fuel tank:
Test fit it:
Then sandblasted and painted (POR) the heat shields, tank straps, and fuel filler neck.
Found a manufacturing date on the tank too
Next headache were bumpstops. I cut them off of the parts car:
And welded them in place:
Without them the torque arm mount would crash into the fuel tank! This was a much bigger job than these pictures tell.
Back to the fuel tank. I started by draining the leftover fuel. Simply power the fuel pump with a battery and let it pump the old fuel into a few gas cans. Then I removed the pump/sump and cleaned the tank out by hand with paper towels. Very clean inside:
Then I started installing the racetronix fuel pump
http://www.ws6project.com/user_stor/...s/FPA-001B.jpg
http://www.ws6project.com/user_stor/...lv61inubrh2lr2
10-16-2017, 08:58 AM
#449
Senior Member
Thread Starter
iTrader: (4)
Join Date: Oct 2008
Location: Niles, IL
Posts: 857
Likes: 0
Received 5 Likes
on
4 Posts
Car: '91 LS6/T56/9"
Engine: LS6
Transmission: T56
Axle/Gears: Currie 9"/4.11, detroit truetrac
Re: Project Procrastination '91Z LS1/T56/currie 9" w/PICS
Then I started making a fuel pump access door.


Then I cut out a larger section from my parts car:

Used some 5mm rivnuts to attach it:


Then painted the bottom of the cover:


Then I cut out a larger section from my parts car:
Used some 5mm rivnuts to attach it:
Then painted the bottom of the cover:
10-16-2017, 08:59 AM
#450
Senior Member
Thread Starter
iTrader: (4)
Join Date: Oct 2008
Location: Niles, IL
Posts: 857
Likes: 0
Received 5 Likes
on
4 Posts
Car: '91 LS6/T56/9"
Engine: LS6
Transmission: T56
Axle/Gears: Currie 9"/4.11, detroit truetrac
Re: Project Procrastination '91Z LS1/T56/currie 9" w/PICS
Then installed the fuel tank again:

Made my fuel lines:

Here's the tank/lines/filter finished

Then I started assembling the rear end. I am not a fan of using RTV, so I bought 2 gaskets. However to aid in removal of the center section, I added a 1/4-20 jack screw. This helps you push the center away from the housing with a screw. Mine won't be difficult since I'm not using RTV, but I wanted it anyway. If you've ever worked on some imports with rear drum brakes, you've probably seen this before on a brake drum. They're VERY handy.
Strange only offers this option on their PRO HD and ULTRA center sections, but I wanted to add one to mine. Simple as drilling and tapping a hole
#18

http://www.strangeengineering.net/wp...1462306264.pdf


Here's the drain plug and magnets I've added:


Made my fuel lines:
Here's the tank/lines/filter finished
Then I started assembling the rear end. I am not a fan of using RTV, so I bought 2 gaskets. However to aid in removal of the center section, I added a 1/4-20 jack screw. This helps you push the center away from the housing with a screw. Mine won't be difficult since I'm not using RTV, but I wanted it anyway. If you've ever worked on some imports with rear drum brakes, you've probably seen this before on a brake drum. They're VERY handy.
Strange only offers this option on their PRO HD and ULTRA center sections, but I wanted to add one to mine. Simple as drilling and tapping a hole
#18
http://www.strangeengineering.net/wp...1462306264.pdf
Here's the drain plug and magnets I've added: