
Project Procrastination '91Z LS1/T56/currie 9" w/PICS


 02-20-2017, 07:33 AM
#306
Senior Member

Thread Starter
iTrader: (4)
Join Date: Oct 2008
Location: Niles, IL
Posts: 857
Likes: 0
Received 5 Likes
on
4 Posts
Car: '91 LS6/T56/9"
Engine: LS6
Transmission: T56
Axle/Gears: Currie 9"/4.11, detroit truetrac
Re: Project Procrastination '91Z LS1/T56/currie 9" w/PICS
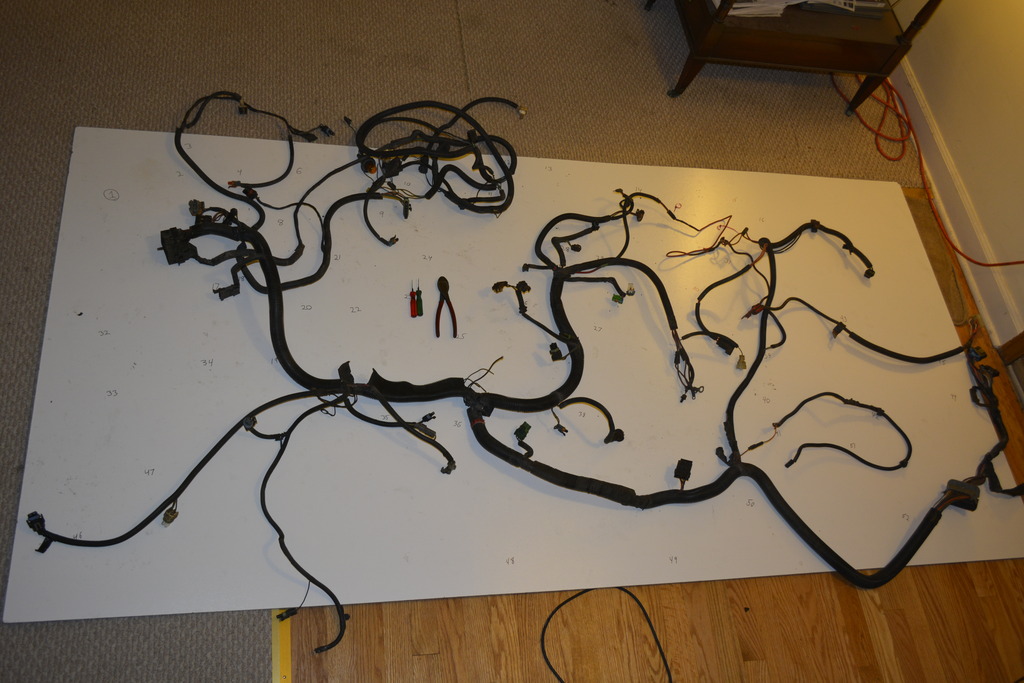
I have a complete LS1/T56 from a '99Z and an LS6/4L60E from an '02 Trans Am. I'm currently focusing on the tedious task of wiring since I think it makes or breaks a project like this.
Right now I'm working on the interior harness which is taking forever even with it completely out of the car.
I'll be working on the engine/trans as soon as the wiring is done, but I haven't even touched the engine harness yet.....
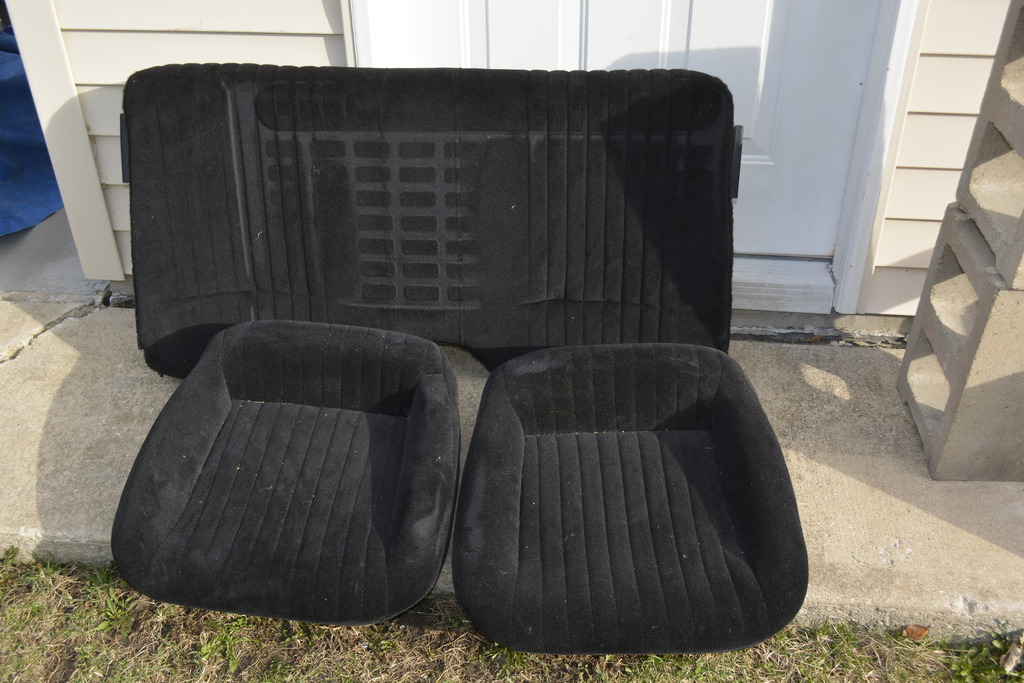
The interior is black with black leather seats that I scored from the 02 Trans am (seats) and an 89 Formula (carpet). I'll post more about all that in a few minutes.
Right now I'm working on the interior harness which is taking forever even with it completely out of the car.
I'll be working on the engine/trans as soon as the wiring is done, but I haven't even touched the engine harness yet.....
The interior is black with black leather seats that I scored from the 02 Trans am (seats) and an 89 Formula (carpet). I'll post more about all that in a few minutes.
02-20-2017, 07:54 AM
#307
Senior Member
Thread Starter
iTrader: (4)
Join Date: Oct 2008
Location: Niles, IL
Posts: 857
Likes: 0
Received 5 Likes
on
4 Posts
Car: '91 LS6/T56/9"
Engine: LS6
Transmission: T56
Axle/Gears: Currie 9"/4.11, detroit truetrac
Re: Project Procrastination '91Z LS1/T56/currie 9" w/PICS
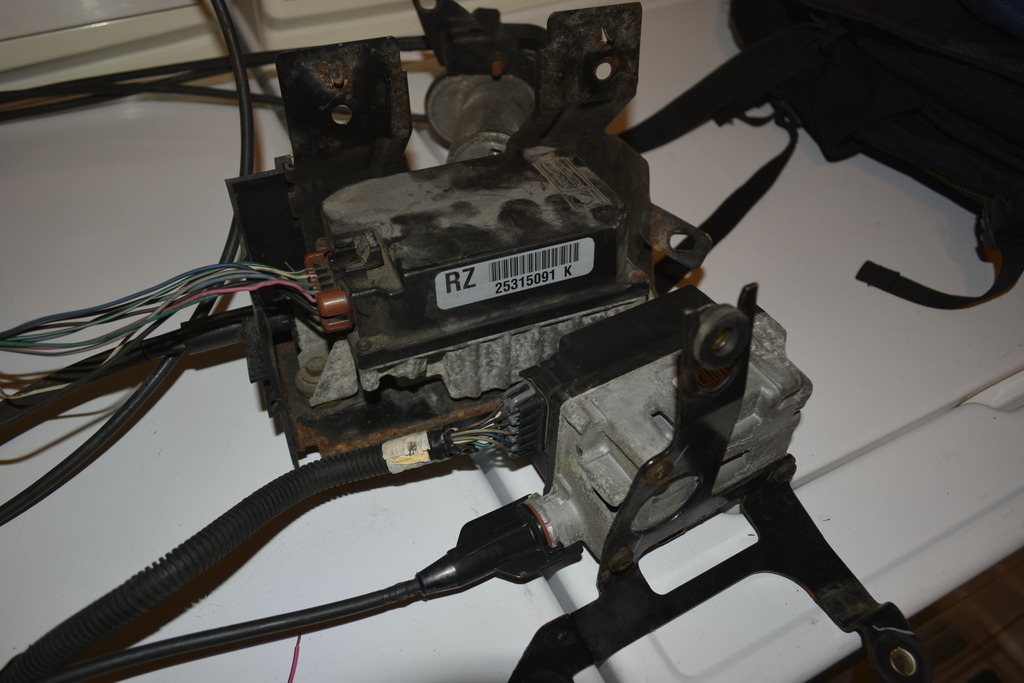
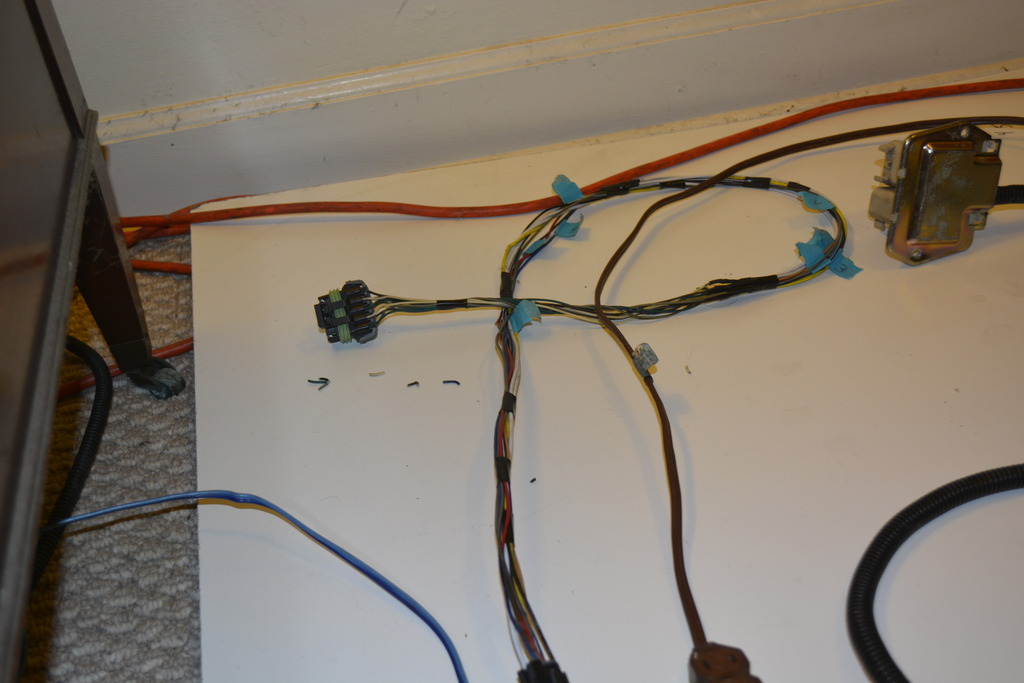
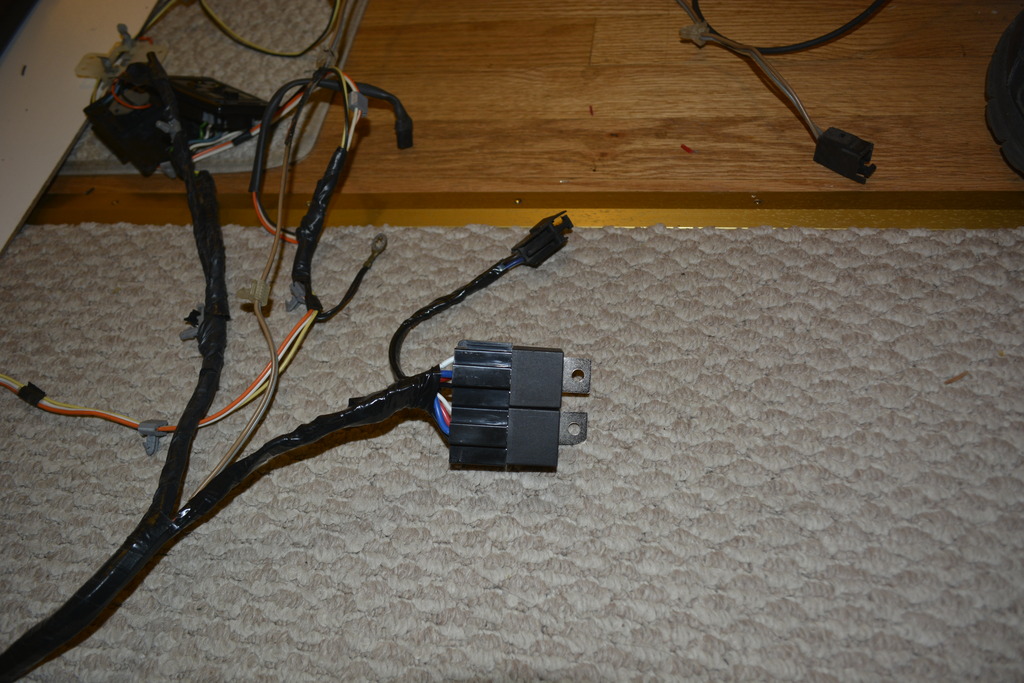
I finished wiring the remote start. Because our doors relay is called by power and the remote start calls with GND, I had to wire up some polarity inverting relays. the relays are from a cadillac that I found in the parts yard. Nice and small. The wiring looks messy but I assure you everything is labeled and will clean up nicely with loom and tape.
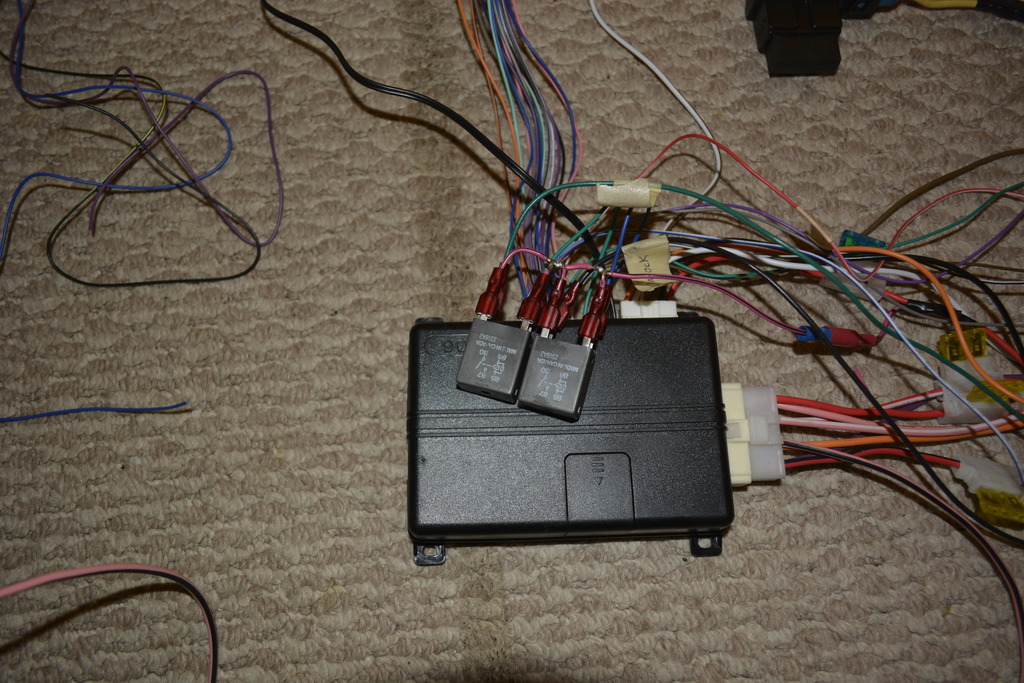
I also finished up adding the clutches neutral safety switch and cruise disable switch. I found it on a '98 Camaro at the parts yard. The car was an auto but it still had the cancel switch on the brake pedal with the wiring. So now cruise will disable any time you touch the brake or clutch, like this:

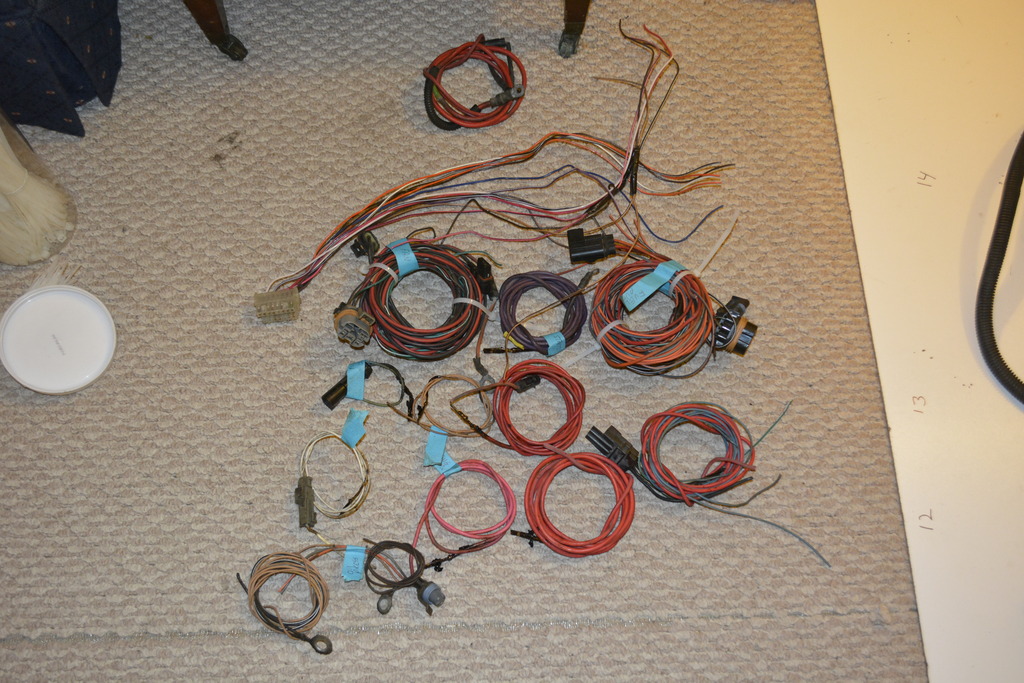
Scored a bunch of wiring and a cruise unit at the parts yard. Everything here for $35.
As you can see the cruise unit is significantly smaller than the F-body one.
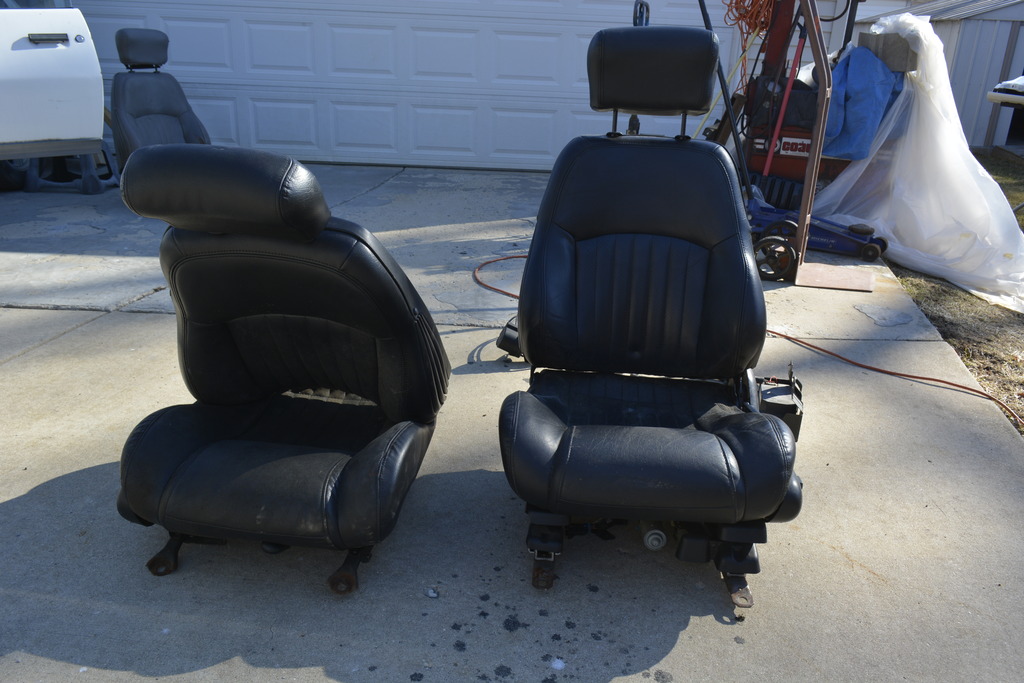
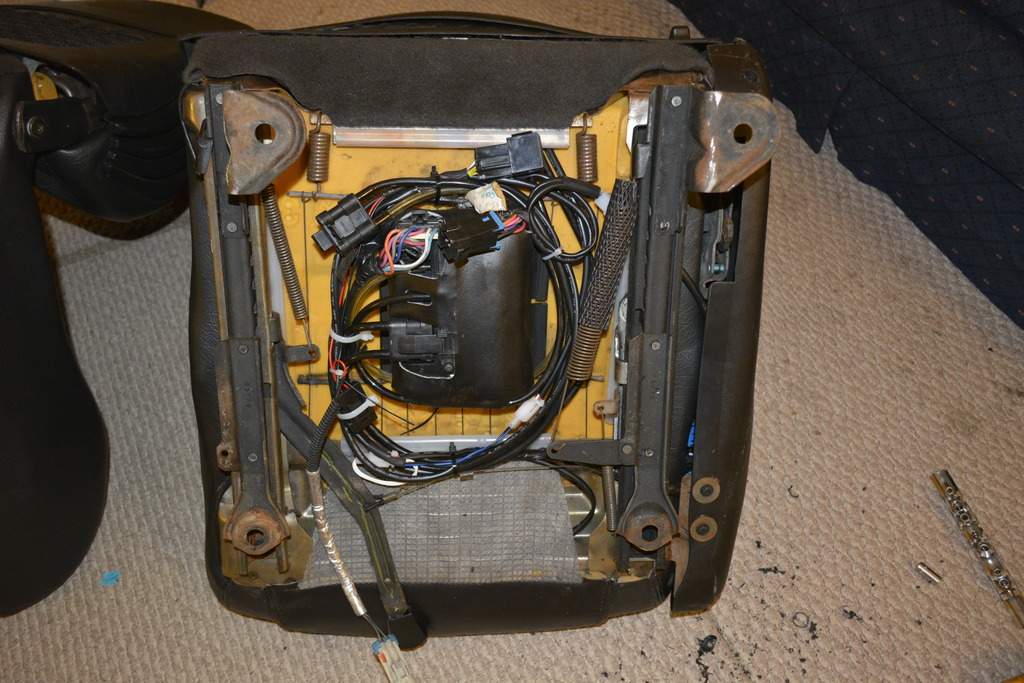
Here are my seats. I have the harness and air lines that run between them but I didn't have the female connector that supplies power to them. I planned on just finding a different connector at the parts yard but I found the correct oem harness on the same '98 camaro that I got the cruise switch from.

I also finished up adding the clutches neutral safety switch and cruise disable switch. I found it on a '98 Camaro at the parts yard. The car was an auto but it still had the cancel switch on the brake pedal with the wiring. So now cruise will disable any time you touch the brake or clutch, like this:


Scored a bunch of wiring and a cruise unit at the parts yard. Everything here for $35.

As you can see the cruise unit is significantly smaller than the F-body one.

Here are my seats. I have the harness and air lines that run between them but I didn't have the female connector that supplies power to them. I planned on just finding a different connector at the parts yard but I found the correct oem harness on the same '98 camaro that I got the cruise switch from.


Last edited by robguitargod1; 02-20-2017 at 07:58 AM.
02-20-2017, 09:13 AM
#310
Senior Member
Thread Starter
iTrader: (4)
Join Date: Oct 2008
Location: Niles, IL
Posts: 857
Likes: 0
Received 5 Likes
on
4 Posts
Car: '91 LS6/T56/9"
Engine: LS6
Transmission: T56
Axle/Gears: Currie 9"/4.11, detroit truetrac
Re: Project Procrastination '91Z LS1/T56/currie 9" w/PICS
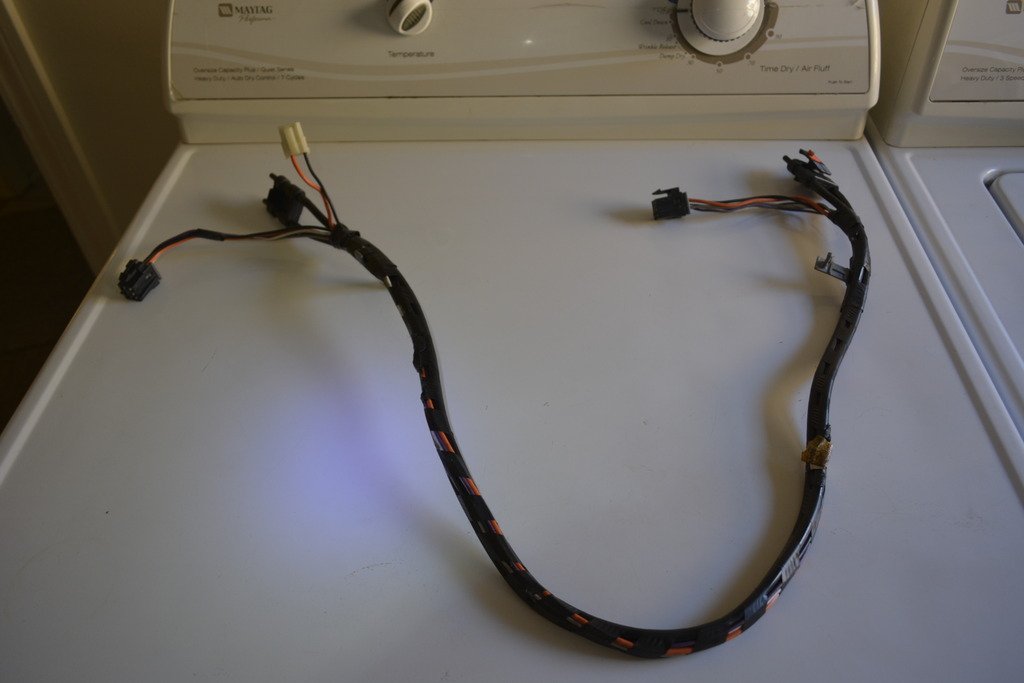
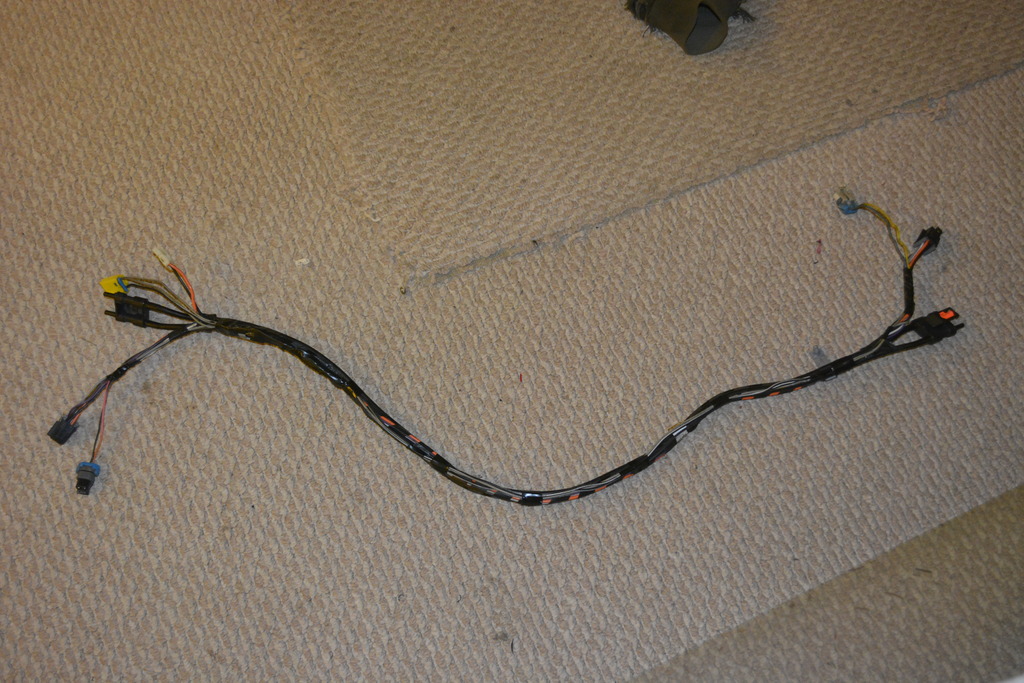
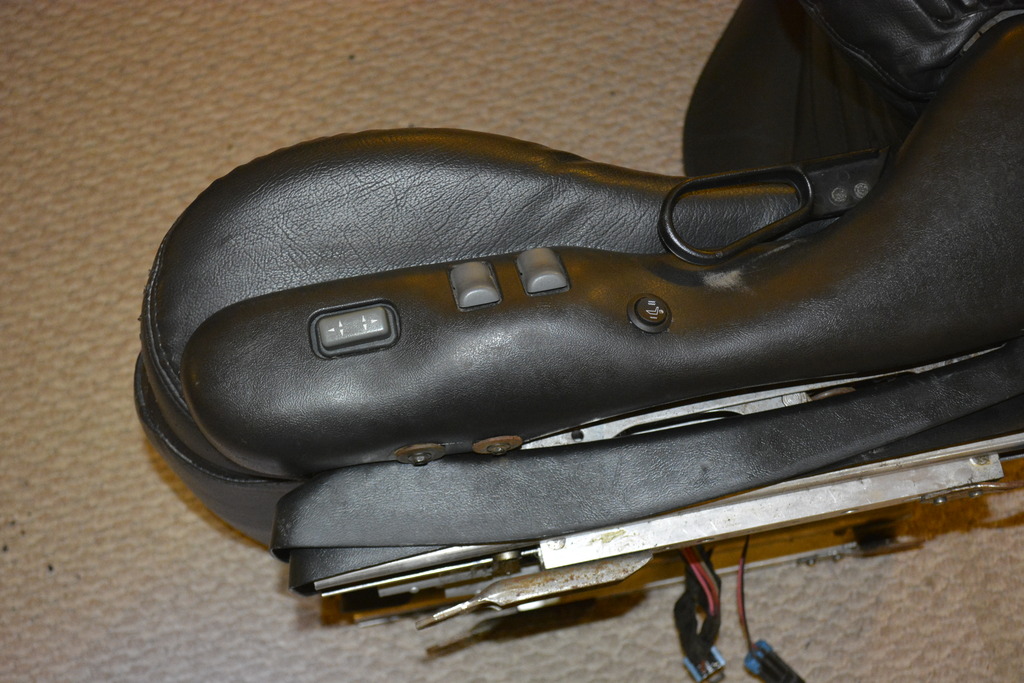
Here's the remote start and seat warmers. I was telling Tibo in his build thread that the power leads for the seat warmers are incredibly thin. Each seat is 10A fused and will get a dedicated fuse feed from the fuse panel. Same for the seat power.

 02-20-2017, 09:18 AM
#312
Senior Member
Thread Starter
iTrader: (4)
Join Date: Oct 2008
Location: Niles, IL
Posts: 857
Likes: 0
Received 5 Likes
on
4 Posts
Car: '91 LS6/T56/9"
Engine: LS6
Transmission: T56
Axle/Gears: Currie 9"/4.11, detroit truetrac
Re: Project Procrastination '91Z LS1/T56/currie 9" w/PICS
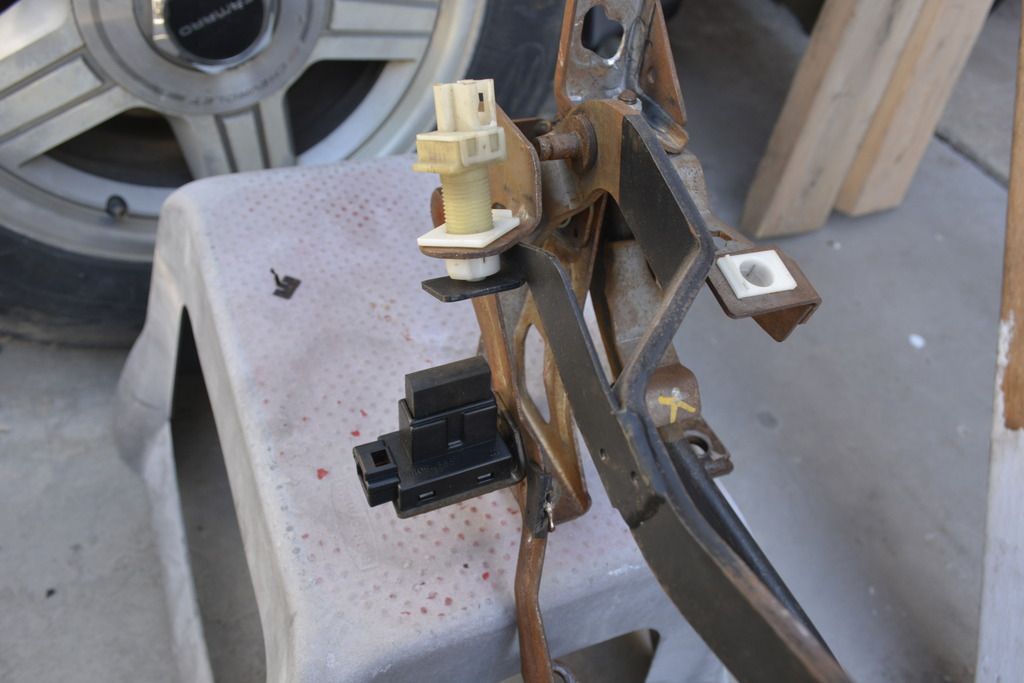
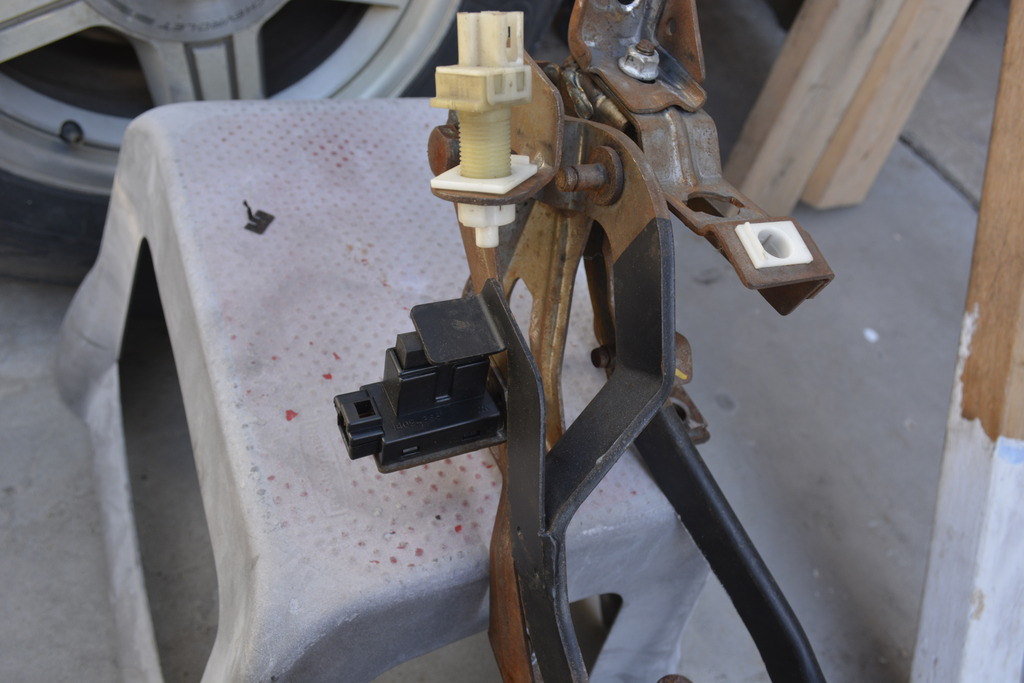
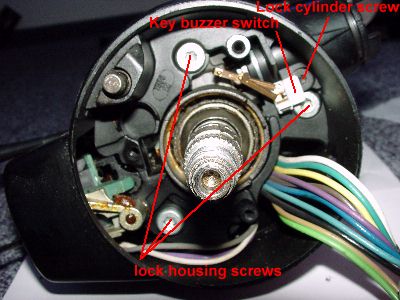
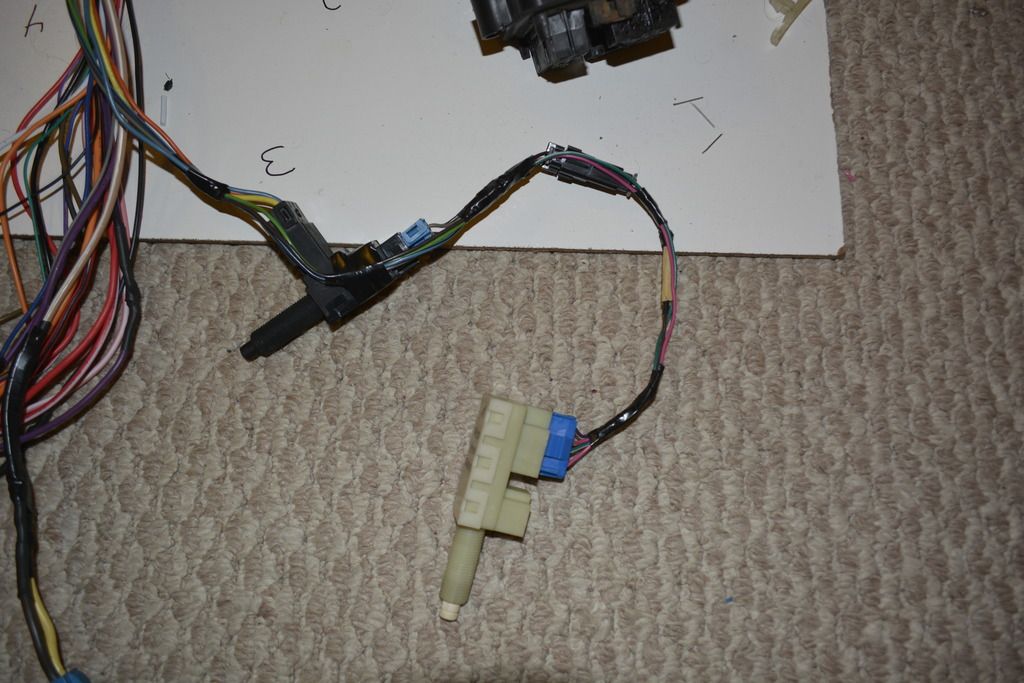
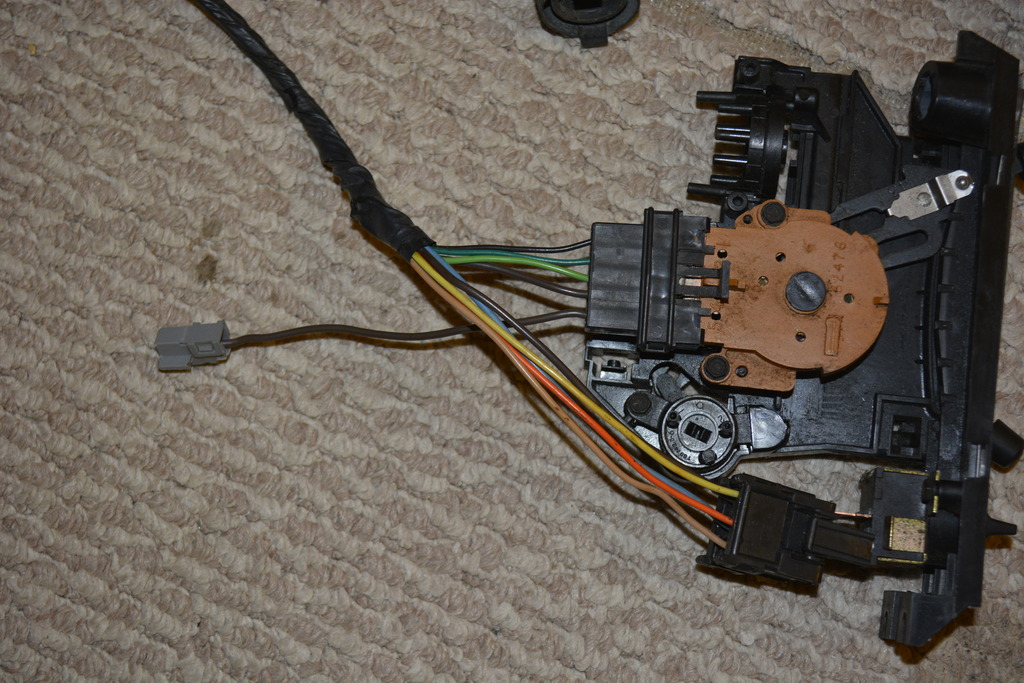
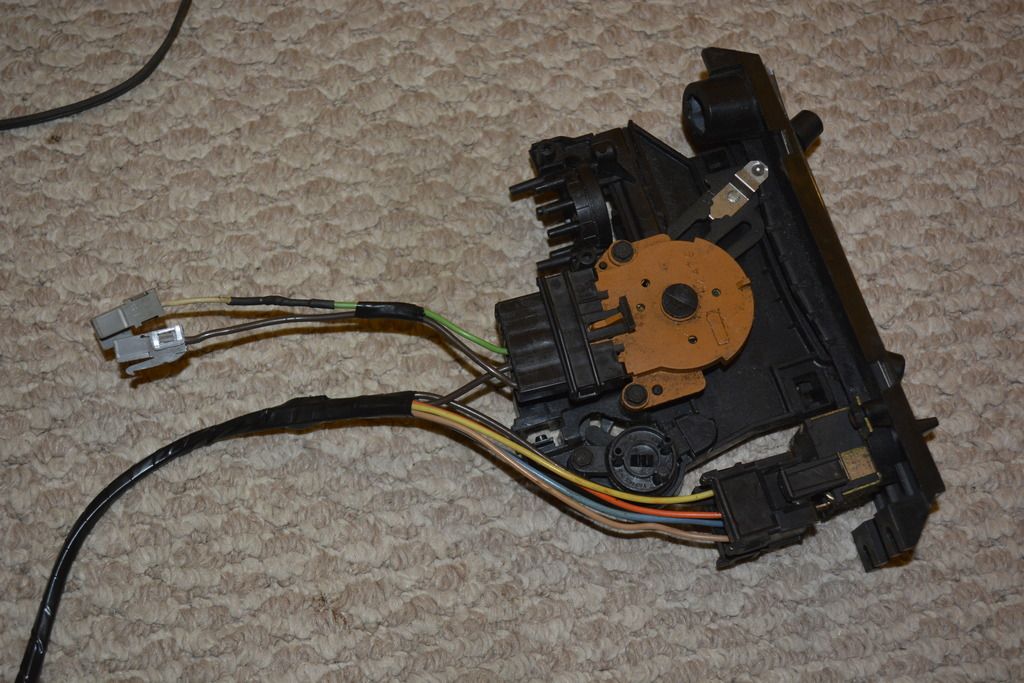
Oh I've studied those pics before I tore into mine so I'd know what to expect.
When I removed the lock housing screws and pulled the housing forward, that's when the clip full off so it's behind all the stuff in that pic.......I'll dig in again and see if I can make sense of it.
When I removed the lock housing screws and pulled the housing forward, that's when the clip full off so it's behind all the stuff in that pic.......I'll dig in again and see if I can make sense of it.
02-20-2017, 09:27 AM
#314
Senior Member
Thread Starter
iTrader: (4)
Join Date: Oct 2008
Location: Niles, IL
Posts: 857
Likes: 0
Received 5 Likes
on
4 Posts
Car: '91 LS6/T56/9"
Engine: LS6
Transmission: T56
Axle/Gears: Currie 9"/4.11, detroit truetrac
Re: Project Procrastination '91Z LS1/T56/currie 9" w/PICS
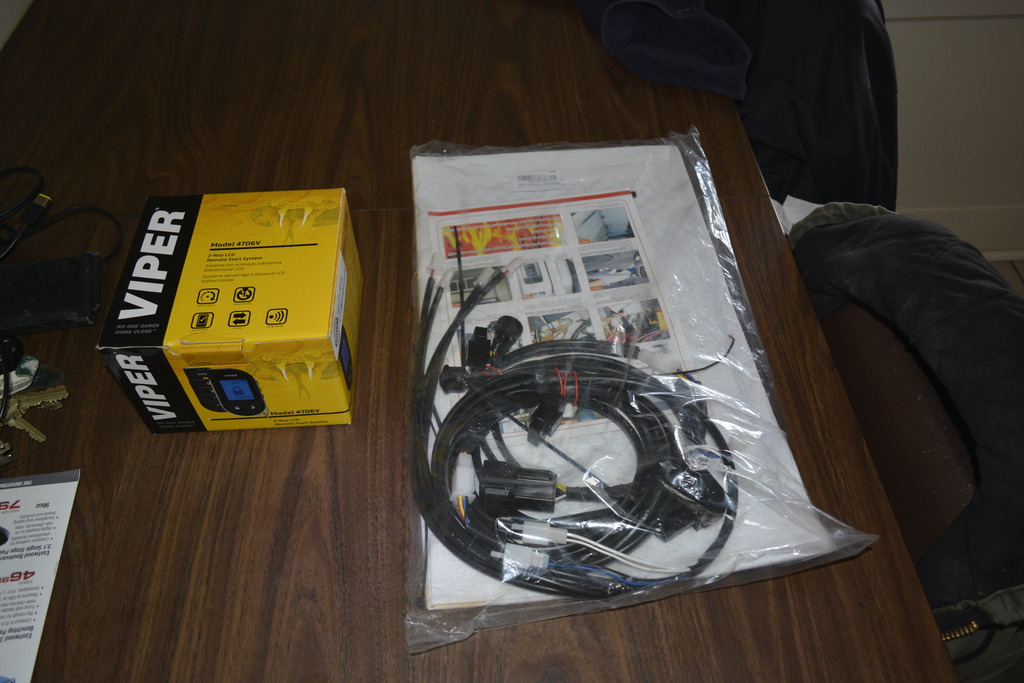
Another thing I've noticed: All remote starts are nearly identical no matter what name is on the box! All of the install guides are 95% the same, and they all have the same features. If you want a mobile app and GPS then you'll have to select a more expensive unit of course. But if you want basic 1 or 2 way communication just buy the least expensive one you can find.
Two warnings though:
Viper do not allow you access to full install guides. My 4706V is no different. However since they're all basically the same just find an install guide for an older unit and you're gold.
Also, make sure it will support a manual transmission install. Not all do.
Because I can't get the install guide for mine I'm not 100% sure of the manual transmission shutdown sequence. This is the sequence the vehicle must me shut off in so that you can remote start.
It's usually:
1. Press remote start button
2. Pull parking brake
3. Exit the vehicle
4. Lock the doors.
Or some combo of those inputs.
02-20-2017, 09:28 AM
#315
Senior Member
Thread Starter
iTrader: (4)
Join Date: Oct 2008
Location: Niles, IL
Posts: 857
Likes: 0
Received 5 Likes
on
4 Posts
Car: '91 LS6/T56/9"
Engine: LS6
Transmission: T56
Axle/Gears: Currie 9"/4.11, detroit truetrac
Re: Project Procrastination '91Z LS1/T56/currie 9" w/PICS
02-21-2017, 12:34 PM
#317
Senior Member
Thread Starter
iTrader: (4)
Join Date: Oct 2008
Location: Niles, IL
Posts: 857
Likes: 0
Received 5 Likes
on
4 Posts
Car: '91 LS6/T56/9"
Engine: LS6
Transmission: T56
Axle/Gears: Currie 9"/4.11, detroit truetrac
Re: Project Procrastination '91Z LS1/T56/currie 9" w/PICS
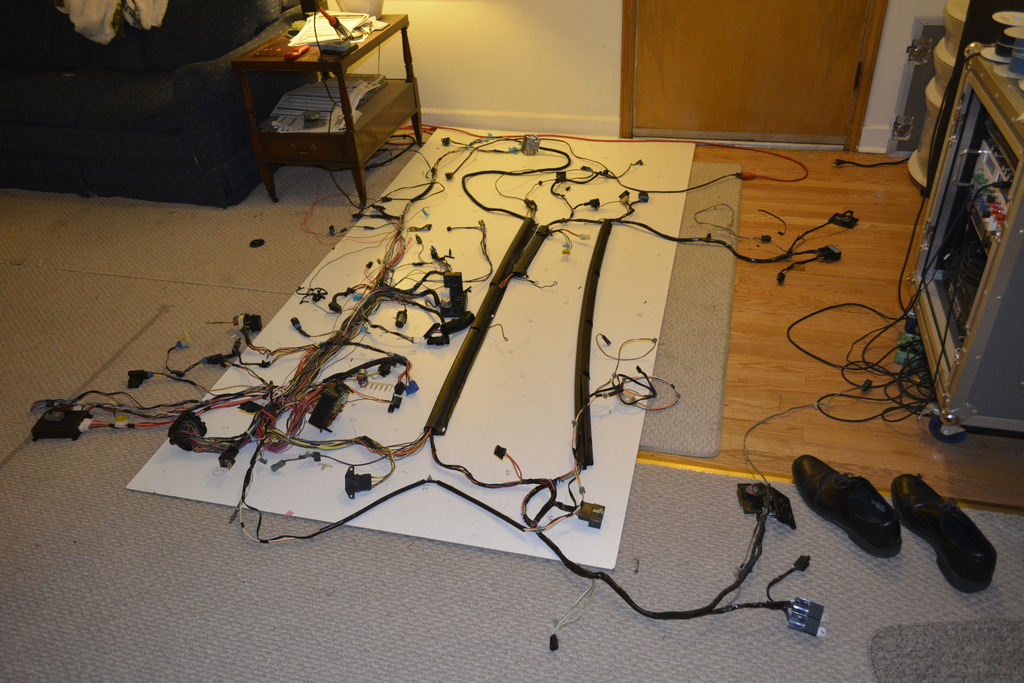
I'm very much looking forward to building the engine/trans, but I'm focusing on the interior wiring right now.
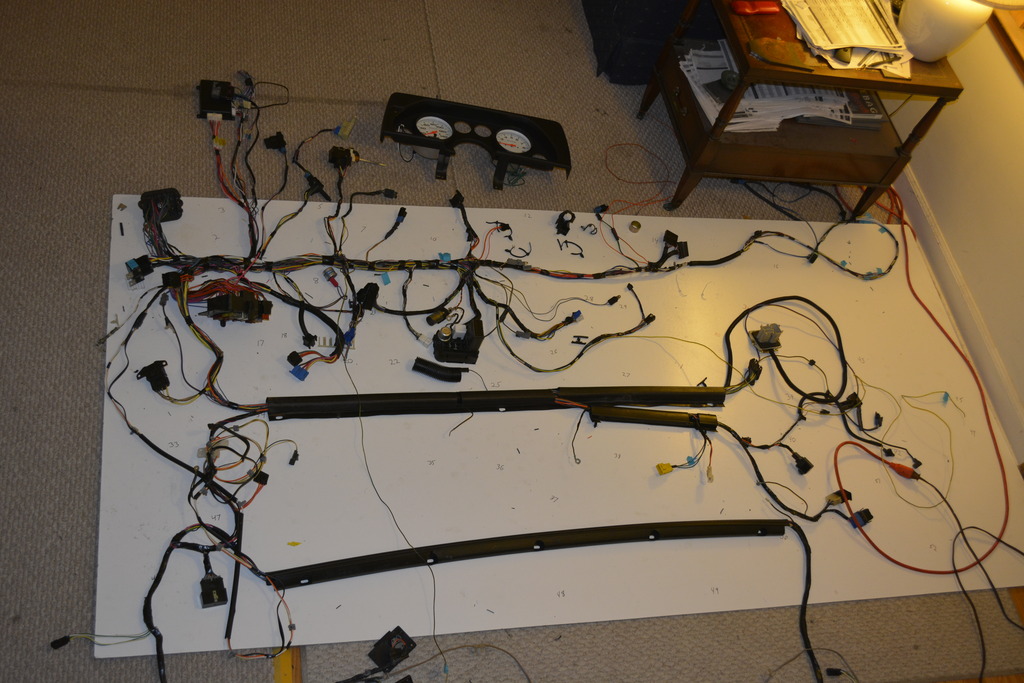
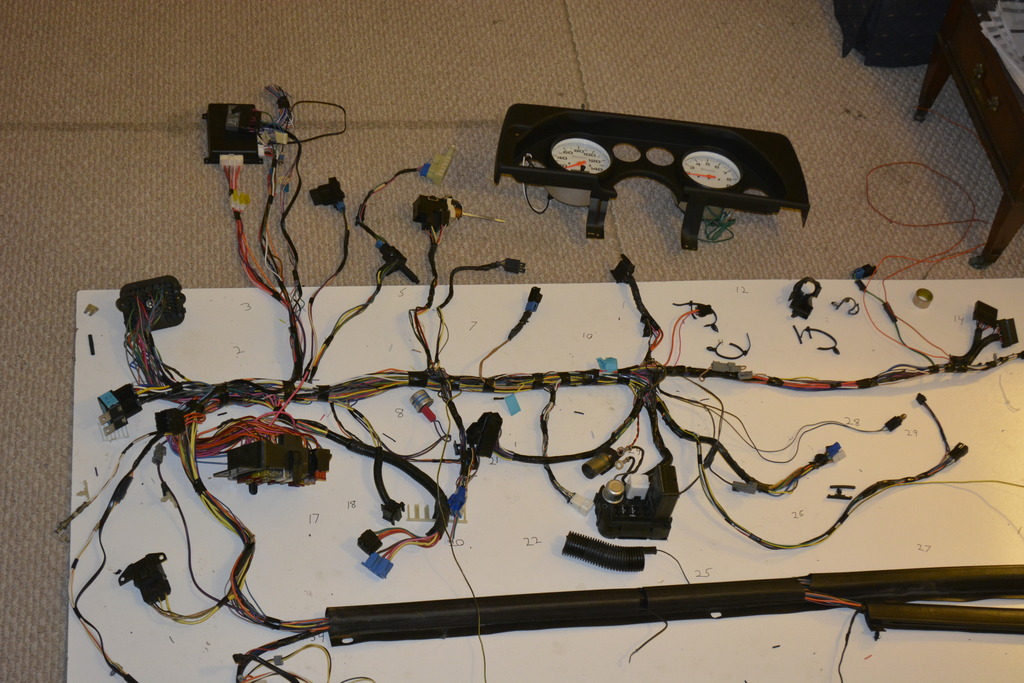
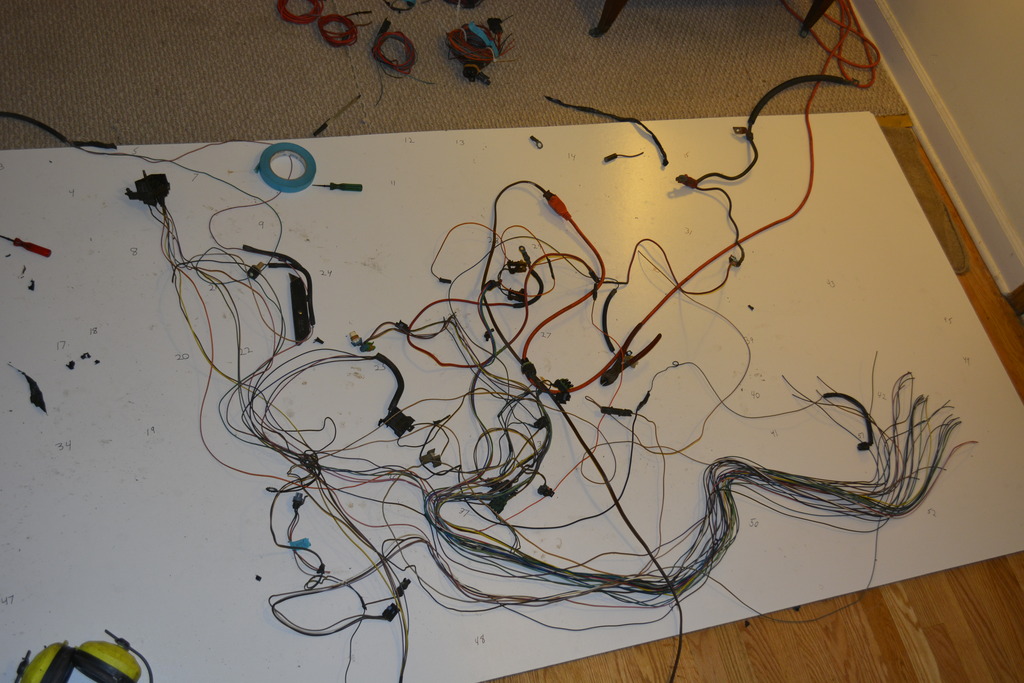
I'm fortunate enough to have the complete uncut interior harness out and blown apart on my living room floor so I can easily modify anything I want. Few people have such a luxury........thus the reason we see so much spaghetti wiring hack jobs.
I know I've posted some of this before but I'm currently:
1. Installing the remote start. (Done except for quenching and protection diodes on the anti-grind relay. Also GND isn't hooked up yet because I cannot find the physical chassis GND connection in the harness! Just need to investigate a little more.)
2. Install the Clutch neutral safety switch and the clutch cruise disable switch. (Done)
3. Add power window relays, re-route power to them, and change the window switch to switch GND and not power to call the new relays.
4. Add the 10-pin cruise control harness. Could then delete the stick cruise harness.
5. Add a fuse position for seat power and its harness
6. Add a fuse position for the seat warmers and add their harness/2-pin connectors at the seats.
7. Re-route the 3rd brake light wire to the new dome light/mirror/brake light harness.
8. Wire the new dash to the two 10-pin connectors I pulled from the pats yard with the following signals:
Gauge power (Gauges fuse)
Gauge GND
Lights +
Lights GND
Check engine warning light
Oil press warning light
Oil press gauge (sender)
Temp gauge (sender)
Temp warning light
Voltage warning light
Voltage gauge
Fuel level
Fuel level low warning light
Seatbelt warning light??
Tach
Speedo
Brake warning light
Left signal
Right signal
High beams
Cruise on
Cruise active
Fuel press
I was wondering how to illuminate all of those warning lights in my custom dash. These are older pics. I still have to decide how they will fit the 90-92 dash.
The leads were kept long and ugly knowing I'd be re-visiting this dash sooner or later.
You can see oil press is on the A pillar......still don't know if I want to keep it there because I still have to add a fuel pressure gauge.
So I ordered a bunch of cool warning lights from a company called Car Builder Solutions in the UK.
http://www.carbuildersolutions.com/u...warning-lights
$67 and $23 to ship. I felt like that was fair.
I purchased those specifically because I can either PCB mount them, or wire direct with spade connectors.
They're between the size of a nickle and quarter.
I'm fortunate enough to have the complete uncut interior harness out and blown apart on my living room floor so I can easily modify anything I want. Few people have such a luxury........thus the reason we see so much spaghetti wiring hack jobs.
I know I've posted some of this before but I'm currently:
1. Installing the remote start. (Done except for quenching and protection diodes on the anti-grind relay. Also GND isn't hooked up yet because I cannot find the physical chassis GND connection in the harness! Just need to investigate a little more.)
2. Install the Clutch neutral safety switch and the clutch cruise disable switch. (Done)
3. Add power window relays, re-route power to them, and change the window switch to switch GND and not power to call the new relays.
4. Add the 10-pin cruise control harness. Could then delete the stick cruise harness.
5. Add a fuse position for seat power and its harness
6. Add a fuse position for the seat warmers and add their harness/2-pin connectors at the seats.
7. Re-route the 3rd brake light wire to the new dome light/mirror/brake light harness.
8. Wire the new dash to the two 10-pin connectors I pulled from the pats yard with the following signals:
Gauge power (Gauges fuse)
Gauge GND
Lights +
Lights GND
Check engine warning light
Oil press warning light
Oil press gauge (sender)
Temp gauge (sender)
Temp warning light
Voltage warning light
Voltage gauge
Fuel level
Fuel level low warning light
Seatbelt warning light??
Tach
Speedo
Brake warning light
Left signal
Right signal
High beams
Cruise on
Cruise active
Fuel press
I was wondering how to illuminate all of those warning lights in my custom dash. These are older pics. I still have to decide how they will fit the 90-92 dash.
The leads were kept long and ugly knowing I'd be re-visiting this dash sooner or later.
You can see oil press is on the A pillar......still don't know if I want to keep it there because I still have to add a fuel pressure gauge.
So I ordered a bunch of cool warning lights from a company called Car Builder Solutions in the UK.
http://www.carbuildersolutions.com/u...warning-lights

$67 and $23 to ship. I felt like that was fair.
I purchased those specifically because I can either PCB mount them, or wire direct with spade connectors.
They're between the size of a nickle and quarter.
02-26-2017, 03:28 PM
#318
Re: Project Procrastination '91Z LS1/T56/currie 9" w/PICS
 02-27-2017, 03:50 PM
#319
Senior Member
Thread Starter
iTrader: (4)
Join Date: Oct 2008
Location: Niles, IL
Posts: 857
Likes: 0
Received 5 Likes
on
4 Posts
Car: '91 LS6/T56/9"
Engine: LS6
Transmission: T56
Axle/Gears: Currie 9"/4.11, detroit truetrac
Re: Project Procrastination '91Z LS1/T56/currie 9" w/PICS
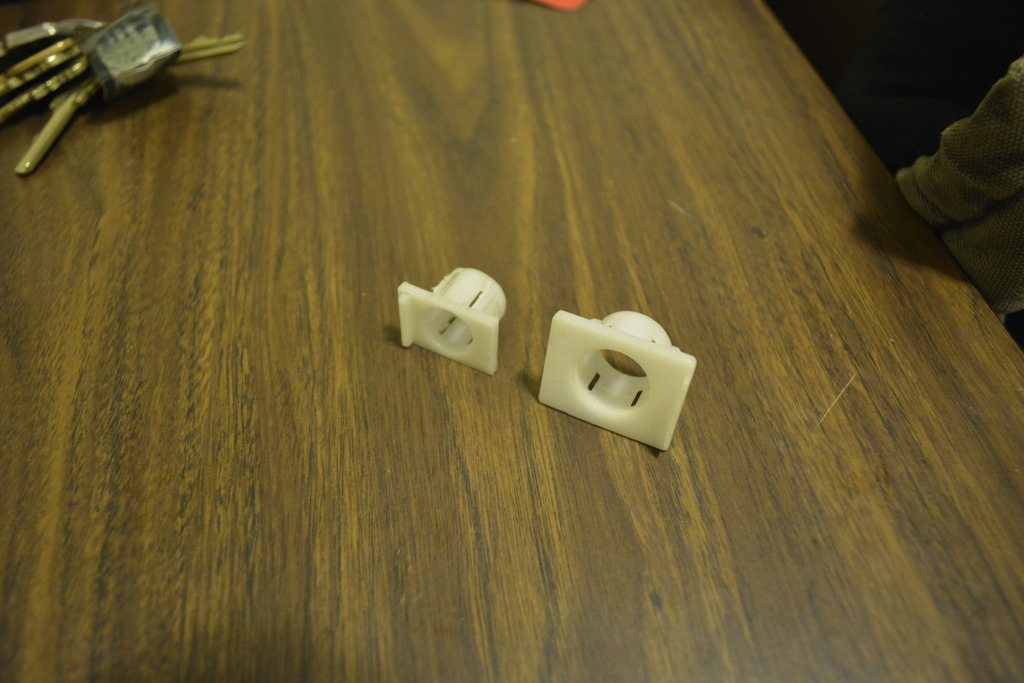
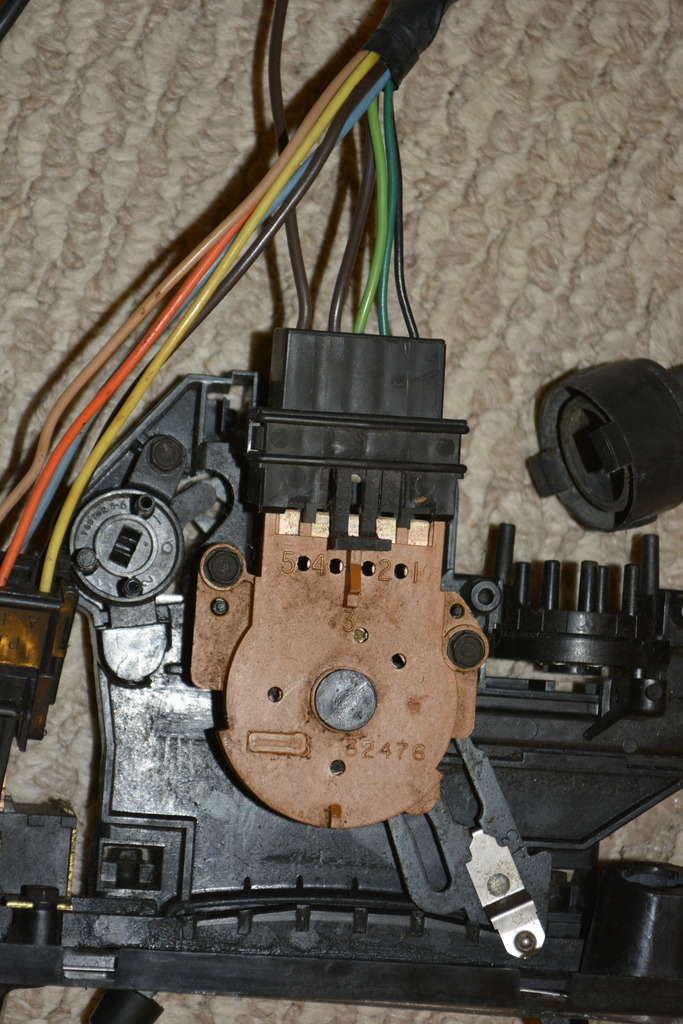
The clip goes underneath the key contact switch to keep tension on it.
 02-27-2017, 04:00 PM
#320
Senior Member
Thread Starter
iTrader: (4)
Join Date: Oct 2008
Location: Niles, IL
Posts: 857
Likes: 0
Received 5 Likes
on
4 Posts
Car: '91 LS6/T56/9"
Engine: LS6
Transmission: T56
Axle/Gears: Currie 9"/4.11, detroit truetrac
Re: Project Procrastination '91Z LS1/T56/currie 9" w/PICS
Yours looks great by the way. I also purchased a fuel pressure gauge that I plan to mount in place of the ash tray. completely ripping off this guy:
https://www.thirdgen.org/forums/fabr...gauge-pod.html

I'm also going to mount oil pressure next to it.
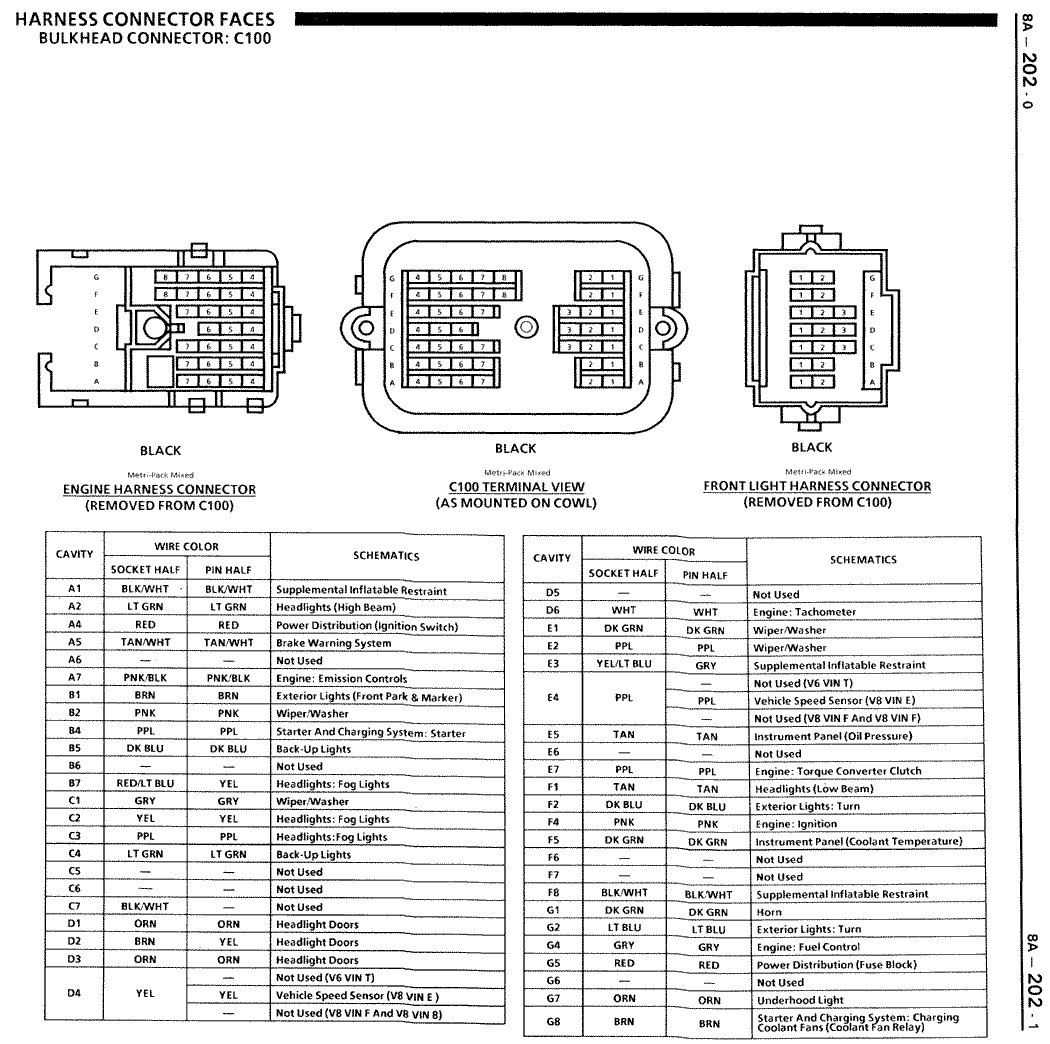
I'll use C100 to pass all sender data onto the gauges. I've heard people say that C100 will be full during an LS swap but I have plenty of room so far.
Just look at D1, D2, D3. Headlight doors which will be empty if you have a camaro.
 03-06-2017, 10:05 PM
#321
Senior Member
Thread Starter
iTrader: (4)
Join Date: Oct 2008
Location: Niles, IL
Posts: 857
Likes: 0
Received 5 Likes
on
4 Posts
Car: '91 LS6/T56/9"
Engine: LS6
Transmission: T56
Axle/Gears: Currie 9"/4.11, detroit truetrac
Re: Project Procrastination '91Z LS1/T56/currie 9" w/PICS
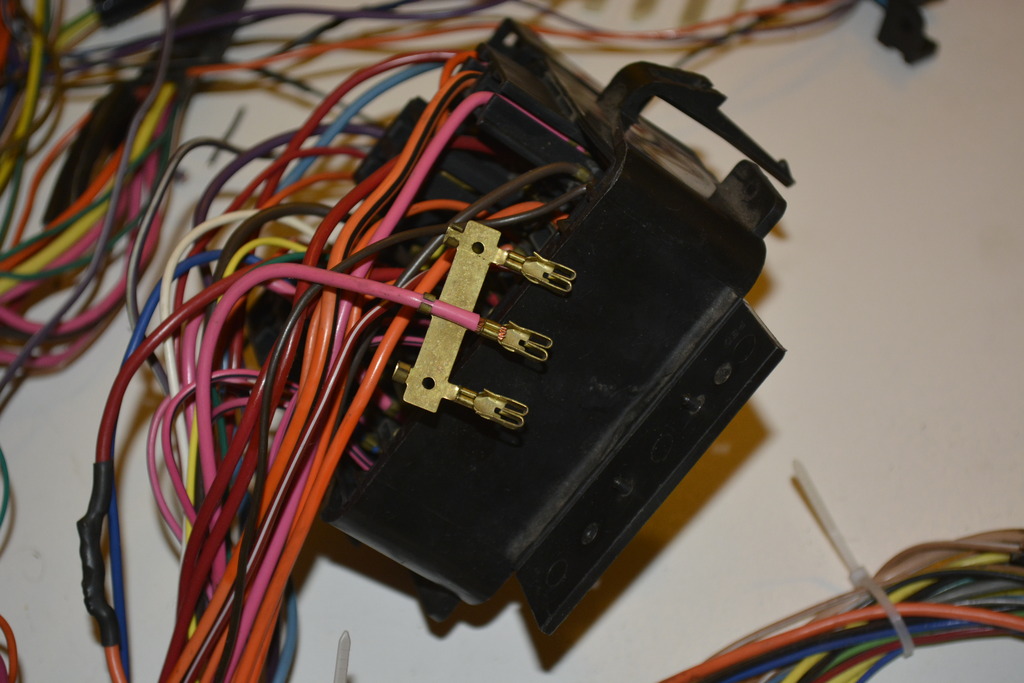
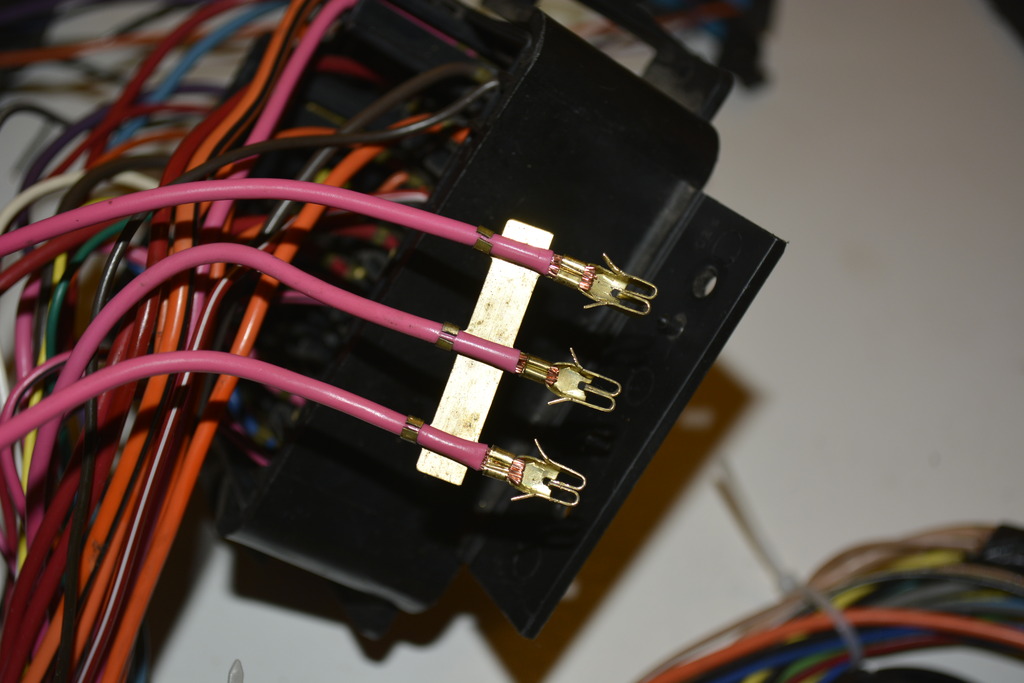
This interior harness work just won't end!! Whenever I think I'm done, I come up with more stuff to add.
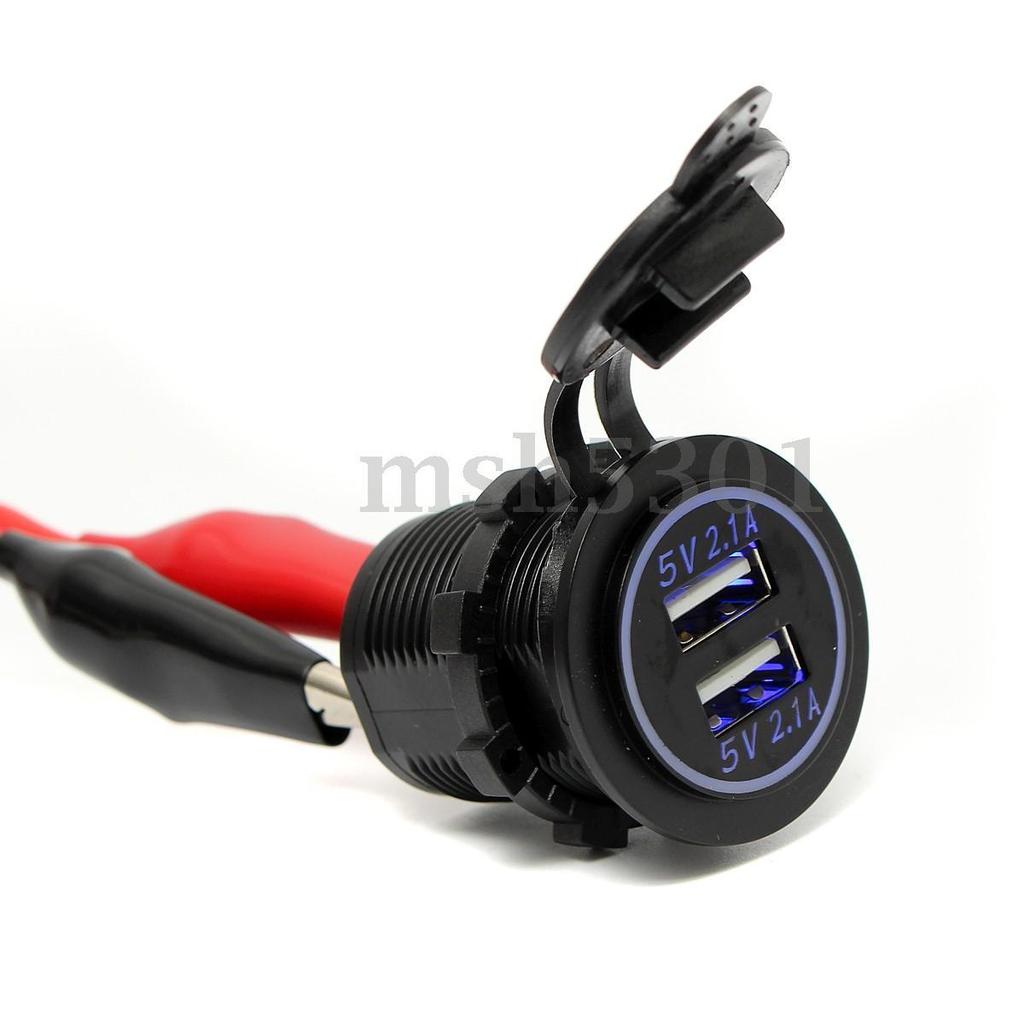
Just this morning I remembered to add 2.1A USB ports. They'll be run via a dedicated fuse of course since I have a few spots available. I bought 3 but will probably only wire 2 at most.
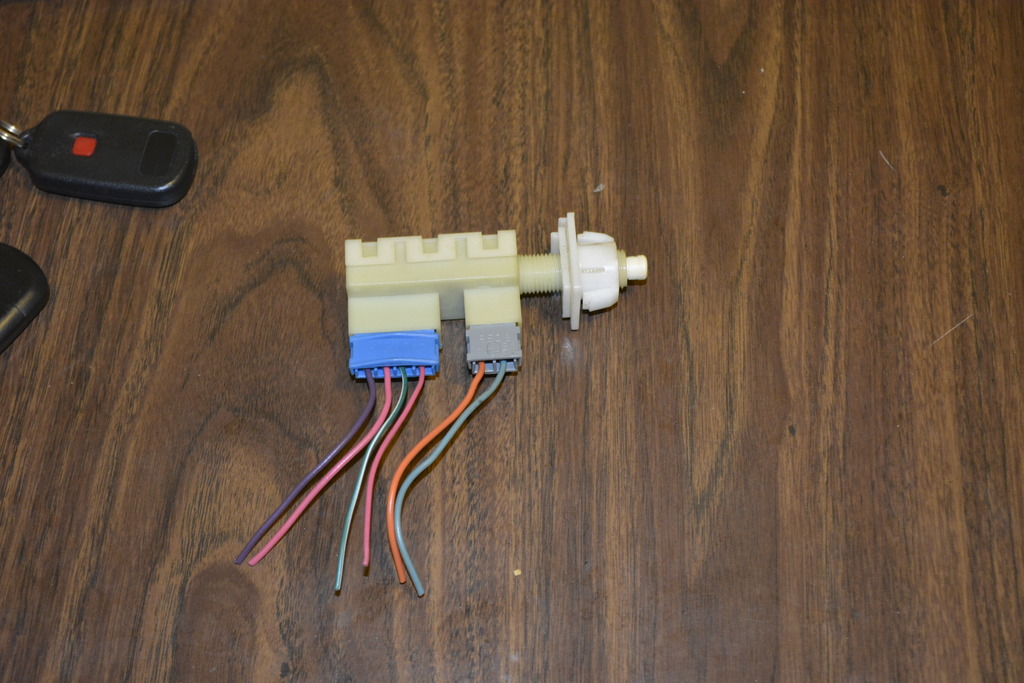
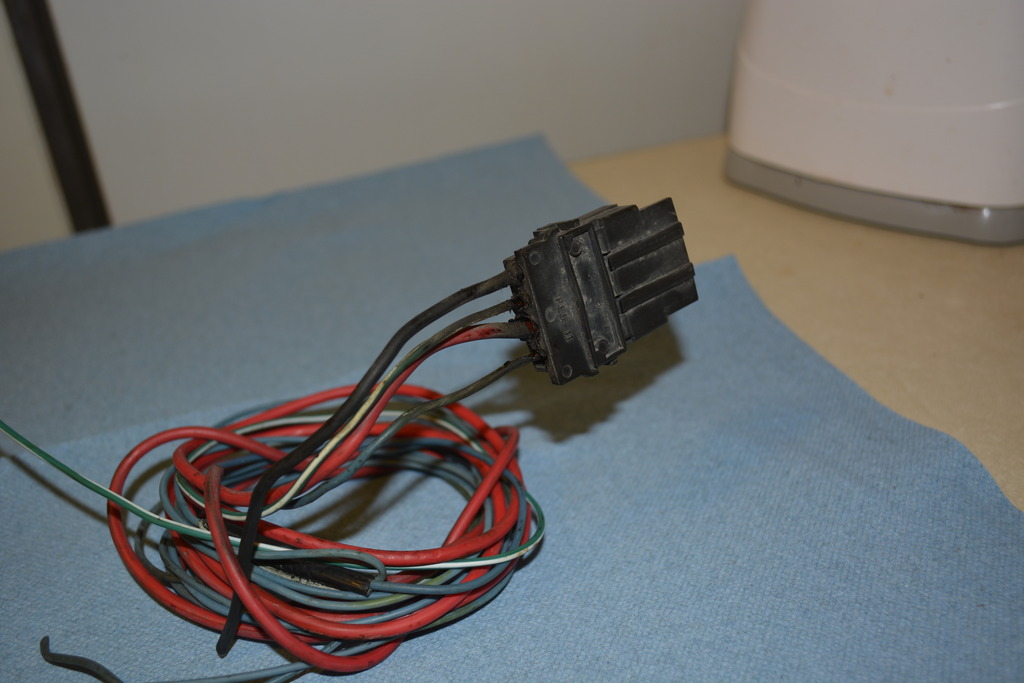
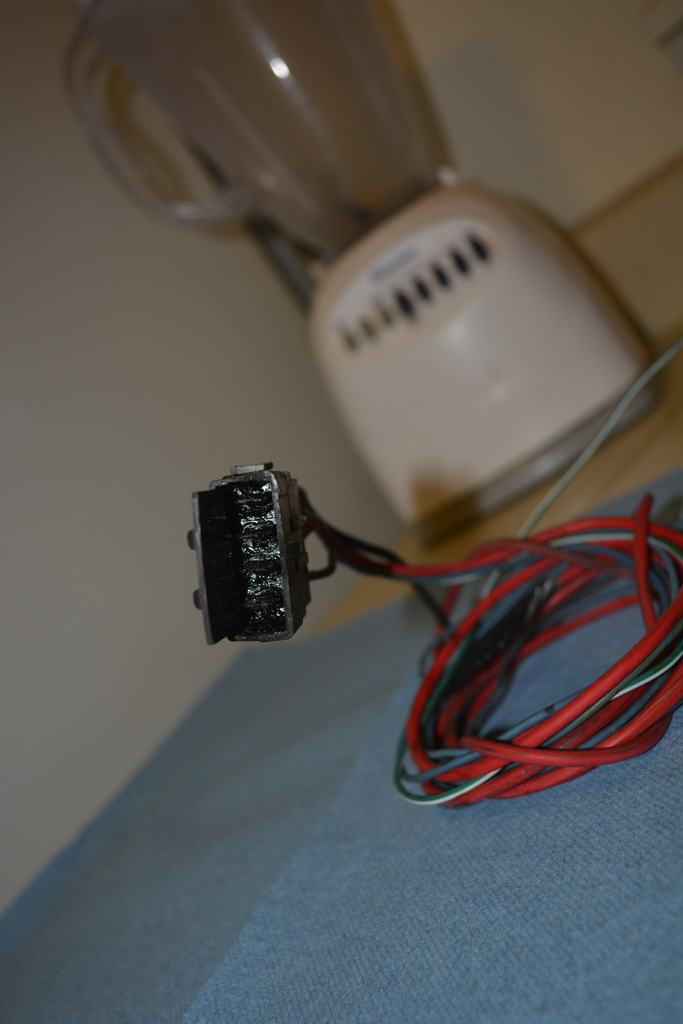
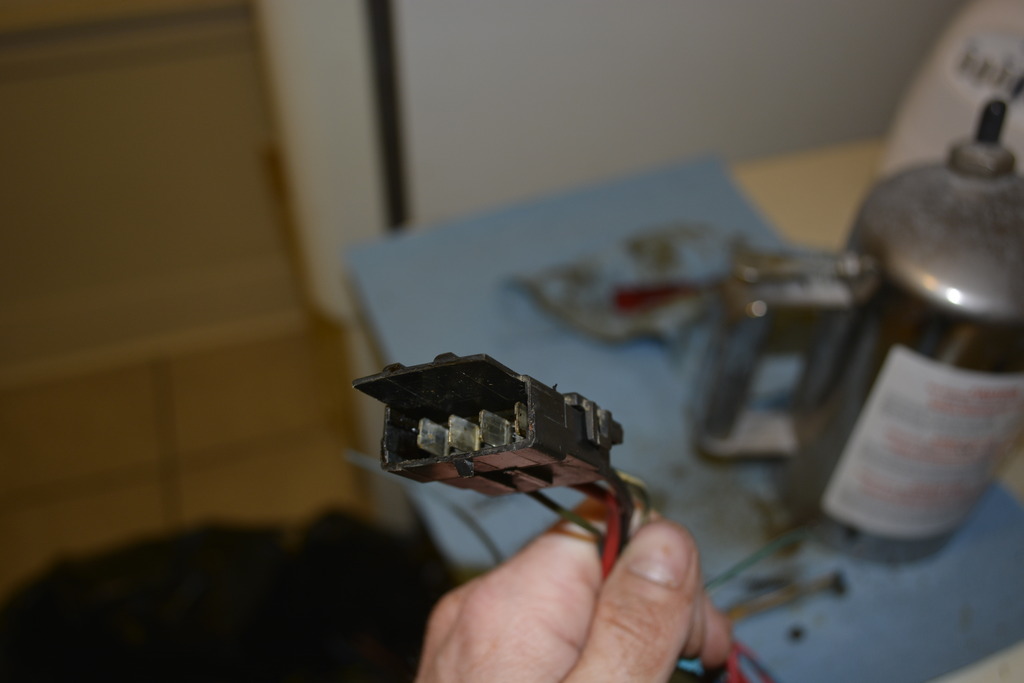
I also changed the clutch's cruise control cancel switch. This switch (which opens when you touch the clutch pedal) must control 2 circuits. It needs to provide GND to the PCM's Clutch Pedal Position pin (C1 32):
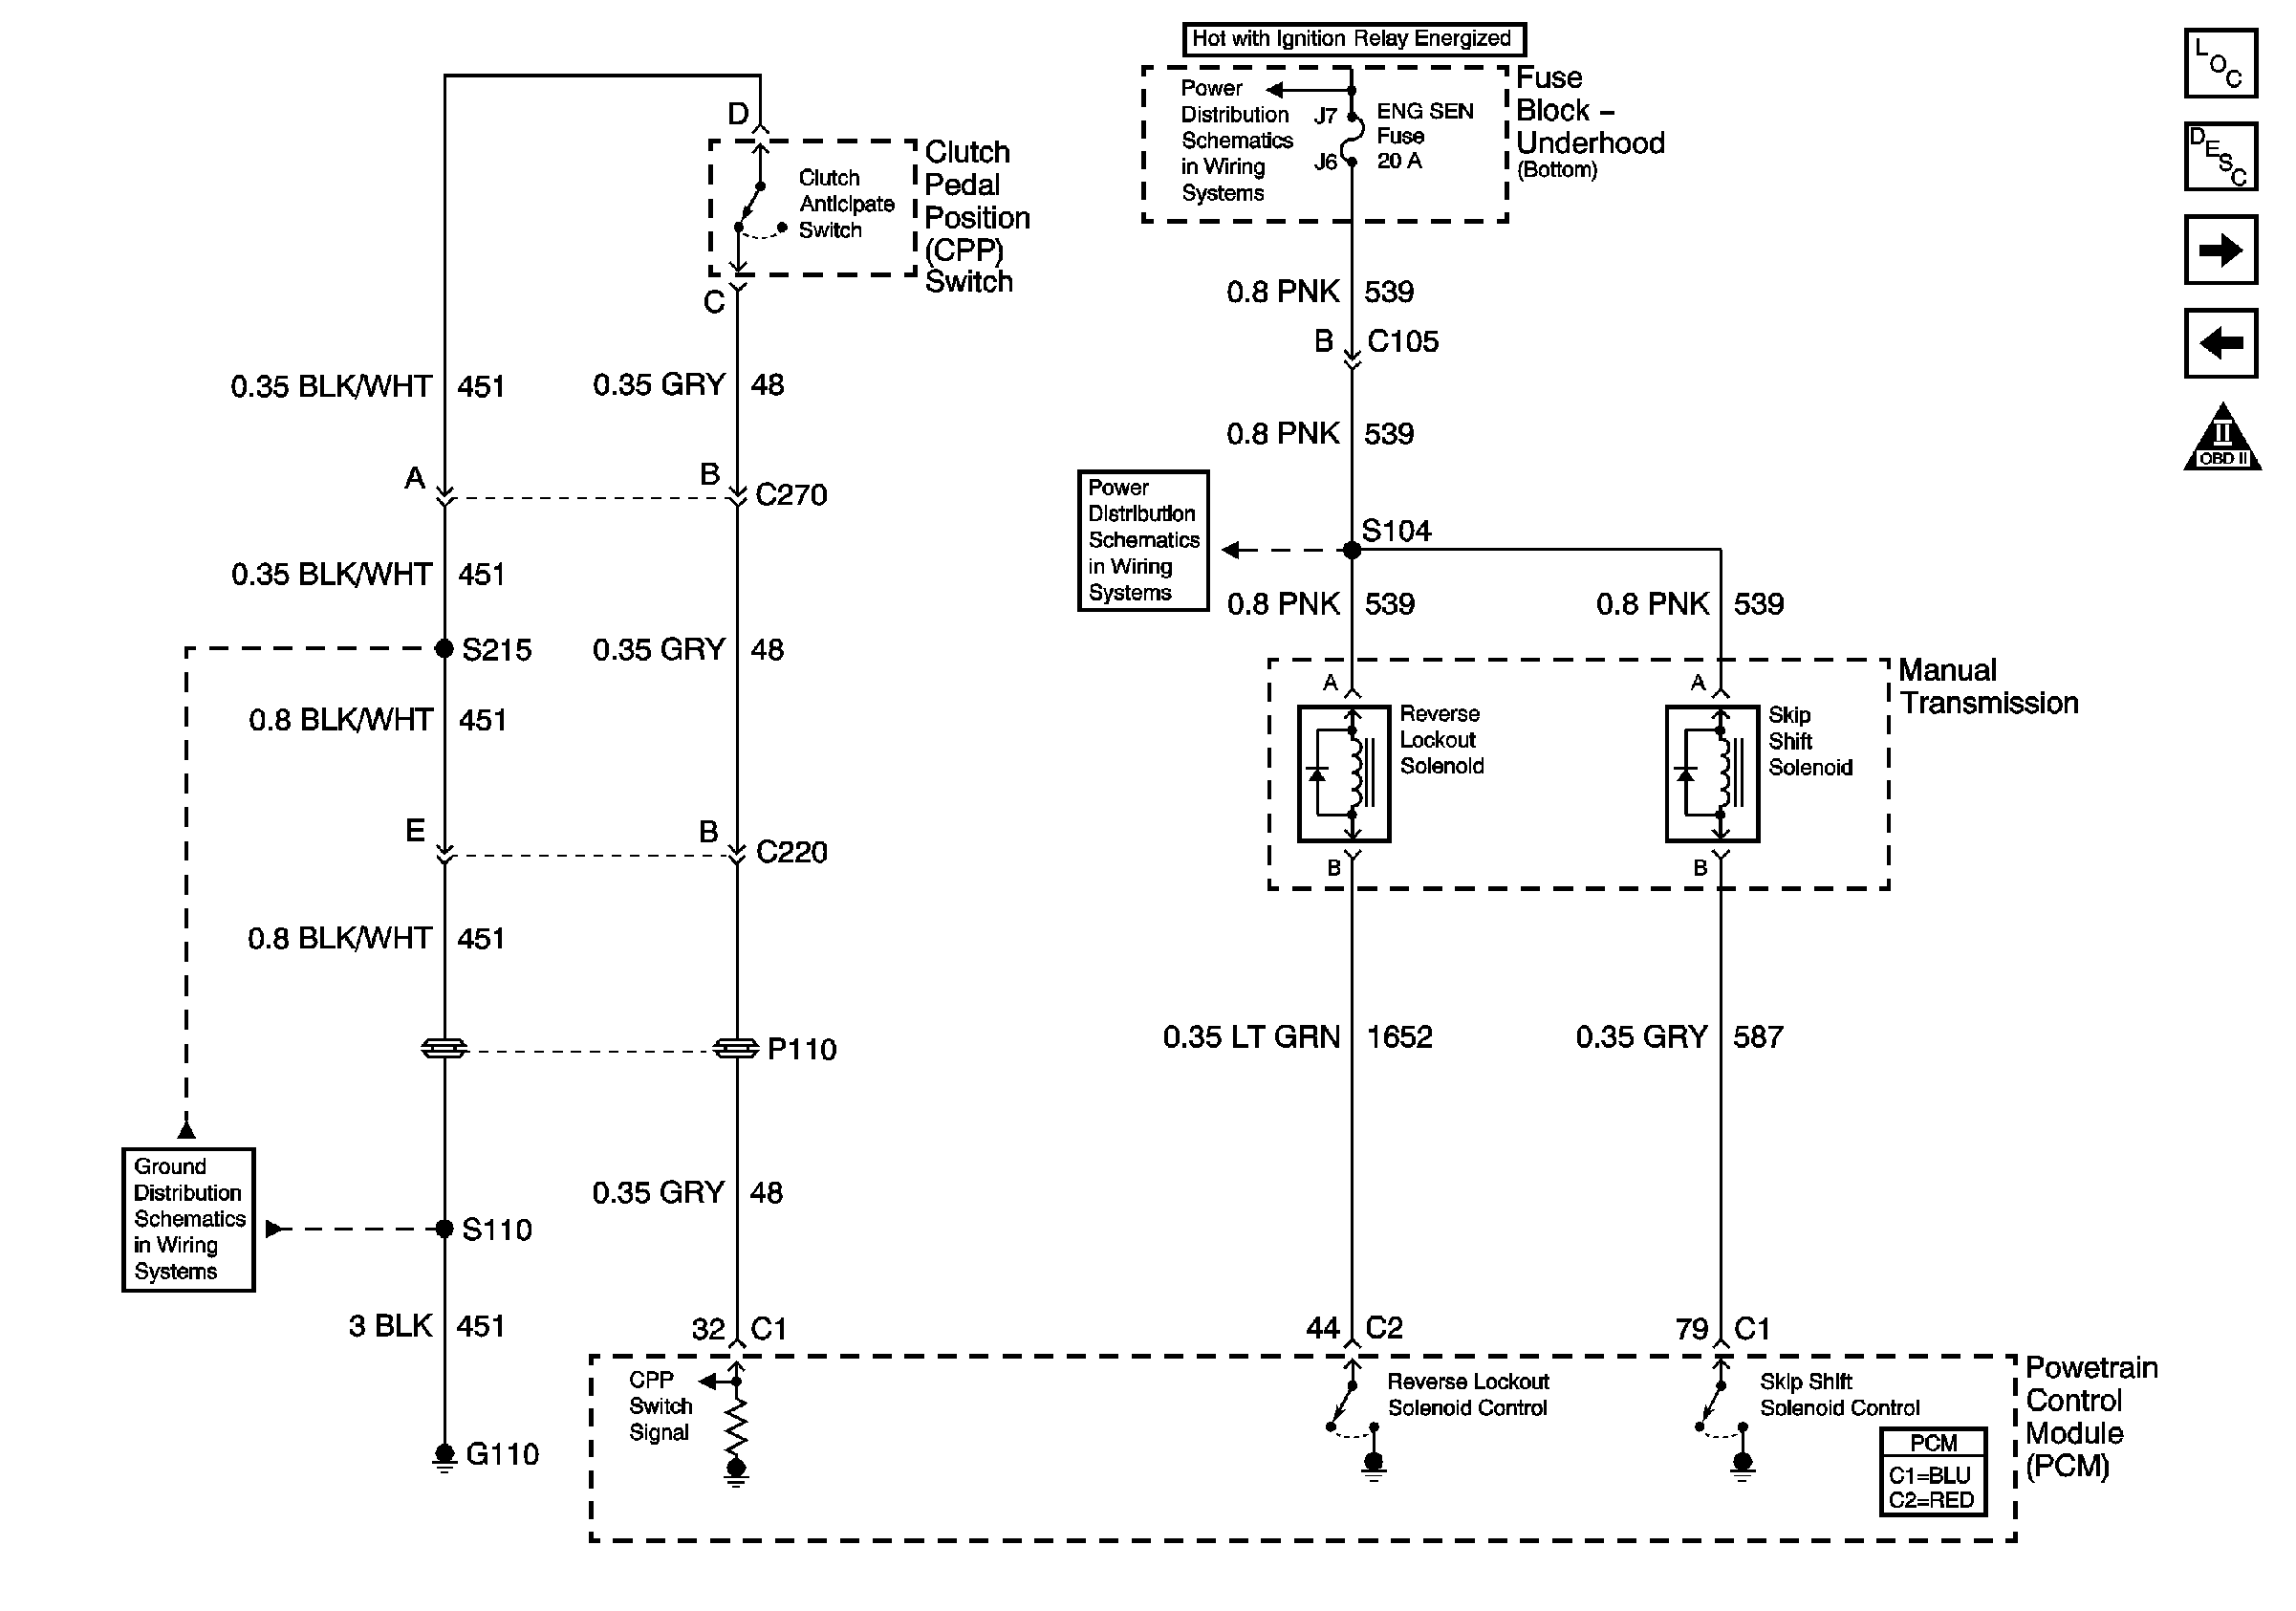
As well as provide power to the cruise control's brake input pin:
To do this I used the brake pedal switch that's on almost every GM vehicle:
The 4 wires are a pair of normally closed switches.
The problem is that its barrel is smaller than the stock clutch switch's plastic insert will hold. So I trimmed the smaller insert until it fit inside the larger one. Now it will fit in the stock position.
Just this morning I remembered to add 2.1A USB ports. They'll be run via a dedicated fuse of course since I have a few spots available. I bought 3 but will probably only wire 2 at most.

I also changed the clutch's cruise control cancel switch. This switch (which opens when you touch the clutch pedal) must control 2 circuits. It needs to provide GND to the PCM's Clutch Pedal Position pin (C1 32):
As well as provide power to the cruise control's brake input pin:
To do this I used the brake pedal switch that's on almost every GM vehicle:

The 4 wires are a pair of normally closed switches.
The problem is that its barrel is smaller than the stock clutch switch's plastic insert will hold. So I trimmed the smaller insert until it fit inside the larger one. Now it will fit in the stock position.


Last edited by robguitargod1; 03-07-2017 at 07:43 AM.
03-06-2017, 10:17 PM
#322
Senior Member
Thread Starter
iTrader: (4)
Join Date: Oct 2008
Location: Niles, IL
Posts: 857
Likes: 0
Received 5 Likes
on
4 Posts
Car: '91 LS6/T56/9"
Engine: LS6
Transmission: T56
Axle/Gears: Currie 9"/4.11, detroit truetrac
Re: Project Procrastination '91Z LS1/T56/currie 9" w/PICS
I also finally posted the interior connector ID. I simply CANNOT get the text to format correctly. I spent a lot of time spacing everything into readable columns. When I submit, the thread smashes all the text together and you can't even tell what's what......
I added the [code] tag which helped the spacing but put it in it's own window.
I just want the damn post to look like every other common post!!!! wtf is going on?
https://www.thirdgen.org/forums/elec...tor-guide.html
And if this site logs me off in the middle of editing again I might just snap. It's literally ever 4 mins I get booted.
Last edited by robguitargod1; 03-07-2017 at 07:45 AM.
03-07-2017, 01:45 AM
#323
Re: Project Procrastination '91Z LS1/T56/currie 9" w/PICS
I have the same USB charging port and it's worked great. With no radio I just used the radio's switched power but I think you would be able to use the heater's switched power. It's a beefy circuit and you're adding less than 5 amps (if you used both ports at once) that would be used intermittently,
A separate question, my interior harness for my 92 was wired already for fog lights but had no fog lights, do you have a 90-92 harness that has that?
A separate question, my interior harness for my 92 was wired already for fog lights but had no fog lights, do you have a 90-92 harness that has that?
03-07-2017, 07:48 AM
#325
Senior Member
Thread Starter
iTrader: (4)
Join Date: Oct 2008
Location: Niles, IL
Posts: 857
Likes: 0
Received 5 Likes
on
4 Posts
Car: '91 LS6/T56/9"
Engine: LS6
Transmission: T56
Axle/Gears: Currie 9"/4.11, detroit truetrac
Re: Project Procrastination '91Z LS1/T56/currie 9" w/PICS
I have the same USB charging port and it's worked great. With no radio I just used the radio's switched power but I think you would be able to use the heater's switched power. It's a beefy circuit and you're adding less than 5 amps (if you used both ports at once) that would be used intermittently,
A separate question, my interior harness for my 92 was wired already for fog lights but had no fog lights, do you have a 90-92 harness that has that?
A separate question, my interior harness for my 92 was wired already for fog lights but had no fog lights, do you have a 90-92 harness that has that?
Are you running fogs?
03-07-2017, 08:12 AM
#326
Senior Member
Thread Starter
iTrader: (4)
Join Date: Oct 2008
Location: Niles, IL
Posts: 857
Likes: 0
Received 5 Likes
on
4 Posts
Car: '91 LS6/T56/9"
Engine: LS6
Transmission: T56
Axle/Gears: Currie 9"/4.11, detroit truetrac
Re: Project Procrastination '91Z LS1/T56/currie 9" w/PICS
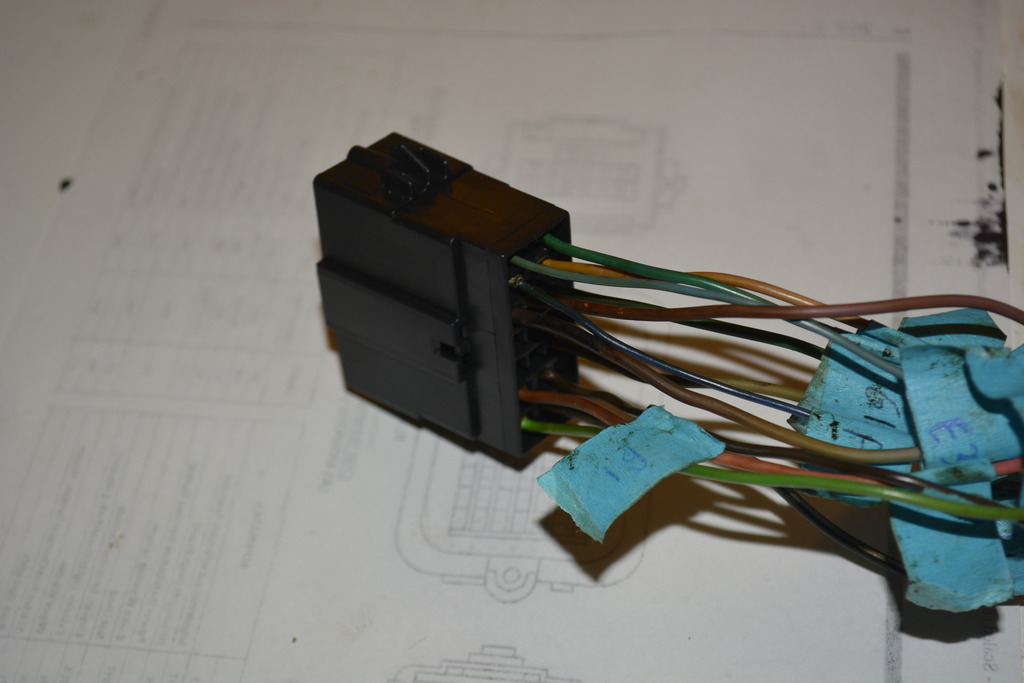
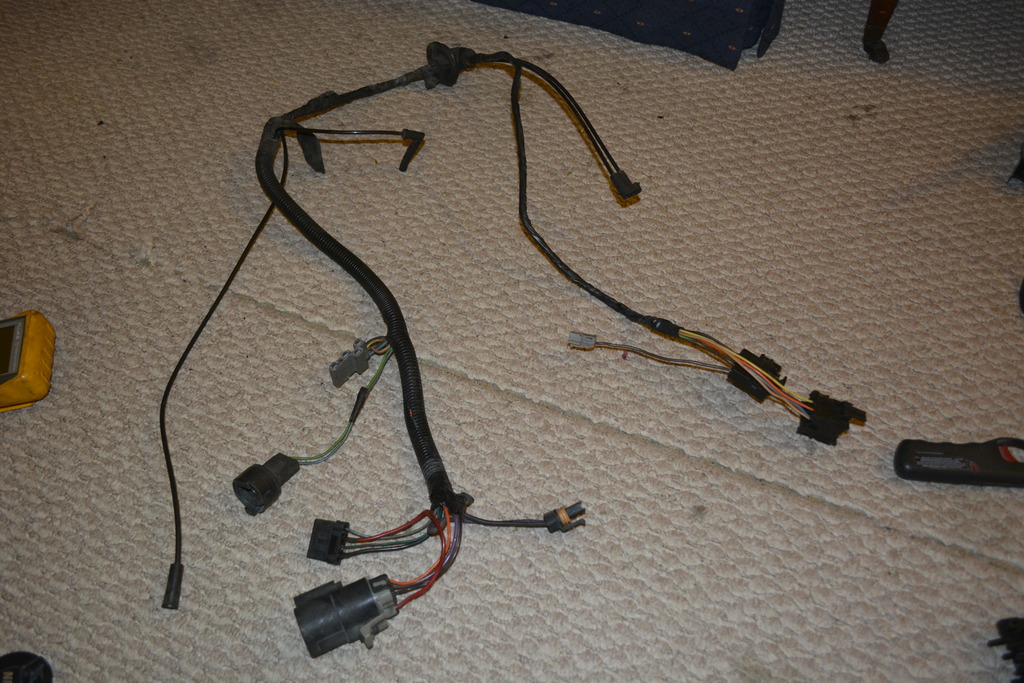
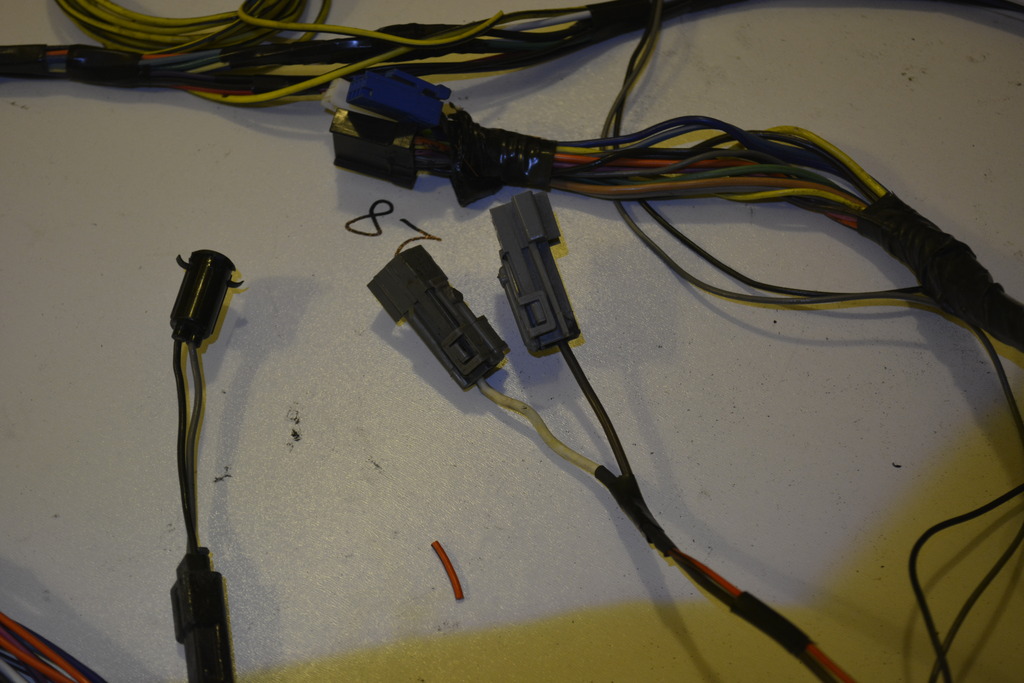
A little interior harness update
Here's the remote start, neutral safety, and brake/clutch switchs
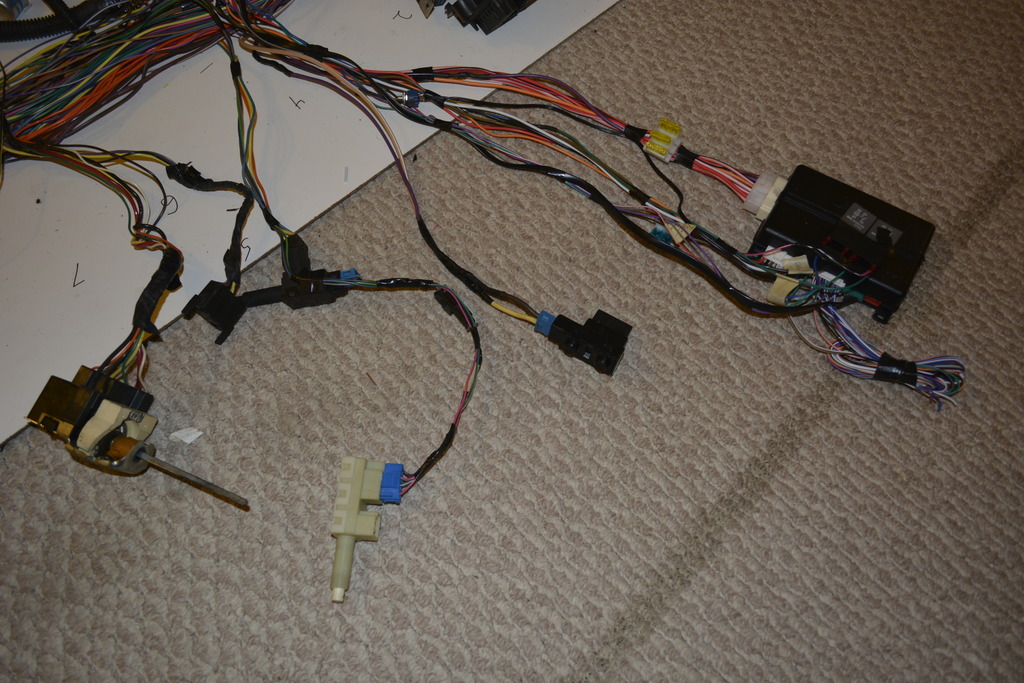
C100 and the anti-grind relay:
The new Autometer dash/warning light connectors. these used to be C220 and C230 from a 98-02 F-body:
Harness for Fuel press and oil temp that'll be where the ash tray used to sit.
Cruise:
Seat and seat warmer power. Yes that yellow connector is an airbag connector that I reused
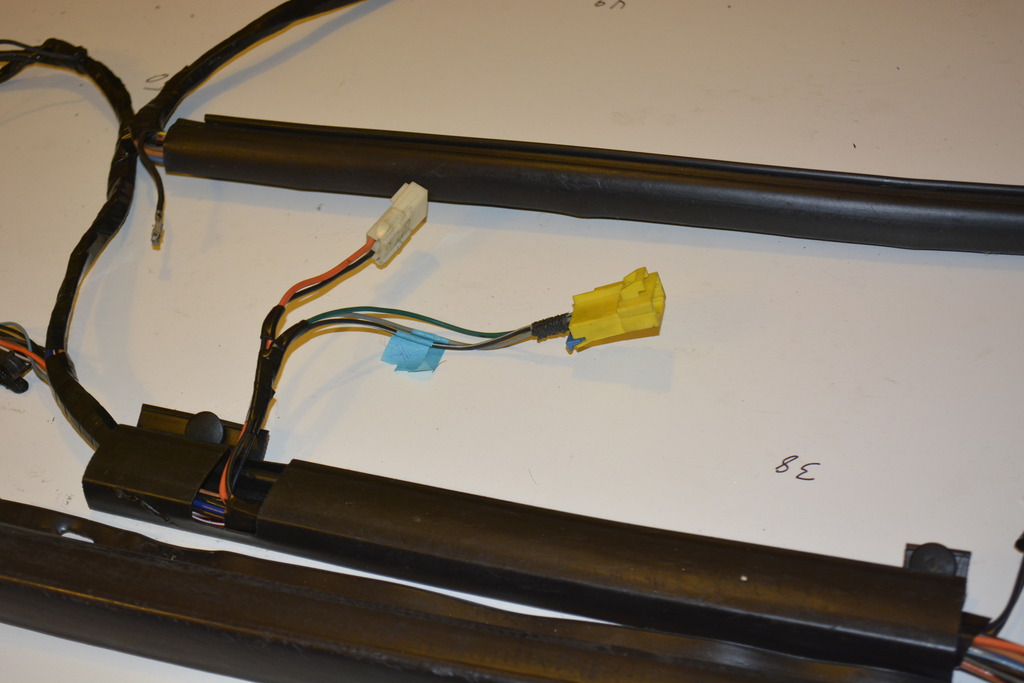
Window relays:
Overview:
Still need to add USB power and couple other little things, but it's mostly done just not taped and looked yet.
Here's the remote start, neutral safety, and brake/clutch switchs

C100 and the anti-grind relay:

The new Autometer dash/warning light connectors. these used to be C220 and C230 from a 98-02 F-body:

Harness for Fuel press and oil temp that'll be where the ash tray used to sit.

Cruise:

Seat and seat warmer power. Yes that yellow connector is an airbag connector that I reused

Window relays:

Overview:

Still need to add USB power and couple other little things, but it's mostly done just not taped and looked yet.
Last edited by robguitargod1; 03-07-2017 at 08:16 AM.
03-07-2017, 12:41 PM
#328
03-07-2017, 12:46 PM
#329
Senior Member
Thread Starter
iTrader: (4)
Join Date: Oct 2008
Location: Niles, IL
Posts: 857
Likes: 0
Received 5 Likes
on
4 Posts
Car: '91 LS6/T56/9"
Engine: LS6
Transmission: T56
Axle/Gears: Currie 9"/4.11, detroit truetrac
Re: Project Procrastination '91Z LS1/T56/currie 9" w/PICS
I will be starting on making the center console gauge pods soon. I've decided to put fuel pressure and oil temp in those positions.
As for the dash I've decided to go with the Classic Dash bezel. I already have the correct gauges so it'll work well for me. The fog and defroster switches will need to be added.

As for the dash I've decided to go with the Classic Dash bezel. I already have the correct gauges so it'll work well for me. The fog and defroster switches will need to be added.
03-08-2017, 02:47 PM
#331
Senior Member
Thread Starter
iTrader: (4)
Join Date: Oct 2008
Location: Niles, IL
Posts: 857
Likes: 0
Received 5 Likes
on
4 Posts
Car: '91 LS6/T56/9"
Engine: LS6
Transmission: T56
Axle/Gears: Currie 9"/4.11, detroit truetrac
Re: Project Procrastination '91Z LS1/T56/currie 9" w/PICS
I do. Will take pictures when I get home.
03-09-2017, 11:01 AM
#333
Senior Member
Thread Starter
iTrader: (4)
Join Date: Oct 2008
Location: Niles, IL
Posts: 857
Likes: 0
Received 5 Likes
on
4 Posts
Car: '91 LS6/T56/9"
Engine: LS6
Transmission: T56
Axle/Gears: Currie 9"/4.11, detroit truetrac
Re: Project Procrastination '91Z LS1/T56/currie 9" w/PICS
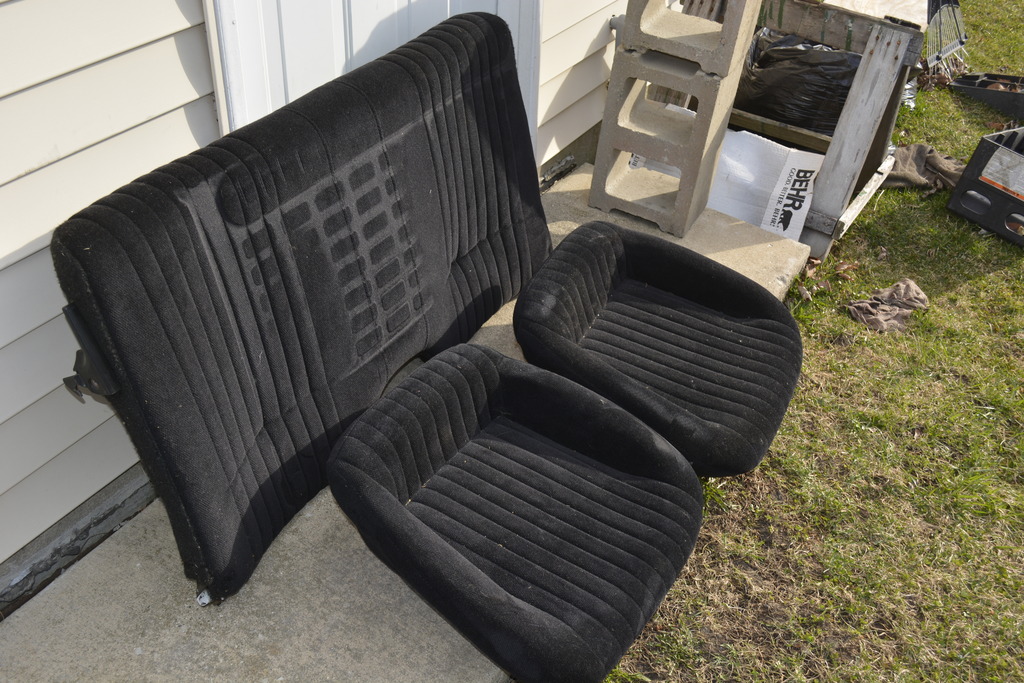
Here they are. The impressions are from the shelf they were on. I'll throw them in the wash later.


 03-09-2017, 04:20 PM
#335
Senior Member
Thread Starter
iTrader: (4)
Join Date: Oct 2008
Location: Niles, IL
Posts: 857
Likes: 0
Received 5 Likes
on
4 Posts
Car: '91 LS6/T56/9"
Engine: LS6
Transmission: T56
Axle/Gears: Currie 9"/4.11, detroit truetrac
Re: Project Procrastination '91Z LS1/T56/currie 9" w/PICS
You just need the covers right?
Do you have any part of the harness? I can build one if not, but the connectors for the bulbs would be cool.
Do you have any part of the harness? I can build one if not, but the connectors for the bulbs would be cool.
Last edited by robguitargod1; 03-09-2017 at 04:23 PM.
03-09-2017, 09:40 PM
#336
Re: Project Procrastination '91Z LS1/T56/currie 9" w/PICS
I'll dig around this weekend but I don't think I do. The car had no engine wire harness and I'm thinking it didn't have the front exterior harness. I know I used the entire harness from my RS.
03-10-2017, 08:50 AM
#337
Senior Member
Thread Starter
iTrader: (4)
Join Date: Oct 2008
Location: Niles, IL
Posts: 857
Likes: 0
Received 5 Likes
on
4 Posts
Car: '91 LS6/T56/9"
Engine: LS6
Transmission: T56
Axle/Gears: Currie 9"/4.11, detroit truetrac
Re: Project Procrastination '91Z LS1/T56/currie 9" w/PICS
Not a problem especially since I plan on running the fog light relay inside on the interior harness. I'll post about it soon, but the stock fog light wiring is a little ***-backwards imo.
03-10-2017, 09:53 AM
#338
Senior Member
Thread Starter
iTrader: (4)
Join Date: Oct 2008
Location: Niles, IL
Posts: 857
Likes: 0
Received 5 Likes
on
4 Posts
Car: '91 LS6/T56/9"
Engine: LS6
Transmission: T56
Axle/Gears: Currie 9"/4.11, detroit truetrac
Re: Project Procrastination '91Z LS1/T56/currie 9" w/PICS
I hadn't given much thought to the fog lights, until Tibo mentioned them. My interior harness was pre-wired for them (so your 90-92 probably is too) but did not actually have that option installed.
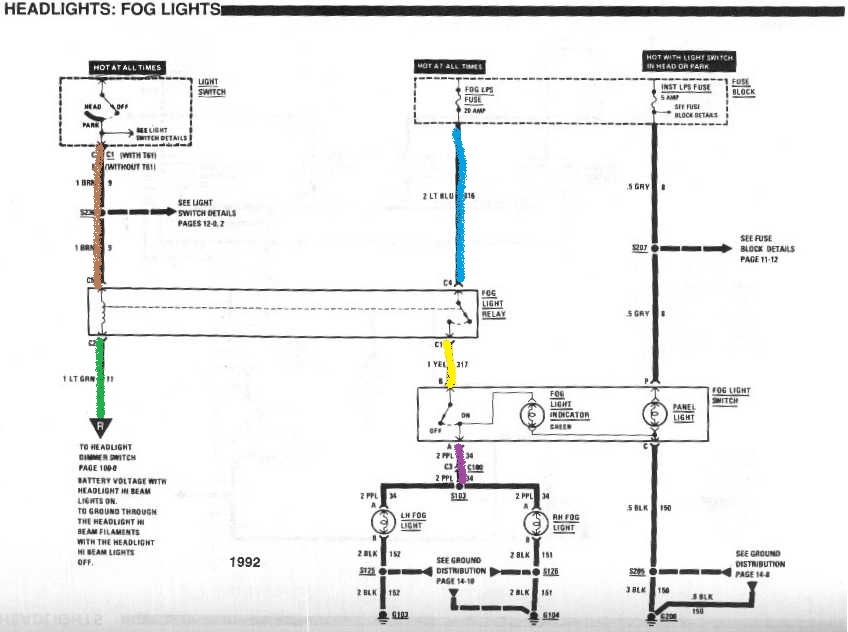
However the stock wiring and relay placement are very inefficient. Because the fog lights power runs directly through the switch and because the relay is in the engine bay, every highlighted net has to pass through C100:
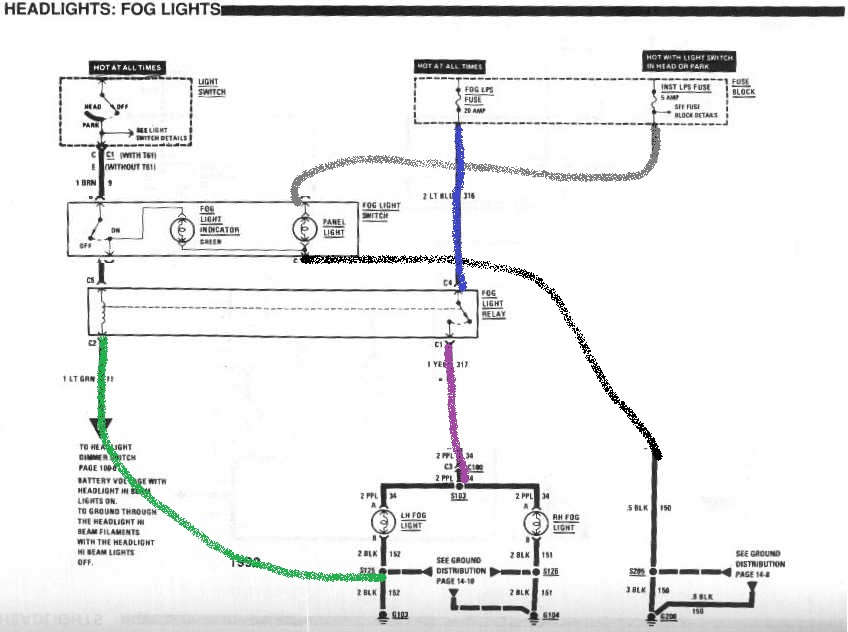
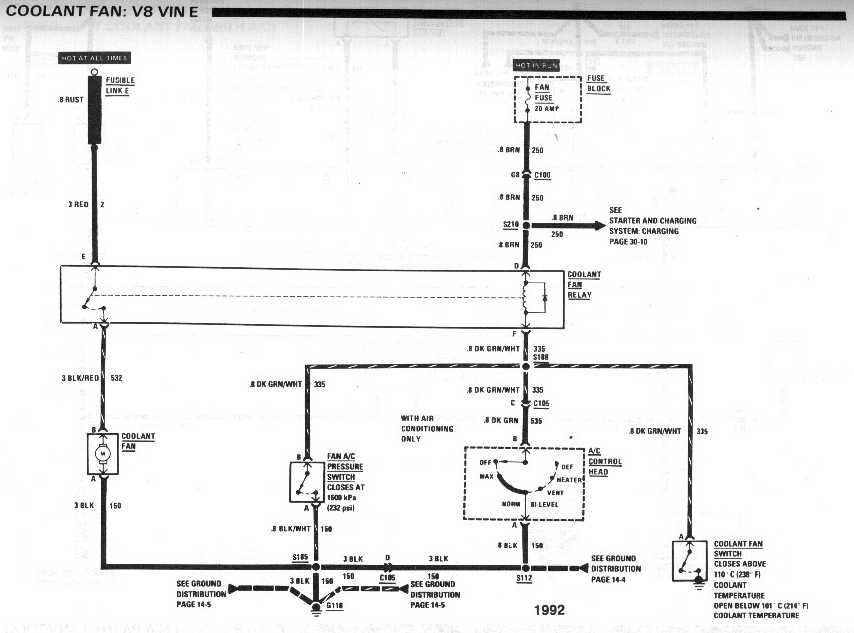
Moving the relay under the dash and re-wiring like this make much more electrical and logistical sense. Now the Purple power feed is the only net passing through C100, high current only passes through the relay, and the fog lights can be called anytime. (as long as your headlights are on)
However the stock wiring and relay placement are very inefficient. Because the fog lights power runs directly through the switch and because the relay is in the engine bay, every highlighted net has to pass through C100:

Moving the relay under the dash and re-wiring like this make much more electrical and logistical sense. Now the Purple power feed is the only net passing through C100, high current only passes through the relay, and the fog lights can be called anytime. (as long as your headlights are on)
 03-10-2017, 10:38 AM
#339
Senior Member
Thread Starter
iTrader: (4)
Join Date: Oct 2008
Location: Niles, IL
Posts: 857
Likes: 0
Received 5 Likes
on
4 Posts
Car: '91 LS6/T56/9"
Engine: LS6
Transmission: T56
Axle/Gears: Currie 9"/4.11, detroit truetrac
Re: Project Procrastination '91Z LS1/T56/currie 9" w/PICS
I'm also working on moving nets (wires) around on C100 between the engine side and light side of the connector so that the engine side is fully interconnected to the LS1's engine harness.
03-11-2017, 07:44 PM
#340
Senior Member
Thread Starter
iTrader: (4)
Join Date: Oct 2008
Location: Niles, IL
Posts: 857
Likes: 0
Received 5 Likes
on
4 Posts
Car: '91 LS6/T56/9"
Engine: LS6
Transmission: T56
Axle/Gears: Currie 9"/4.11, detroit truetrac
Re: Project Procrastination '91Z LS1/T56/currie 9" w/PICS
I wrapped up the interior harness today......I think.
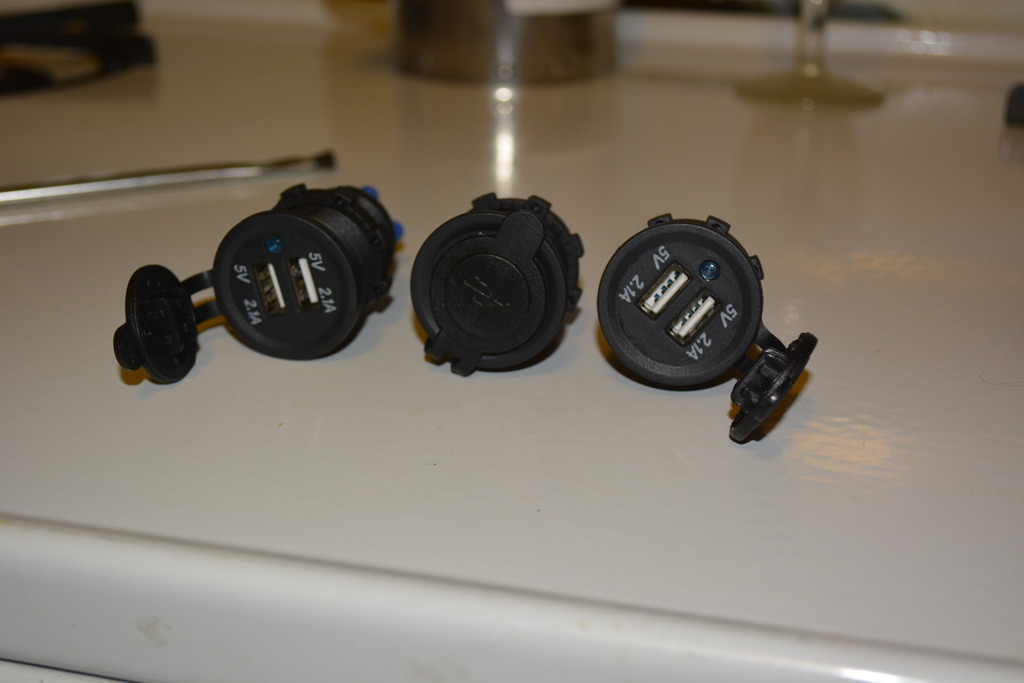
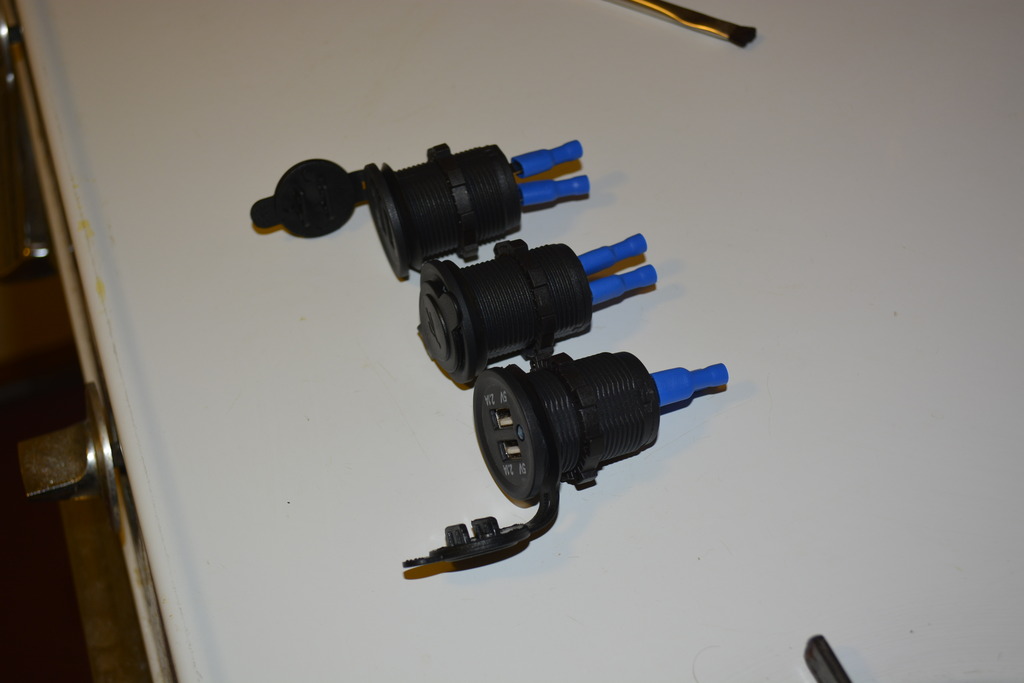
Added a switched 12V fuse position for the USB power. I pulled one of the switched 12V busses from the fuse panel, carefully opened up the wire crimp area, and added 2 new 12V feeds. I need one, but figured I'd add a second in case I need it in the future.
Here's the ports. I ran the power feed long so I can trim it to the correct length once it's installed.
Here's the harness right now. Taped up and ready for loom. Lots more tape too but it's good for now.
I also got around to testing every circuit I possibly could. I hooked up a battery and my steering column, and using a test light was able to verify things like the door locks, lights, fog light relay ect.
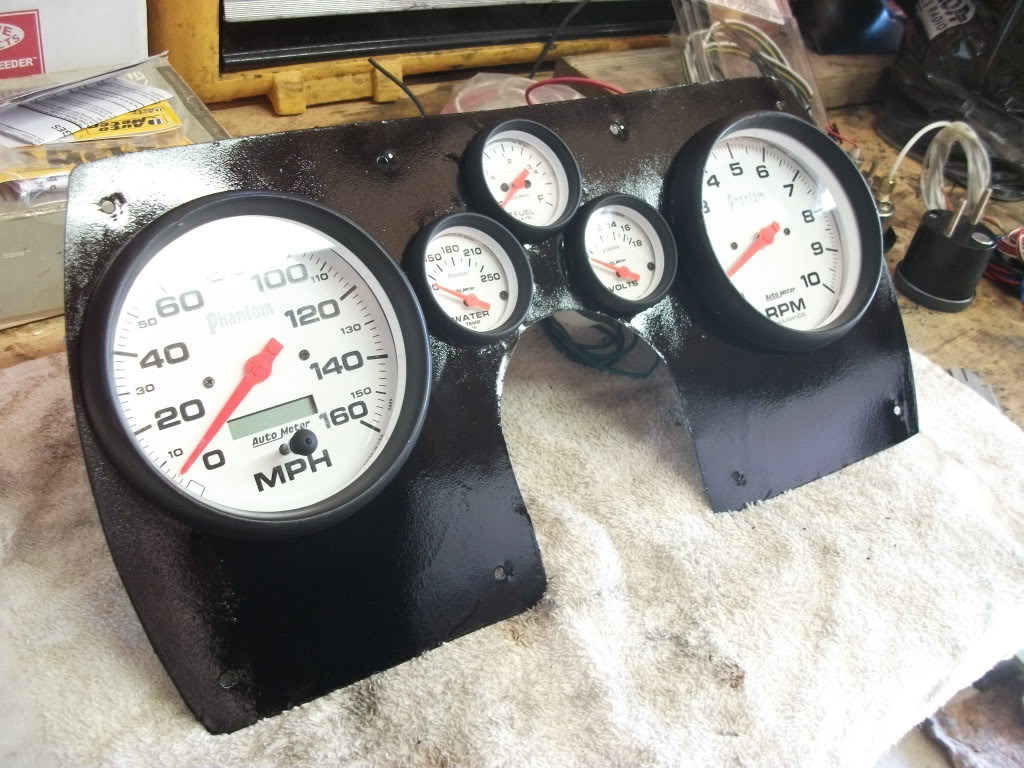
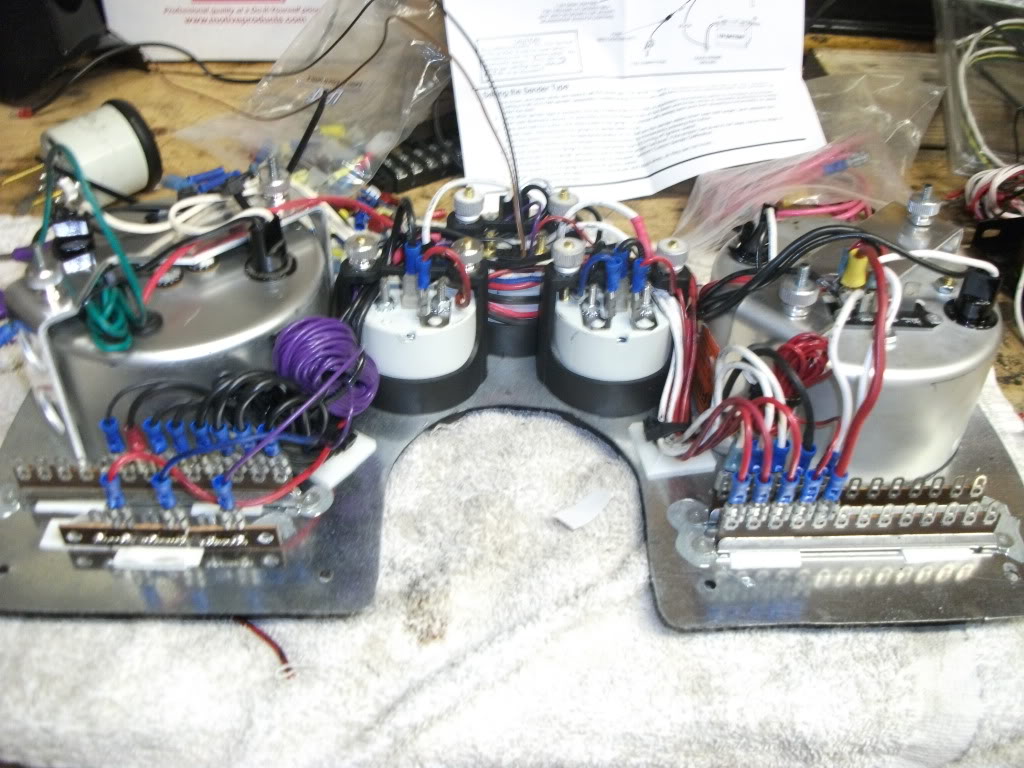
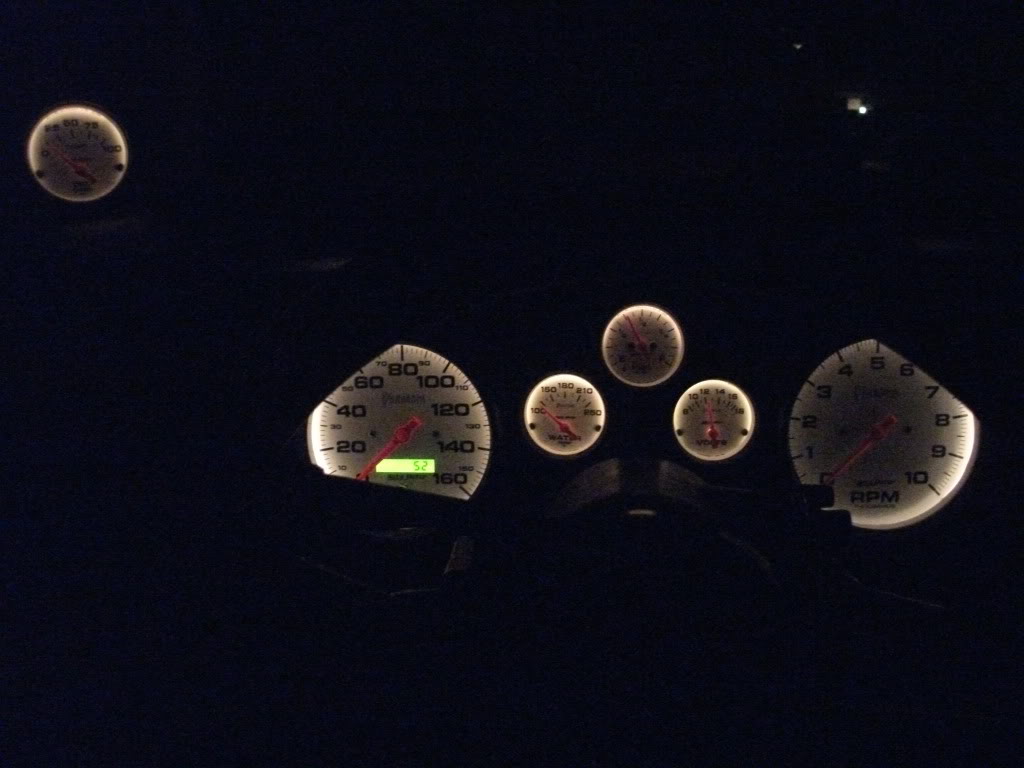
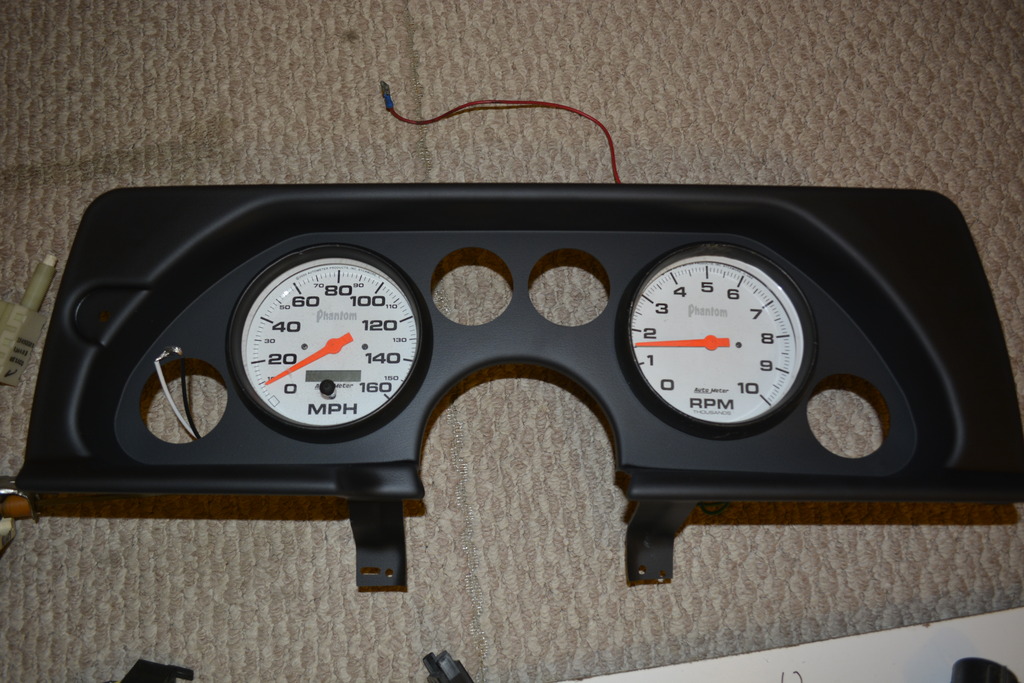
The classic dash came in too. I'll wire it tomorrow but I set the tach and speedo in place. Still need to touch up the black rings on them too.
Added a switched 12V fuse position for the USB power. I pulled one of the switched 12V busses from the fuse panel, carefully opened up the wire crimp area, and added 2 new 12V feeds. I need one, but figured I'd add a second in case I need it in the future.


Here's the ports. I ran the power feed long so I can trim it to the correct length once it's installed.


Here's the harness right now. Taped up and ready for loom. Lots more tape too but it's good for now.


I also got around to testing every circuit I possibly could. I hooked up a battery and my steering column, and using a test light was able to verify things like the door locks, lights, fog light relay ect.
The classic dash came in too. I'll wire it tomorrow but I set the tach and speedo in place. Still need to touch up the black rings on them too.
 03-13-2017, 05:56 PM
#341
Senior Member
Thread Starter
iTrader: (4)
Join Date: Oct 2008
Location: Niles, IL
Posts: 857
Likes: 0
Received 5 Likes
on
4 Posts
Car: '91 LS6/T56/9"
Engine: LS6
Transmission: T56
Axle/Gears: Currie 9"/4.11, detroit truetrac
Re: Project Procrastination '91Z LS1/T56/currie 9" w/PICS
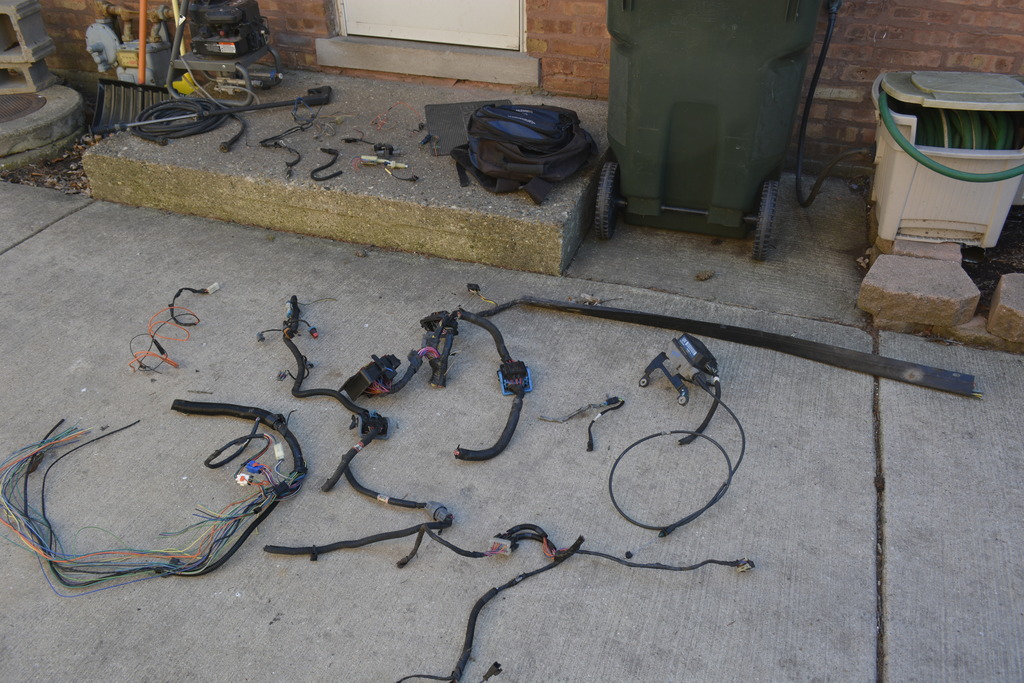
Over the weekend I started working on the engine side of C100, AKA the original engines harness and light harness.
This harnesses C100 (Male) was UGLY:
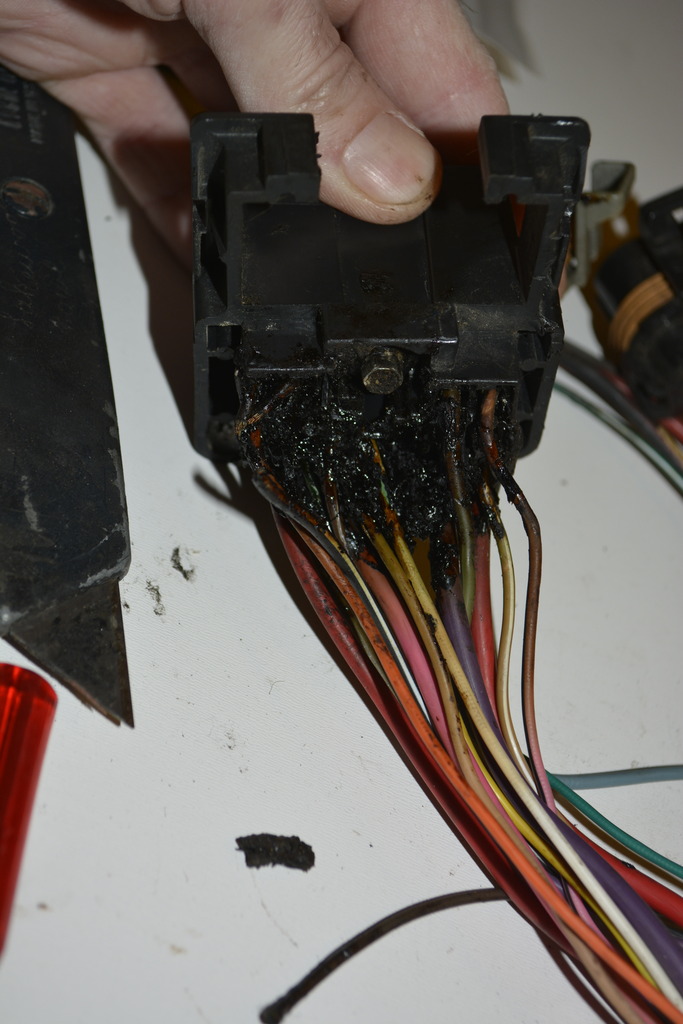
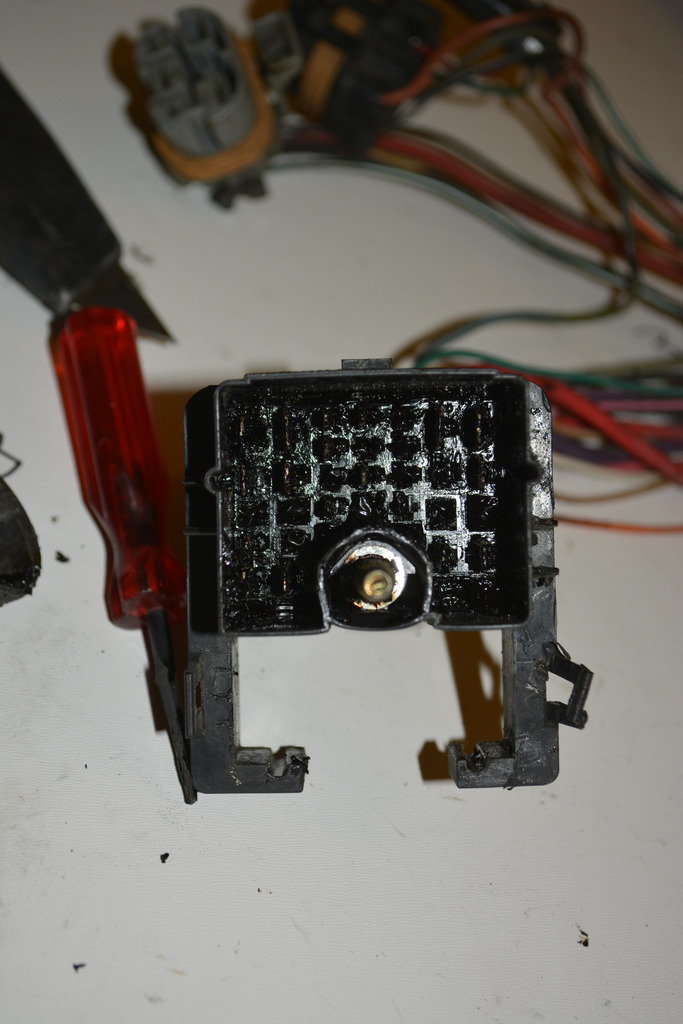
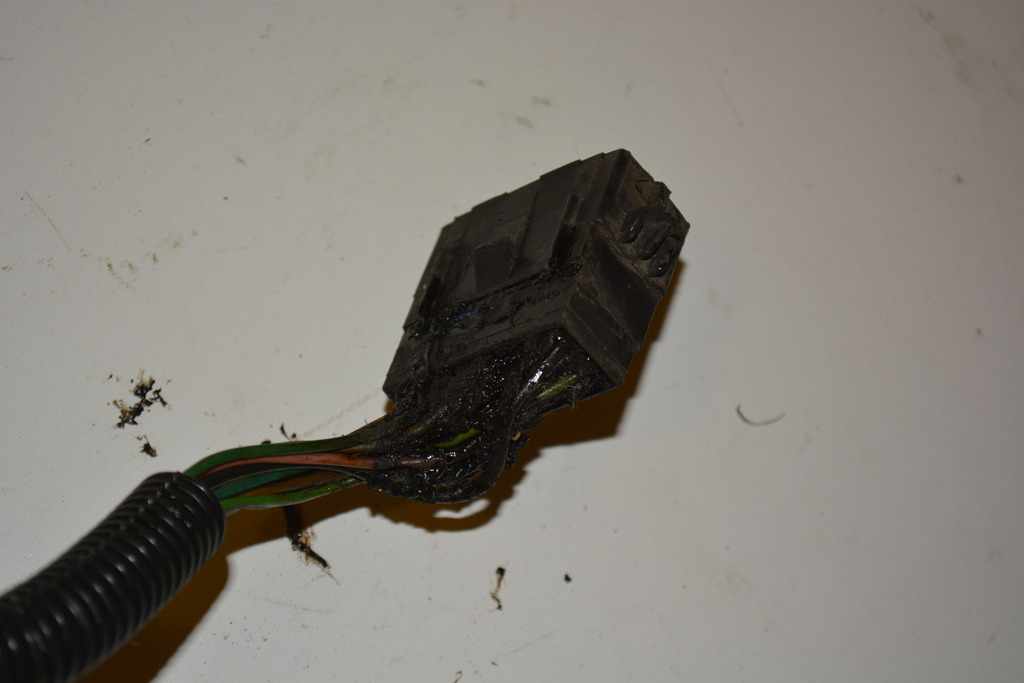
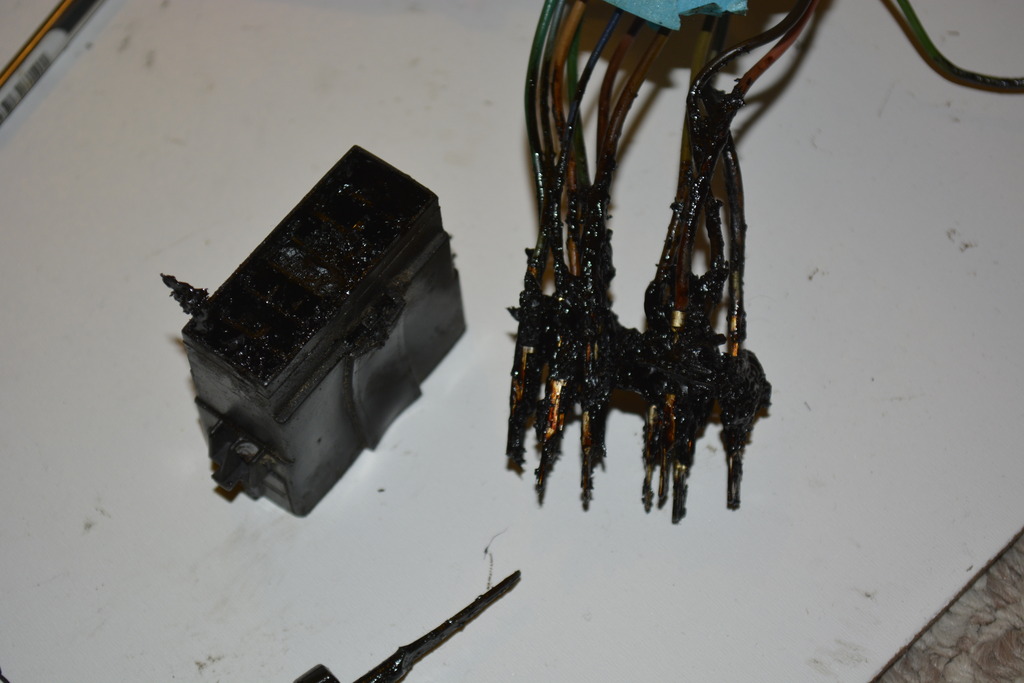
After an hour of cleaning with a brush and a few paper towels, they came out pretty clean.
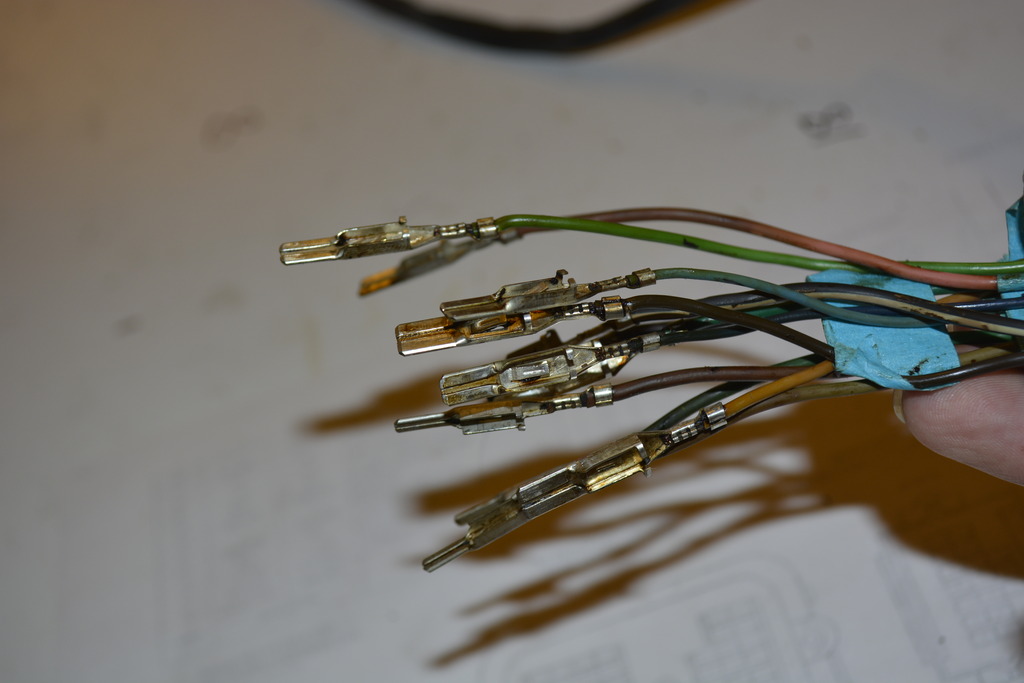
So if yours looks that awful, it IS possible to repair. That dielectric grease has turned into tar which is horribly messy..........but tough it out and it'll be worth it.
Luckily for us the male side of C100 is available, so all you have to do is clean the pins then insert them into the new connector.
However I had to clean and reuse the HAVC connector. Ugly like C100
After cleaning:
The light side of the harness (top) is untouched as of now, but I need to blow it apart to add fog lights and remove the airbag connector. I also want to re-route the harness inside the subframe just behind the fender which means I'll have to lengthen them all. Not something I can do inside because the lengths need to be perfect.
After some cutting:
Here's what I'm keeping:
Relays,starter wire, HVAC power, GND terminals.
A lot of this may be unnecessary because I may run all new power wires. So far these are the fused battery power feeds that I need:
1. Fan 1 relay (30A)
2. Fan 2 relay (30A)
3. Fuel pump relay (20A)
4. Blower motor relay (20A)
5. AC compressor clutch relay (20A)
6. Power to C100 A4 (30-40A not sure yet)
7. Power to C100 G5 (30-40A not sure yet)
This harnesses C100 (Male) was UGLY:


After an hour of cleaning with a brush and a few paper towels, they came out pretty clean.


So if yours looks that awful, it IS possible to repair. That dielectric grease has turned into tar which is horribly messy..........but tough it out and it'll be worth it.
Luckily for us the male side of C100 is available, so all you have to do is clean the pins then insert them into the new connector.
However I had to clean and reuse the HAVC connector. Ugly like C100


After cleaning:

The light side of the harness (top) is untouched as of now, but I need to blow it apart to add fog lights and remove the airbag connector. I also want to re-route the harness inside the subframe just behind the fender which means I'll have to lengthen them all. Not something I can do inside because the lengths need to be perfect.

After some cutting:

Here's what I'm keeping:
Relays,starter wire, HVAC power, GND terminals.

A lot of this may be unnecessary because I may run all new power wires. So far these are the fused battery power feeds that I need:
1. Fan 1 relay (30A)
2. Fan 2 relay (30A)
3. Fuel pump relay (20A)
4. Blower motor relay (20A)
5. AC compressor clutch relay (20A)
6. Power to C100 A4 (30-40A not sure yet)
7. Power to C100 G5 (30-40A not sure yet)
Last edited by robguitargod1; 03-20-2017 at 12:28 PM.
03-13-2017, 05:56 PM
#342
Senior Member
Thread Starter
iTrader: (4)
Join Date: Oct 2008
Location: Niles, IL
Posts: 857
Likes: 0
Received 5 Likes
on
4 Posts
Car: '91 LS6/T56/9"
Engine: LS6
Transmission: T56
Axle/Gears: Currie 9"/4.11, detroit truetrac
Re: Project Procrastination '91Z LS1/T56/currie 9" w/PICS
To run these I'm eliminating the factory fusable links and replacing them with fuses and this distribution panel:

Last edited by robguitargod1; 03-13-2017 at 06:02 PM.
03-14-2017, 09:26 AM
#343
Senior Member
Thread Starter
iTrader: (4)
Join Date: Oct 2008
Location: Niles, IL
Posts: 857
Likes: 0
Received 5 Likes
on
4 Posts
Car: '91 LS6/T56/9"
Engine: LS6
Transmission: T56
Axle/Gears: Currie 9"/4.11, detroit truetrac
Re: Project Procrastination '91Z LS1/T56/currie 9" w/PICS
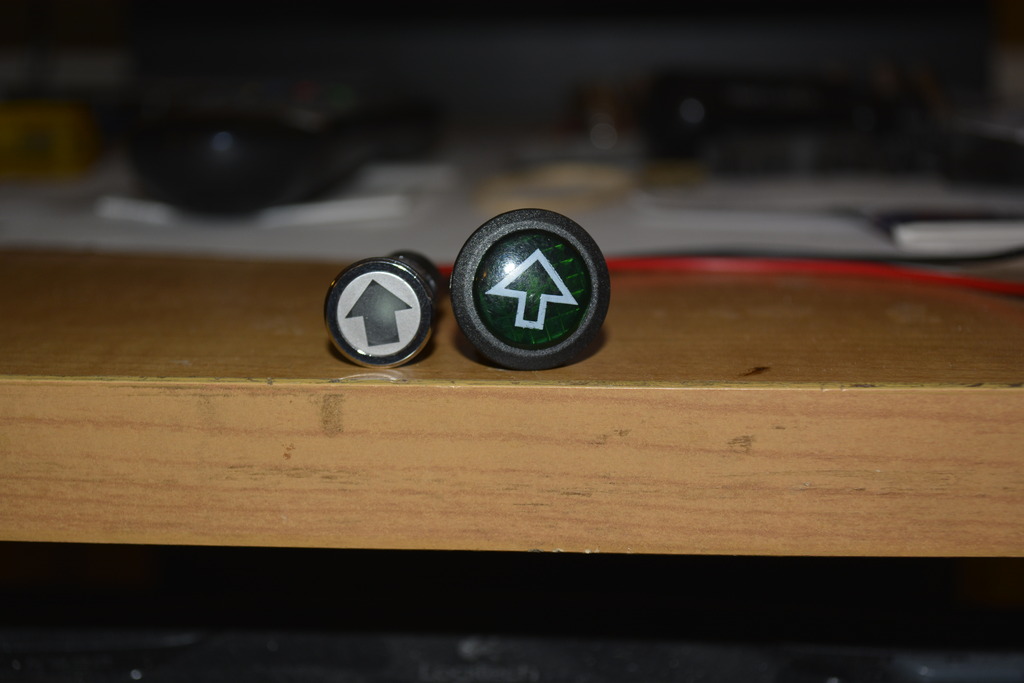
I ended up buying different signal indicators for the dash. The once from the UK are nice, but too big and the light obscures the white lettering on the lens. Meaning when the turn signals flash you only see a green light, not the arrow that's painted on the face.
I bought these instead. They came from Hong Kong but arrived in 7 days. Pretty amazing.
http://www.ebay.com/itm/182363274451...%3AMEBIDX%3AIT

http://www.ebay.com/itm/182363274451...%3AMEBIDX%3AIT

I bought these instead. They came from Hong Kong but arrived in 7 days. Pretty amazing.
http://www.ebay.com/itm/182363274451...%3AMEBIDX%3AIT
http://www.ebay.com/itm/182363274451...%3AMEBIDX%3AIT
03-17-2017, 05:20 PM
#344
Senior Member
Thread Starter
iTrader: (4)
Join Date: Oct 2008
Location: Niles, IL
Posts: 857
Likes: 0
Received 5 Likes
on
4 Posts
Car: '91 LS6/T56/9"
Engine: LS6
Transmission: T56
Axle/Gears: Currie 9"/4.11, detroit truetrac
Re: Project Procrastination '91Z LS1/T56/currie 9" w/PICS
I got the signal indicators and am pleasantly surprised.
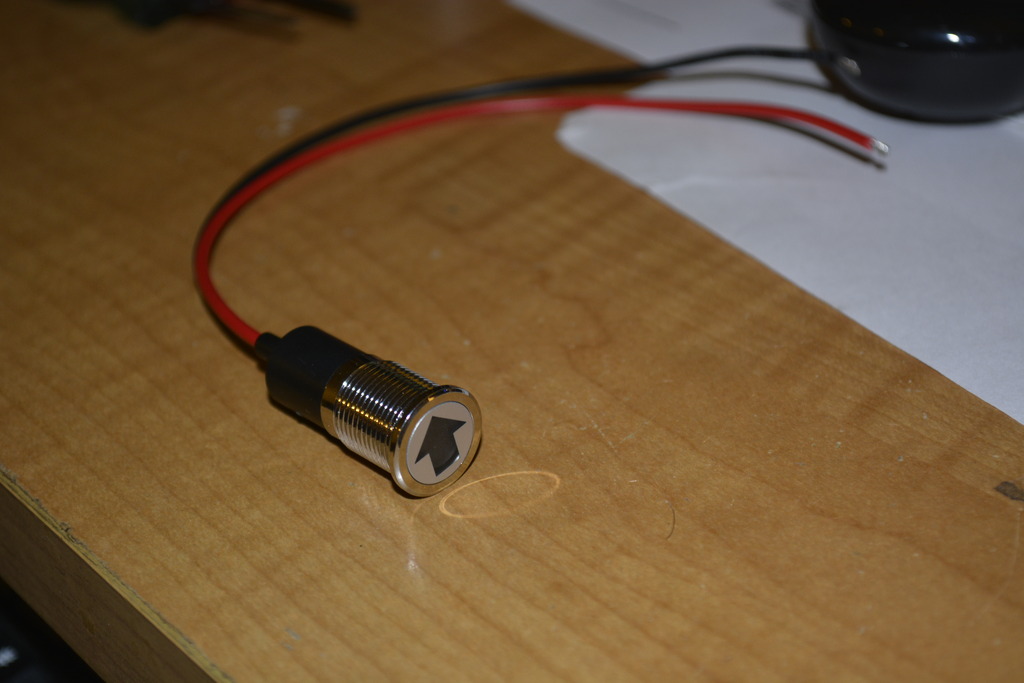
The tops unscrew and are interchangeable. Under is an LED of different colors and a 1.8K current limiting resistor.
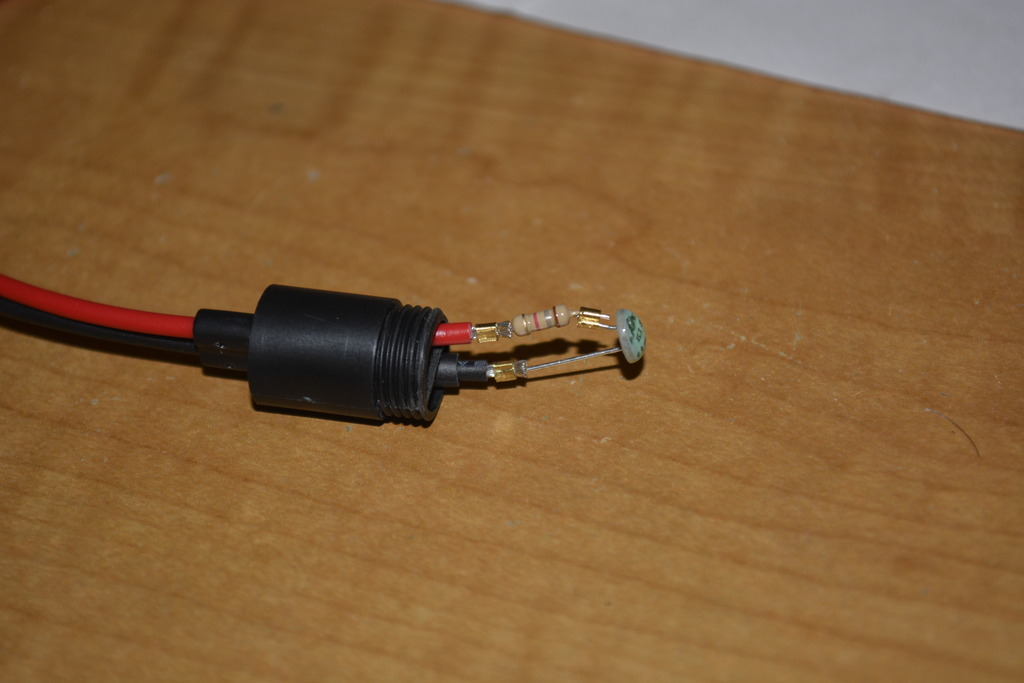
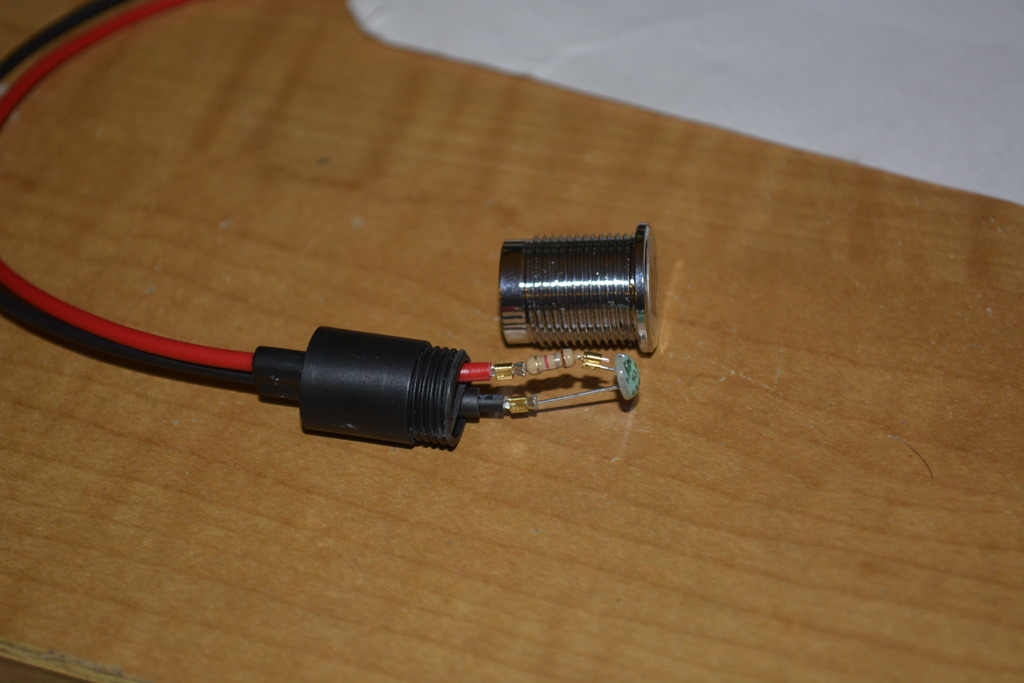

Here is a size comparison to the other lights I bought.

The tops unscrew and are interchangeable. Under is an LED of different colors and a 1.8K current limiting resistor.


Here is a size comparison to the other lights I bought.
 03-20-2017, 01:43 PM
#345
Senior Member
Thread Starter
iTrader: (4)
Join Date: Oct 2008
Location: Niles, IL
Posts: 857
Likes: 0
Received 5 Likes
on
4 Posts
Car: '91 LS6/T56/9"
Engine: LS6
Transmission: T56
Axle/Gears: Currie 9"/4.11, detroit truetrac
Re: Project Procrastination '91Z LS1/T56/currie 9" w/PICS
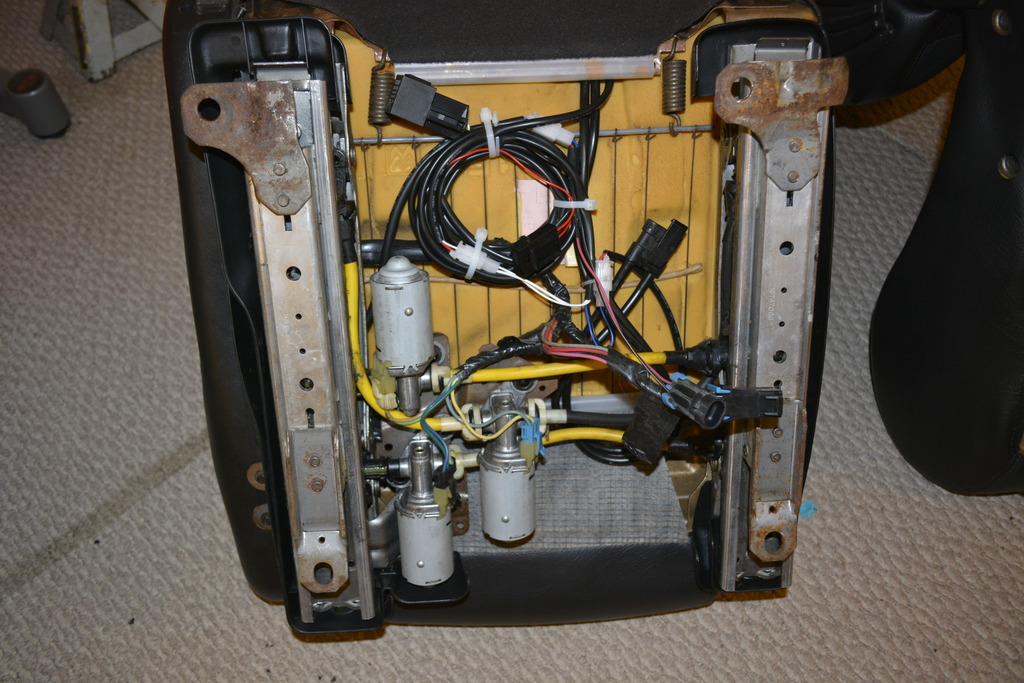
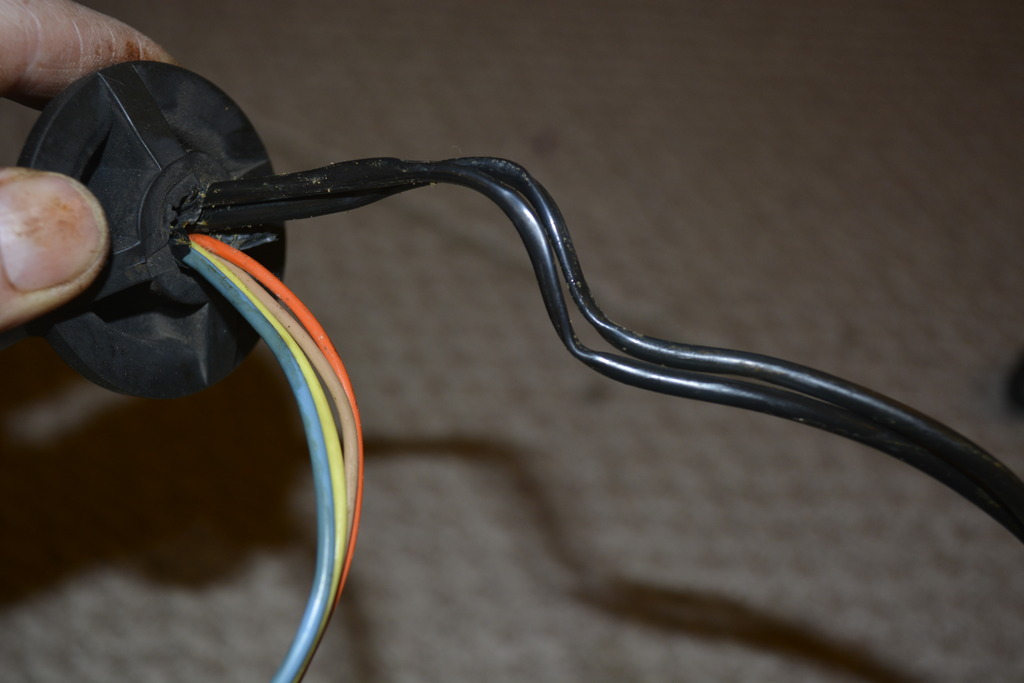
Finished the seats finally. I needed to mount the heater switches and build the wiring harness that connects the seats together.

Then I started modifying the HVAC harness. This sub harness connects to your HVAC controls and pass through the firewall to connect to the blower motor, blower motor relay, blower motor resistors, power connector, and AC pressure switch.
Because the LS1's PCM will control the A/C compressor and radiator fans, this harness can be simplified. First notice that the HVAC harness only connects to the interior harness in once place, this brown plug that supplies power to the controls:
From left to right:
5 - Power input from the interior harness
4 - Power output to the blower controls. This wire supplies power in any position except off.
3 - AC request. Shows 12V in any of the 3 A/C positions
2 - Output to the radiator fan relay. This goes to GND anytime A/C is requested. This is to turn on the radiator's fan whenever you turn on the A/C
1 - GND
So what I did was eliminate the A/C pressure switch (because the PCM now controls it through a separate switch), and ran AC request through its own connector (like the power connector) and into C207.


Then I started modifying the HVAC harness. This sub harness connects to your HVAC controls and pass through the firewall to connect to the blower motor, blower motor relay, blower motor resistors, power connector, and AC pressure switch.

Because the LS1's PCM will control the A/C compressor and radiator fans, this harness can be simplified. First notice that the HVAC harness only connects to the interior harness in once place, this brown plug that supplies power to the controls:


From left to right:
5 - Power input from the interior harness
4 - Power output to the blower controls. This wire supplies power in any position except off.
3 - AC request. Shows 12V in any of the 3 A/C positions
2 - Output to the radiator fan relay. This goes to GND anytime A/C is requested. This is to turn on the radiator's fan whenever you turn on the A/C
1 - GND
So what I did was eliminate the A/C pressure switch (because the PCM now controls it through a separate switch), and ran AC request through its own connector (like the power connector) and into C207.

 03-20-2017, 01:44 PM
#346
Senior Member
Thread Starter
iTrader: (4)
Join Date: Oct 2008
Location: Niles, IL
Posts: 857
Likes: 0
Received 5 Likes
on
4 Posts
Car: '91 LS6/T56/9"
Engine: LS6
Transmission: T56
Axle/Gears: Currie 9"/4.11, detroit truetrac
Re: Project Procrastination '91Z LS1/T56/currie 9" w/PICS
So now the power connector is down to just power and GND with A/C request and fan relay call. Here's the harness now:
While pulling the unused wire through the firewall grommet I noticed they were pinched so I'll have to fix that.
Then I started working on the engine harness.
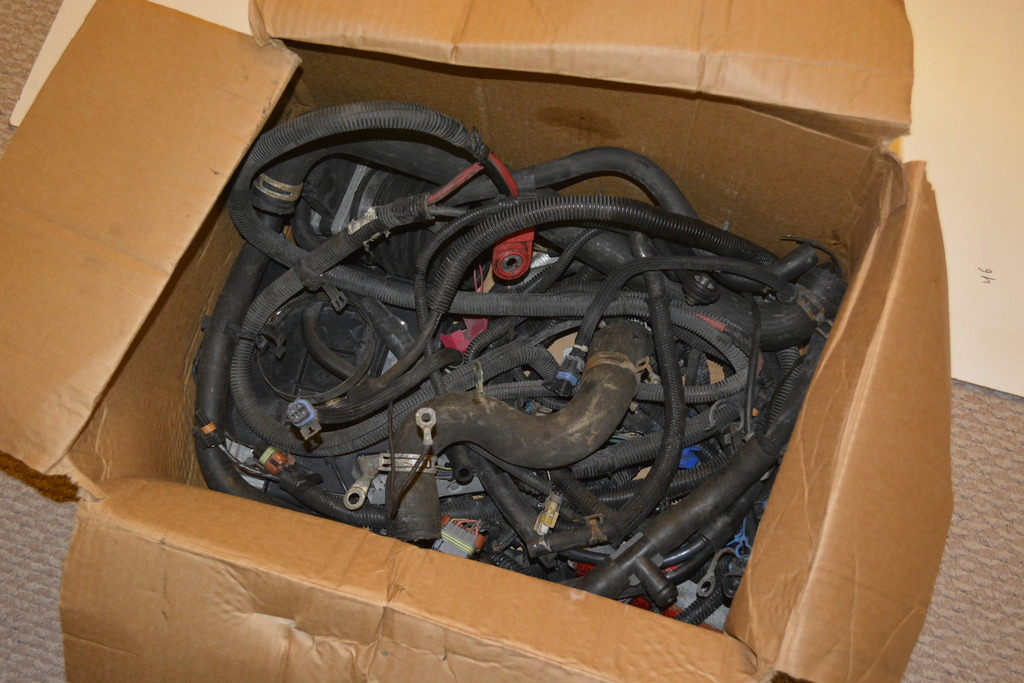
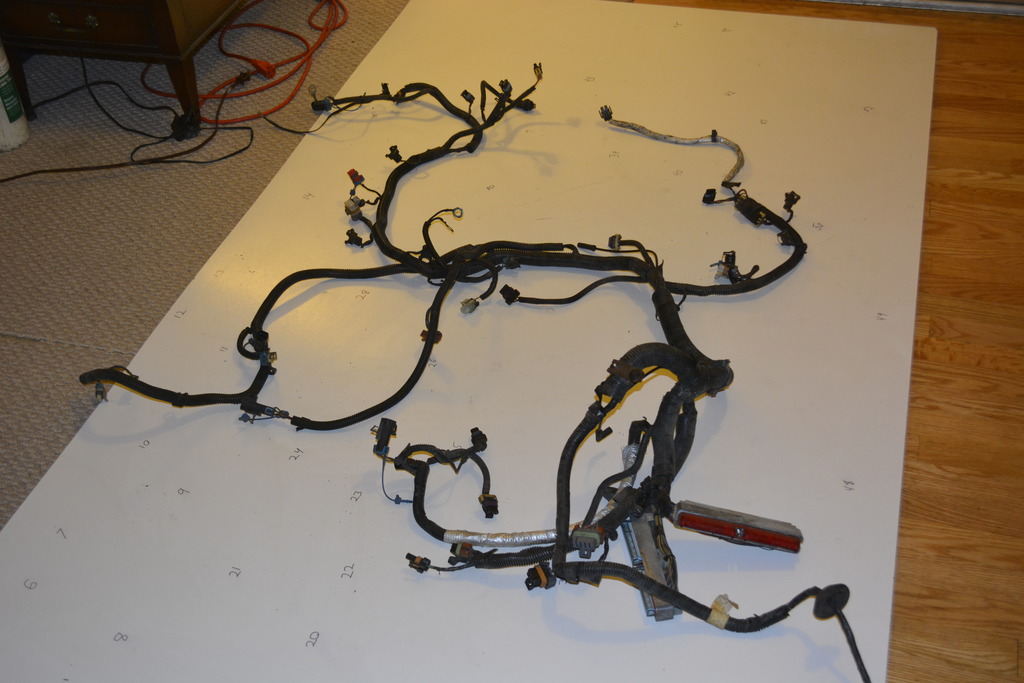
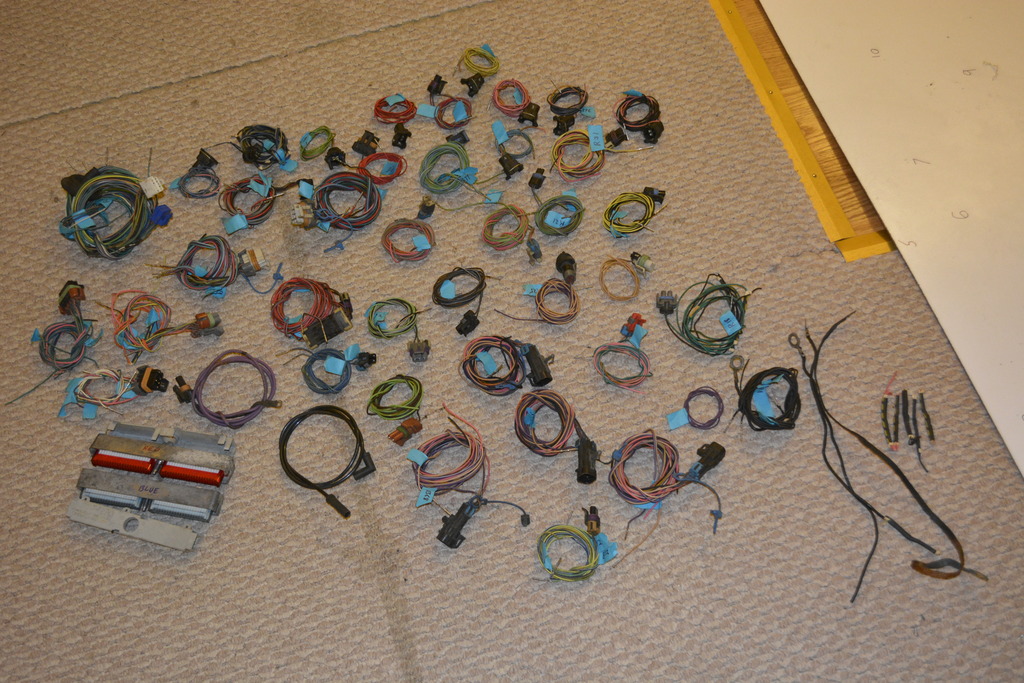
Labeled every pin. 45 on the RED side, 47 on the BLUE side
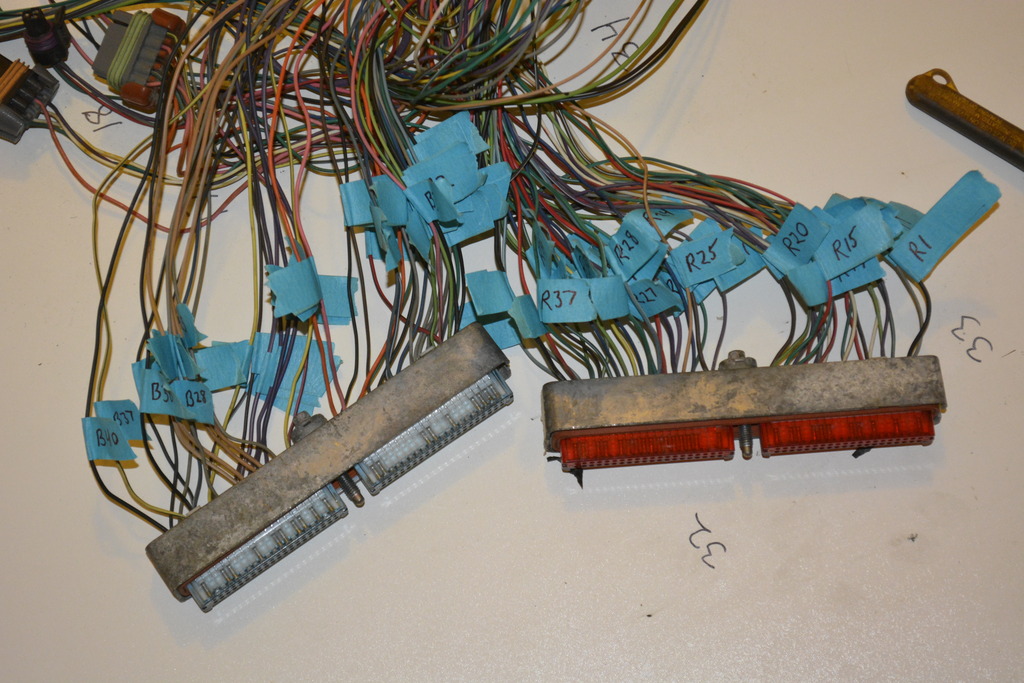
Then de-pinned
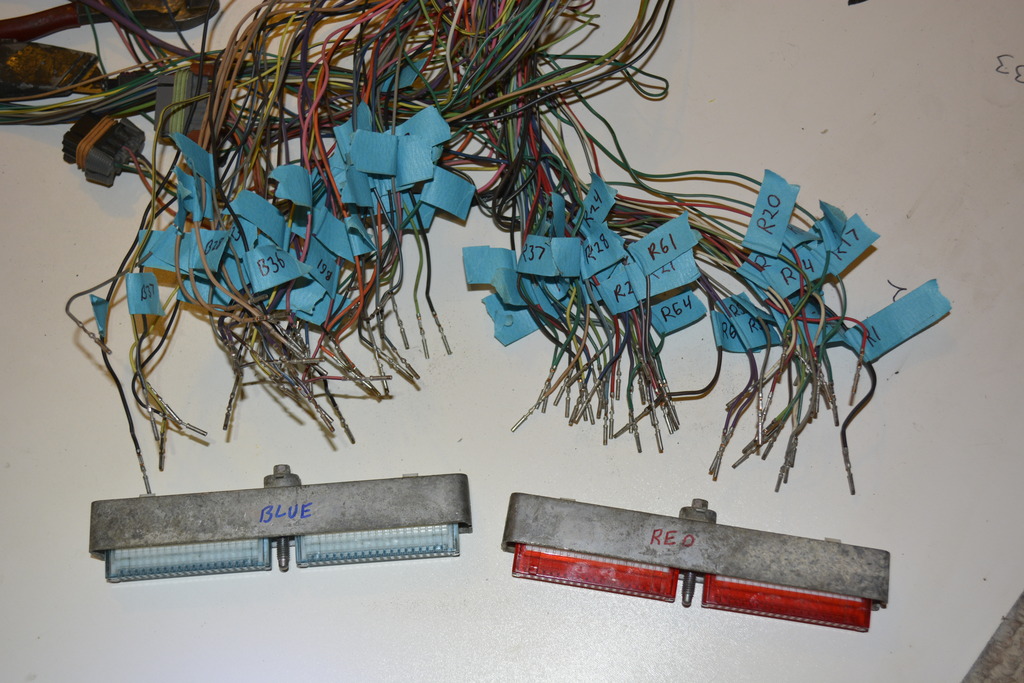
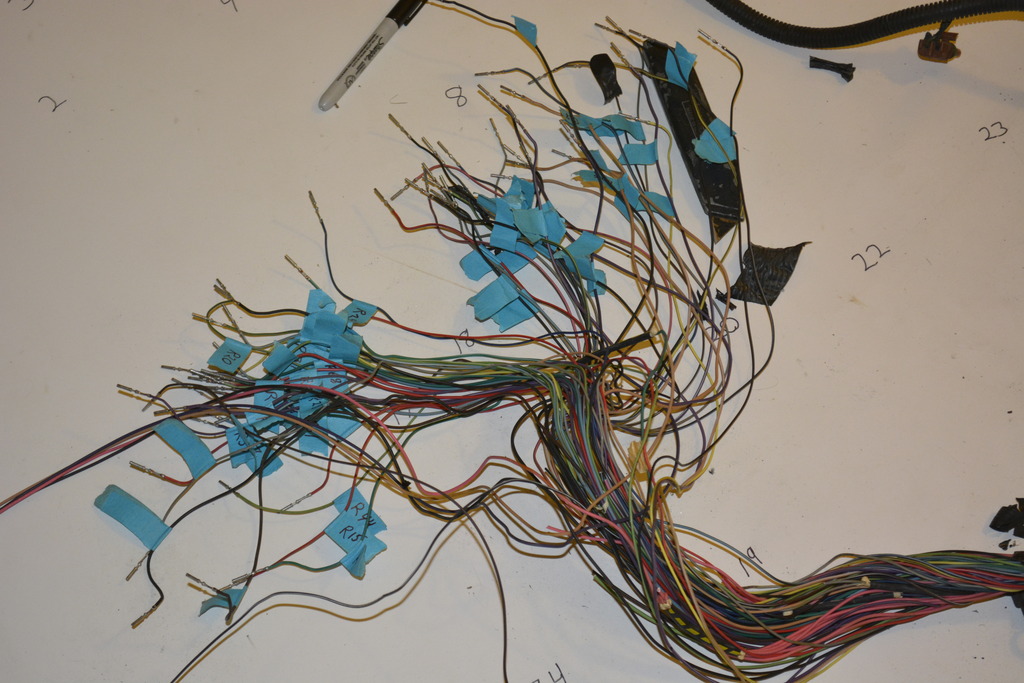

Here's every circuit
Then I got the engine/trans out of the shed. From here:
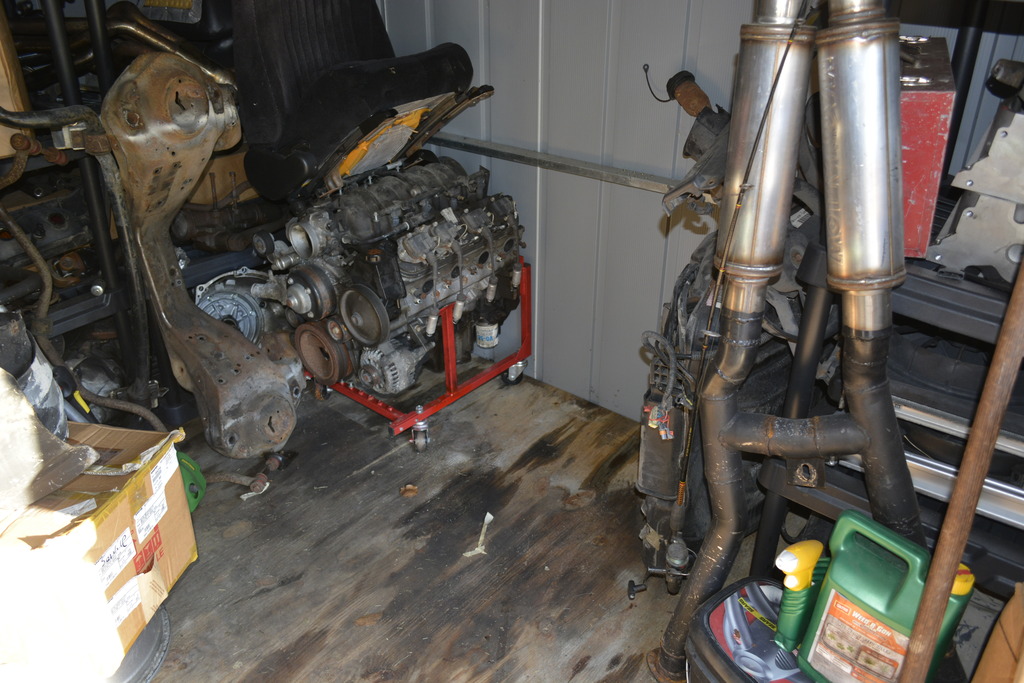
To here
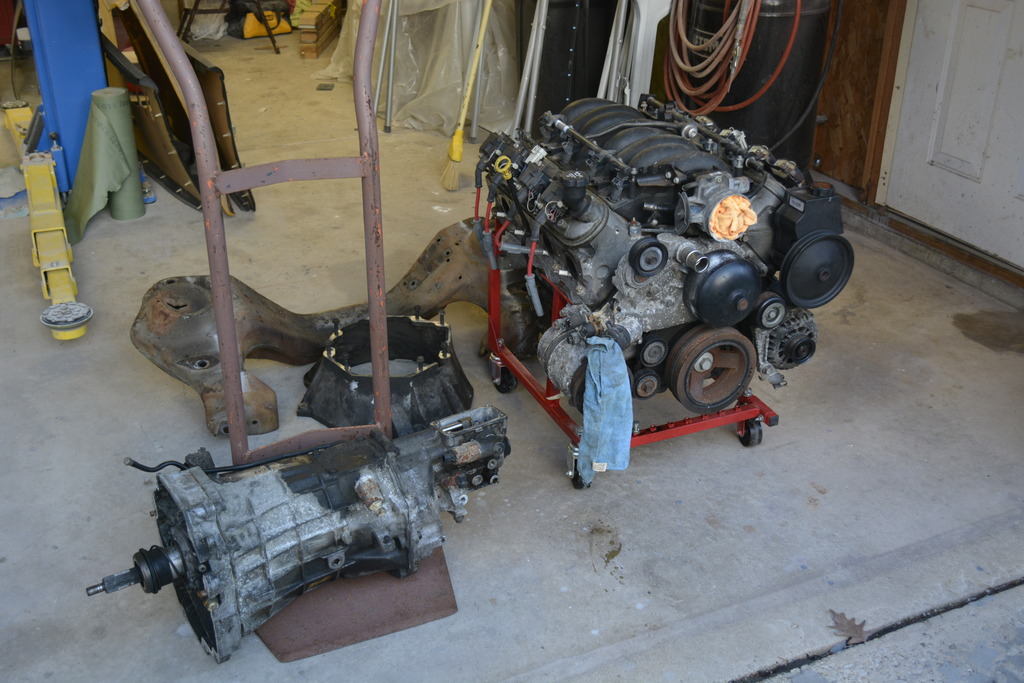
And now I need to start laying out the harness on the engine.

While pulling the unused wire through the firewall grommet I noticed they were pinched so I'll have to fix that.

Then I started working on the engine harness.


Labeled every pin. 45 on the RED side, 47 on the BLUE side

Then de-pinned


Here's every circuit

Then I got the engine/trans out of the shed. From here:

To here

And now I need to start laying out the harness on the engine.
03-20-2017, 03:35 PM
#347
Re: Project Procrastination '91Z LS1/T56/currie 9" w/PICS
I did the same thing with a harness a few years ago, so now I have one complete harness that is completely taken apart in one bin and another complete (unmolested) harness in another. I no longer remember why I bought them both, why I did this or really, why I am keeping them. Just that it will probably, somehow, come in handy.
Big bit of advice that I learned the hard way-- Wait to cut the wires until the engine is in the engine bay. The first harness I modified I did inside on the floor and some of the leads were too long and some were too short so I had to do more cutting and soldering once I had it in the engine...
And when you ground the circuits for the ignition use a good ground and make that the only thing that is on that grounding stud. Until I saw on MegaSquirt with their Noise filter for the ignition how much noise was coming through my power and grounds. Also if you can shield the ignition wires like an audio cable, do that.
Last edited by Tibo; 03-20-2017 at 04:01 PM.

 04-01-2017, 06:49 PM
#349
Re: Project Procrastination '91Z LS1/T56/currie 9" w/PICS
This interior harness work just won't end!! Whenever I think I'm done, I come up with more stuff to add.
Just this morning I remembered to add 2.1A USB ports. They'll be run via a dedicated fuse of course since I have a few spots available. I bought 3 but will probably only wire 2 at most.

Just this morning I remembered to add 2.1A USB ports. They'll be run via a dedicated fuse of course since I have a few spots available. I bought 3 but will probably only wire 2 at most.
04-02-2017, 09:31 PM
#350
Senior Member
Thread Starter
iTrader: (4)
Join Date: Oct 2008
Location: Niles, IL
Posts: 857
Likes: 0
Received 5 Likes
on
4 Posts
Car: '91 LS6/T56/9"
Engine: LS6
Transmission: T56
Axle/Gears: Currie 9"/4.11, detroit truetrac
Re: Project Procrastination '91Z LS1/T56/currie 9" w/PICS
I have that exact same USB charging port and I just remembered why I ran mine on a switched power-- Parasitic loss. I wasn't driving the car much (maybe one day a week) and I noticed after starting the car the alternator had to work to bring the voltage up. I assumed it was an older battery issue but I did some testing for parasitic draw and found that USB charging port to be the culprit. May be a good idea to check if yours is a vampire too.