
painted iroc rims. came out amazing!!!
 03-27-2013, 11:00 PM
#1
Member
Thread Starter

Join Date: Sep 2007
Location: central NJ
Posts: 244
Likes: 0
Received 0 Likes
on
0 Posts
Car: 1988 iroc
Engine: 350 tpi
Transmission: t-5
Axle/Gears: stock
painted iroc rims. came out amazing!!!
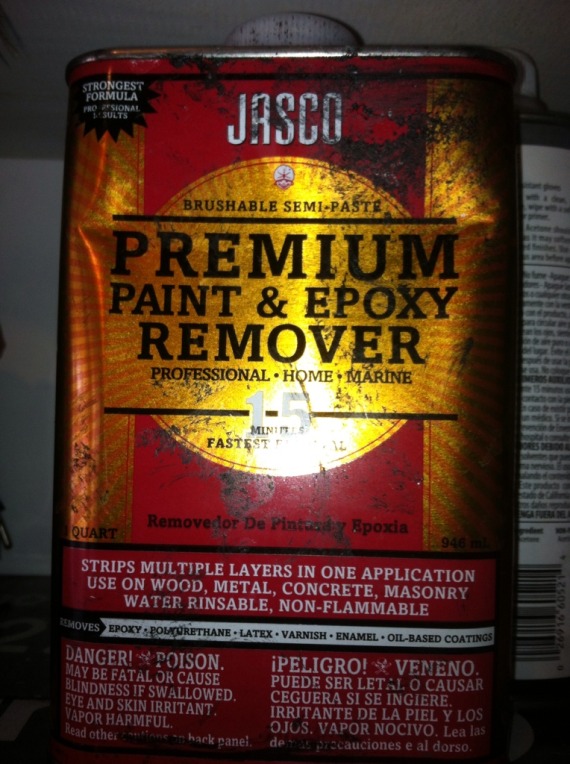
So after reading the write up on how to paint rims i decided to give it a try. i didn't snap a before pic but well all know how worn out iroc rims look like, clear coat kinda peeling.... dull grey color. Just old looking. I was inspired by the way they could look based on the write up so i dove in on my spring break. One thing the article was spot on about was the time..... in total it took me about 15 hours give or take. That time includes getting the wheels off, going out and buying materials, removing clear coat, sanding, taping, painting, and polishing aluminum. Its was amazingly tedious but so worth it. First thing i did was gather my supplies. A box of 100 square razors at ten bucks was a great investment considering i have like 80 left over. Also, DONT USE CRAPPY PAINT REMOVER. I bought the cheapo 6 dollar can and it was terrible. Barely took the clear coat off after 3 applications and i still spend hours sanding. For the second pair of rims i used the 27 dollar aircraft paint remover. This is the good stuff:

this is the bad stuff:
as far as spray paint goes i just used some random high gloss black i found at walmart. just two cans gave me 4 coats on all for rims. not bad for 3 bucks a can:

this is what the aircraft paint remover looks like when applied:

And again the article was spot when it said, "at this point youll be saying to yourself, what the hell did i get myself into." Because thats exactly how i felt lol. But there's no turning back now...
The article also said if you wanna use a plastic scraper go ahead but hose it down after wards making it seem like scraping was optional. WRONG its 100% mandatory and I found a razor worked best. It also said on the bad rims you may need to apply 2-3 coats. I had to apply 3 coats to each one to really get the paint 100% off. it was a pain but worth the extra time. Also, gloves are a must. this stuff burns like crazy even if you get the tiniest spec of it on you. I didn't use goggles and you don't really need them but it is still a good idea especially when hosing the rims off. This is what they should look like with the paint completely off:

once you dry them off sand them up for three reasons: One, it scuffs the metal for the paint. Its worth it to go over them because you wont be using a primer. Two, it gives you a chance to go over every inch of the rim looking for imperfections or specs of paint still on, and three to remove said paint.
Now the taping can begin. Its also very tedious and time consuming but i found it more enjoyable then the paint removal process. I taped the spokes first lining the edge of the tape up with the inside of spoke and letting the rest hang off inside to be cut later. The outer aluminum i just used two peices of tape in a real shallow "V" and then cut the curve with a razor. It also really helped to put a drop light under the rim to light up the tape. it gives you a line to cut on instead of just trying to feel for it. some taping pics....


Now your ready for paint! same old rules when it comes to spray paint....shake the can thouroughly, light coats, dont spray to close, dont wait to long in between coats, ect. ect. pictures make the black have a muddy looking brown tint to them for some reason but trust me they're black.


after 4 coats and letting them sit overnight this is the end result: (a little tire shine never hurt either, lol)

I'm still in the process of polishing the rims so the above picture is without the aluminum polish. Anyway, let me know what you guys think! Totally worth the effort in my opinion. All in all it only cost me about 60 bucks for all the supplies. Oh and i forgot to mention the 400 grit sand paper does literally nothing unlike what the write up states. I found 180 to work best but to each his own, That might be a little to aggressive also. And when the article stresses only to apply the paint remover in one direction disregard it unless you know the mysterious reason why you would spend the extra time to make sure your brush strokes are all in the same direction. I mean, its paint remover .....and your going to be sanding it and repainting it anyway. The brush stroke direction means nothing but more time. You can take the extra time to do it but I didn't and got awesome results.
this is the bad stuff:
as far as spray paint goes i just used some random high gloss black i found at walmart. just two cans gave me 4 coats on all for rims. not bad for 3 bucks a can:
this is what the aircraft paint remover looks like when applied:
And again the article was spot when it said, "at this point youll be saying to yourself, what the hell did i get myself into." Because thats exactly how i felt lol. But there's no turning back now...
The article also said if you wanna use a plastic scraper go ahead but hose it down after wards making it seem like scraping was optional. WRONG its 100% mandatory and I found a razor worked best. It also said on the bad rims you may need to apply 2-3 coats. I had to apply 3 coats to each one to really get the paint 100% off. it was a pain but worth the extra time. Also, gloves are a must. this stuff burns like crazy even if you get the tiniest spec of it on you. I didn't use goggles and you don't really need them but it is still a good idea especially when hosing the rims off. This is what they should look like with the paint completely off:
once you dry them off sand them up for three reasons: One, it scuffs the metal for the paint. Its worth it to go over them because you wont be using a primer. Two, it gives you a chance to go over every inch of the rim looking for imperfections or specs of paint still on, and three to remove said paint.
Now the taping can begin. Its also very tedious and time consuming but i found it more enjoyable then the paint removal process. I taped the spokes first lining the edge of the tape up with the inside of spoke and letting the rest hang off inside to be cut later. The outer aluminum i just used two peices of tape in a real shallow "V" and then cut the curve with a razor. It also really helped to put a drop light under the rim to light up the tape. it gives you a line to cut on instead of just trying to feel for it. some taping pics....
Now your ready for paint! same old rules when it comes to spray paint....shake the can thouroughly, light coats, dont spray to close, dont wait to long in between coats, ect. ect. pictures make the black have a muddy looking brown tint to them for some reason but trust me they're black.
after 4 coats and letting them sit overnight this is the end result: (a little tire shine never hurt either, lol)
I'm still in the process of polishing the rims so the above picture is without the aluminum polish. Anyway, let me know what you guys think! Totally worth the effort in my opinion. All in all it only cost me about 60 bucks for all the supplies. Oh and i forgot to mention the 400 grit sand paper does literally nothing unlike what the write up states. I found 180 to work best but to each his own, That might be a little to aggressive also. And when the article stresses only to apply the paint remover in one direction disregard it unless you know the mysterious reason why you would spend the extra time to make sure your brush strokes are all in the same direction. I mean, its paint remover .....and your going to be sanding it and repainting it anyway. The brush stroke direction means nothing but more time. You can take the extra time to do it but I didn't and got awesome results.
 03-27-2013, 11:08 PM
#2
Member

Join Date: Mar 2013
Location: gladstone
Posts: 325
Likes: 0
Received 0 Likes
on
0 Posts
Car: 72 nova/ 90 camaro rs,04 suburban
Engine: blown 327/ 355/306/355/5.3
Transmission: muncie 4 speed/T5/powerglide,4l80e
Axle/Gears: 342/411/456/ moser axles
Re: painted iroc rims. came out amazing!!!
Wheels look awesome!
03-28-2013, 06:38 AM
#3
Member

Join Date: Oct 2012
Location: Wisconsin & FOB fenty AFG
Posts: 123
Likes: 0
Received 4 Likes
on
3 Posts
Car: 1991 Camaro RS
Engine: 305
Transmission: T5
Axle/Gears: 7.6" 3.73 yukon locker
Re: painted iroc rims. came out amazing!!!
I just ordered my set form Thirdgen.org. All polished and painted black. Cant wat to get home and see them. Still have a few days in the air before that happens.... man.. I have a few flyer miles saved up.
And yours look great. Good job on the prep and doing it right.
And yours look great. Good job on the prep and doing it right.
 03-28-2013, 11:43 AM
#5
COTM Editor
iTrader: (11)
Join Date: Mar 2006
Location: WINDSOR, CO
Posts: 4,098
Likes: 0
Received 13 Likes
on
13 Posts
Car: 91 Z28, 87 SC, 90 IROC, 92 RS
Engine: LS1, 305 TPI, L98, NADA
Transmission: T56, 700r4's, and NADA
Axle/Gears: 3.89, 3.42, 3.23, NADA
Re: painted iroc rims. came out amazing!!!
Nice man!
03-28-2013, 12:37 PM
#6
Supreme Member
Re: painted iroc rims. came out amazing!!!
like new! awesome job and nice post with good pics and tips. will you be applying clear coat to the bare aluminum now? wont it start pitting or corroding without some kind of protectent?
03-28-2013, 12:43 PM
#7
Senior Member
iTrader: (1)
Join Date: Feb 2011
Location: Round Rock, TX
Posts: 670
Likes: 0
Received 0 Likes
on
0 Posts
Car: 1988 Firbird formula 350
Engine: 5.7L TPI
Transmission: 700R4
Axle/Gears: 3.27 Nine Bolt
Re: painted iroc rims. came out amazing!!!
Wow, great job! Good info in the write up too.
Trending Topics
03-28-2013, 01:06 PM
#8
Senior Member
iTrader: (1)

Join Date: Dec 2012
Location: San Antonio, Texas
Posts: 753
Likes: 0
Received 1 Like
on
1 Post
Car: 1987 Camaro Z28, 1989 TTA #922
Engine: lb9, 3.8L turbo
Transmission: 700r4, 2004R
Re: painted iroc rims. came out amazing!!!
Nice job man im actually about to do mines, but mine are gold just having a tedious time trying to find the code for the factory gold color lol
03-28-2013, 02:04 PM
#9
Member
Thread Starter
Join Date: Sep 2007
Location: central NJ
Posts: 244
Likes: 0
Received 0 Likes
on
0 Posts
Car: 1988 iroc
Engine: 350 tpi
Transmission: t-5
Axle/Gears: stock
Re: painted iroc rims. came out amazing!!!
03-28-2013, 02:47 PM
#10
Member
Thread Starter
Join Date: Sep 2007
Location: central NJ
Posts: 244
Likes: 0
Received 0 Likes
on
0 Posts
Car: 1988 iroc
Engine: 350 tpi
Transmission: t-5
Axle/Gears: stock
Re: painted iroc rims. came out amazing!!!
And thanks for all the great replies guys! After the paint cures up I do plan on waxing them up. I'll post pics later this week.
03-30-2013, 04:38 PM
#11
Senior Member
Join Date: May 2011
Location: Houston,Texas
Posts: 549
Likes: 0
Received 1 Like
on
1 Post
Car: 1992 Camaro (Z28 Clone)
Engine: LB9|TPI
Transmission: 700R4
Axle/Gears: 2.73
Re: painted iroc rims. came out amazing!!!
They look awesome!
By the way
Thanks for the Write up!
By the way
Thanks for the Write up!
03-31-2013, 07:34 PM
#12
Junior Member
Join Date: Feb 2008
Location: Hilliard, OH
Posts: 2
Likes: 0
Received 0 Likes
on
0 Posts
Car: '92 Camaro RS
Engine: L03
Transmission: 700R4
Axle/Gears: 2.73
Re: painted iroc rims. came out amazing!!!
Those look great! Nice work man. I need to do mine at some point, it's just a matter of having the spare time
08-03-2013, 01:32 PM
#14
Member

Join Date: Mar 2011
Location: Tacoma, Wa
Posts: 101
Likes: 0
Received 1 Like
on
1 Post
Car: 1987 Sport Coupe
Engine: Carbeurated 5.7
Transmission: NWC T-5
Axle/Gears: Non-posi 2.73
Re: painted iroc rims. came out amazing!!!
So did you clear coat the entire rim or just the painted sections?
08-03-2013, 08:53 PM
#16
Re: painted iroc rims. came out amazing!!!
Nice job. I know the whole "what did I get myself into" thing. I did it twice to the same set of wheels. Didn't like the Gold as much as I thought I would after the first go around.

So I went through the whole process again with a dark metallic grey

As far as polishing, Are you going to sand out the factory machining lines, or just polish them up like that? Count on 4-6 hours a wheel to get all the lines out and have a mirror finish if you do it by hand. Start with 220 and progressively work up to 800 before polish.
08-03-2013, 09:02 PM
#17
Re: painted iroc rims. came out amazing!!!
Also, Have the wheels balanced with the weights on the inside only if possible. They destroy the finish on the wheel. Hold road grime and moisture against your now unprotected finish. Not to mention the little nicks from the clip that holds them on.
08-03-2013, 11:47 PM
#18
Senior Member
iTrader: (3)

Join Date: Oct 2012
Location: SC
Posts: 725
Likes: 0
Received 1 Like
on
1 Post
Car: '87 IROC-Z | '99 SS
Engine: LB9 | LS1
Transmission: 700R4 | T56
Re: painted iroc rims. came out amazing!!!
Nice job. I know the whole "what did I get myself into" thing. I did it twice to the same set of wheels. Didn't like the Gold as much as I thought I would after the first go around.

So I went through the whole process again with a dark metallic grey

As far as polishing, Are you going to sand out the factory machining lines, or just polish them up like that? Count on 4-6 hours a wheel to get all the lines out and have a mirror finish if you do it by hand. Start with 220 and progressively work up to 800 before polish.
So I went through the whole process again with a dark metallic grey
As far as polishing, Are you going to sand out the factory machining lines, or just polish them up like that? Count on 4-6 hours a wheel to get all the lines out and have a mirror finish if you do it by hand. Start with 220 and progressively work up to 800 before polish.
08-03-2013, 11:54 PM
#19
Senior Member
Re: painted iroc rims. came out amazing!!!
Kinda makes me wish I had kept my IROC wheels. Looks good
08-04-2013, 07:30 AM
#20
Junior Member

Join Date: Jun 2010
Location: Barnegat nj
Posts: 16
Likes: 0
Received 0 Likes
on
0 Posts
Car: 88 iroc, 71 ss, 91 z28
Engine: 5.0 tpi, 454, 5.7 tpi
Re: painted iroc rims. came out amazing!!!
those came out real nice, cant figure out how to post the pic of mine. lots of work but well worth it
08-04-2013, 08:20 AM
#21
Re: painted iroc rims. came out amazing!!!
The most foolproof way to post pics is to upload them to Photobucket first. Then on your photos there, to the right are links to share them. Click in the bottom of these links, the one that says "image". It will copy a link, then paste the link here and it will show an image.
Last edited by Joe Tag; 08-04-2013 at 08:21 AM. Reason: typo
08-04-2013, 08:24 AM
#22
Supreme Member

Re: painted iroc rims. came out amazing!!!
What is the Opti-coat? is it better than clear coat?
08-04-2013, 09:09 AM
#23
Senior Member
iTrader: (3)
Join Date: Oct 2012
Location: SC
Posts: 725
Likes: 0
Received 1 Like
on
1 Post
Car: '87 IROC-Z | '99 SS
Engine: LB9 | LS1
Transmission: 700R4 | T56
Re: painted iroc rims. came out amazing!!!
Optimum Opti-Coat 2.0
I am a detailer and apply this coating, but the "Pro" version that cures much faster on a lot of stuff. Great product
I am a detailer and apply this coating, but the "Pro" version that cures much faster on a lot of stuff. Great product
08-04-2013, 09:42 AM
#24
Supreme Member
Re: painted iroc rims. came out amazing!!!
Thanks for the information!
08-04-2013, 10:45 AM
#25
Re: painted iroc rims. came out amazing!!!
Was interested in the opticoat. Found some on Fleabay, $70 for 20cc? I think I'd rather polish my wheels every few months. I decided not to clear because clear eventually yellows and does not have the same look as bare polished aluminum.
08-04-2013, 01:57 PM
#26
Senior Member
iTrader: (3)
Join Date: Oct 2012
Location: SC
Posts: 725
Likes: 0
Received 1 Like
on
1 Post
Car: '87 IROC-Z | '99 SS
Engine: LB9 | LS1
Transmission: 700R4 | T56
Re: painted iroc rims. came out amazing!!!
That's the point... The Opticoat IS just that, a coating. It's permanent and it protects from UV, and its surface prevents a lot of the brake dust from embedding into the surface. You DON'T use the entire 20cc for your wheels.
08-04-2013, 01:59 PM
#27
Senior Member
iTrader: (3)
Join Date: Oct 2012
Location: SC
Posts: 725
Likes: 0
Received 1 Like
on
1 Post
Car: '87 IROC-Z | '99 SS
Engine: LB9 | LS1
Transmission: 700R4 | T56
Re: painted iroc rims. came out amazing!!!
True, BUT... The more expensive the clear, the "clearer" it is.. Also you don't apply enough clear to actually alter the appearance of the surface. The more expensive the clear, the more/better US resistant components it has.
08-04-2013, 02:57 PM
#28
Senior Member
iTrader: (1)
Join Date: Dec 2009
Location: Waxahachie Texas
Posts: 627
Likes: 0
Received 0 Likes
on
0 Posts
Car: 88 IROC Z/28-under re-construction
Engine: 5.7 Tuned Port
Transmission: It's in there....
Axle/Gears: 9 bolt Borg-Warner
Re: painted iroc rims. came out amazing!!!

Last edited by mjdavis68; 11-27-2013 at 11:28 AM.

Thread
Thread Starter
Forum
Replies
Last Post
ambainb
Camaros for Sale
11
04-25-2016 09:21 PM
mustangman65_79
Body
3
08-11-2015 03:17 PM