Customizing dash pad
#1
Junior Member
Thread Starter
Join Date: Sep 2019
Location: Jacksonville, NC
Posts: 35
Likes: 0
Received 3 Likes
on
2 Posts
Car: 1992 Camaro RS
Engine: 305 TBI
Transmission: Auto
Customizing dash pad
For as long as I have owned my camaro (wife has named her cammie), I've had a carpet top on my dash pad. When I removed it to deep clean shortly after buying, I realized why. You will see in the pictures. My plan was to make a new fiberglass top for it. But why stop there. I decided to mold new speakers into the top. Then decided to mold the side defrost vents in.
I'm almost done fixing the small imperfections now. I figured I would share my journey with everyone incase anyone else would like to try.
#3
Junior Member
Thread Starter
Join Date: Sep 2019
Location: Jacksonville, NC
Posts: 35
Likes: 0
Received 3 Likes
on
2 Posts
Car: 1992 Camaro RS
Engine: 305 TBI
Transmission: Auto
Re: Customizing dash pad
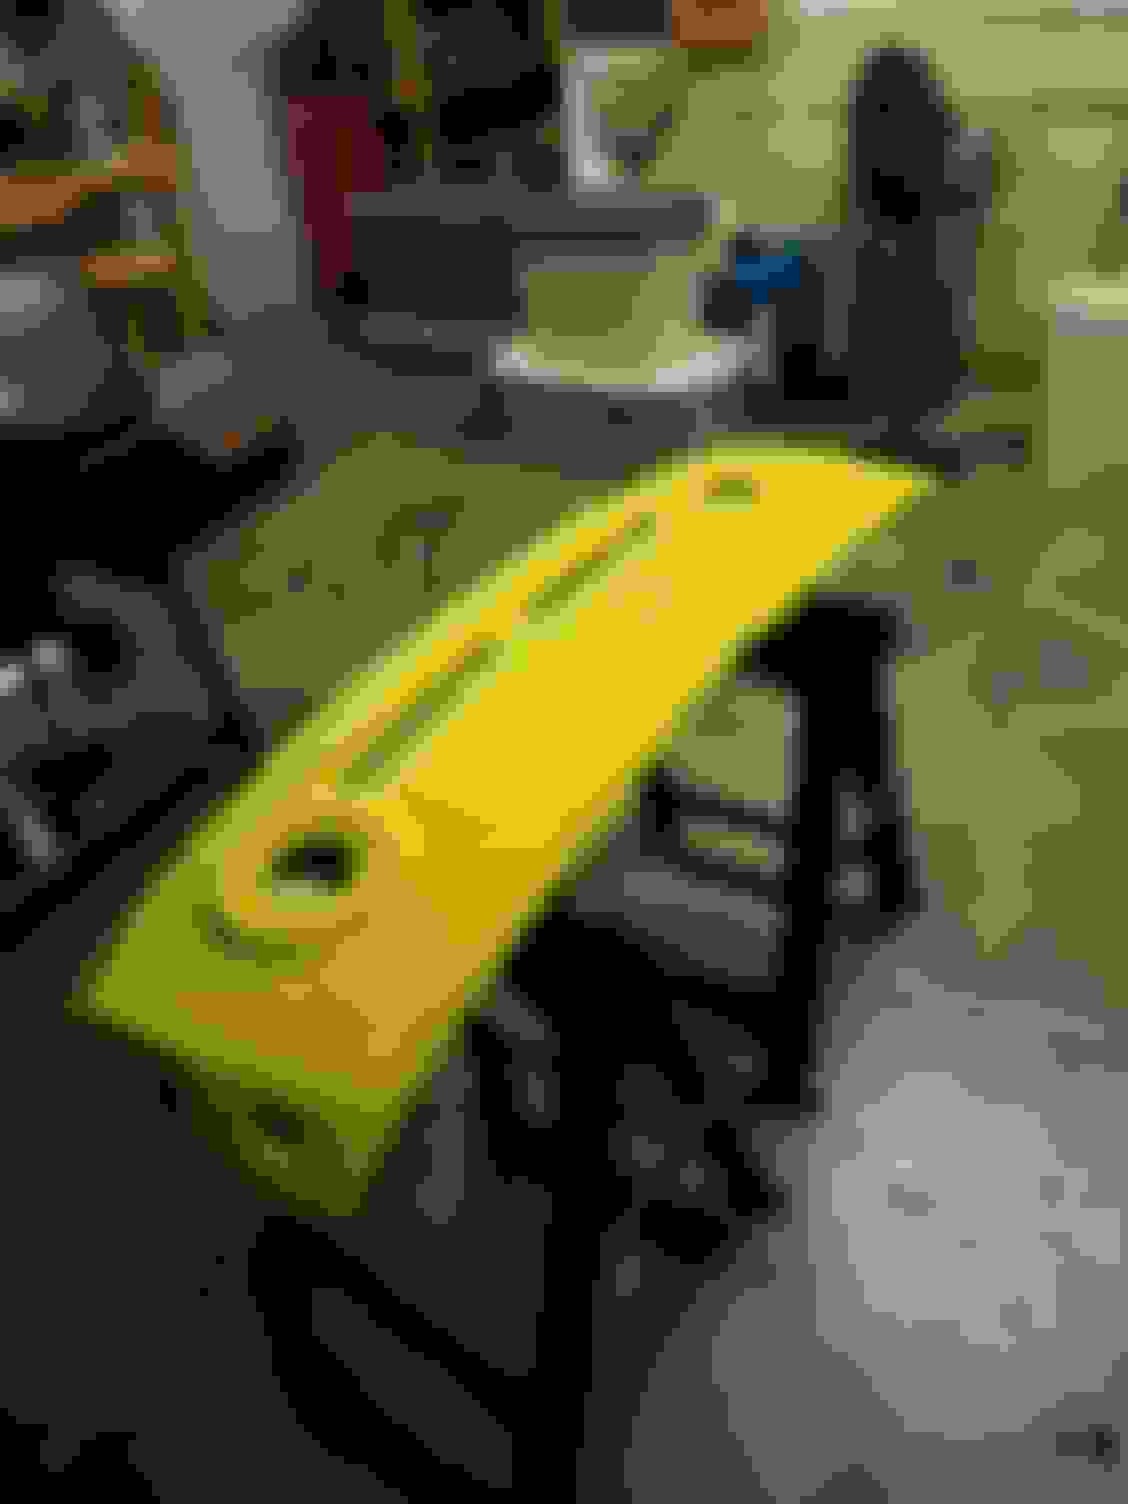
So I shaved all the high spots and cut out the speaker vents. I also removed the side vents.
then I had to figure out what to do with the speakers. I cut two circles out of wood so the new grilles would fit down in and not stick up to give it a nicer look.
now that's done I choose to glue fleece down and pour fiberglass resin on top. Figured it should work.
then I had to figure out what to do with the speakers. I cut two circles out of wood so the new grilles would fit down in and not stick up to give it a nicer look.
now that's done I choose to glue fleece down and pour fiberglass resin on top. Figured it should work.
#4
Junior Member
Thread Starter
Join Date: Sep 2019
Location: Jacksonville, NC
Posts: 35
Likes: 0
Received 3 Likes
on
2 Posts
Car: 1992 Camaro RS
Engine: 305 TBI
Transmission: Auto
Re: Customizing dash pad
After a good day of drying, it was solid. After cutting some extra off in places, I noticed the resin didn't soak all the way through the fleece. I'm okay with that. It leaves sort of a cushion to allow for movement and wont crack again, hopefully.
Next would be alot....alot....slot of sanding and putty and sanding. Until it was smooth again.
#5
Junior Member
Thread Starter
Join Date: Sep 2019
Location: Jacksonville, NC
Posts: 35
Likes: 0
Received 3 Likes
on
2 Posts
Car: 1992 Camaro RS
Engine: 305 TBI
Transmission: Auto
Re: Customizing dash pad
Now to work on them vent openings.
When working with resin and fleece, remember that edges will curl up. Wish I would have known before I started. I would have stapled the edges down.
I had to cut some off around the vents and re apply resin.
I also makes and cut out the side openings so I could resin them in
When working with resin and fleece, remember that edges will curl up. Wish I would have known before I started. I would have stapled the edges down.
I had to cut some off around the vents and re apply resin.
I also makes and cut out the side openings so I could resin them in
Trending Topics
#8
Junior Member
Thread Starter
Join Date: Sep 2019
Location: Jacksonville, NC
Posts: 35
Likes: 0
Received 3 Likes
on
2 Posts
Car: 1992 Camaro RS
Engine: 305 TBI
Transmission: Auto
Re: Customizing dash pad
I shot some black primer over it to see what I was working with. Not too bad.
I set the speakers in to see as well.
#9
Junior Member
Thread Starter
Join Date: Sep 2019
Location: Jacksonville, NC
Posts: 35
Likes: 0
Received 3 Likes
on
2 Posts
Car: 1992 Camaro RS
Engine: 305 TBI
Transmission: Auto
Re: Customizing dash pad
Now I'm working on some final little bumps and holes.
hopefully I will be top coating it tonight. I have decided to go with iron armor bed liner from harbor freight. This is my test spray on some plywood
hope it wont be too shiny. If so, I will have to top that with a matte clear. I will keep this updated. Hopefully pics of it in the car by the end of next week.
#11
Junior Member
Thread Starter
Join Date: Sep 2019
Location: Jacksonville, NC
Posts: 35
Likes: 0
Received 3 Likes
on
2 Posts
Car: 1992 Camaro RS
Engine: 305 TBI
Transmission: Auto
Re: Customizing dash pad
Since I dont race my car, I'm not too concerned about the weight. I'm sure it added a few pounds though lol
#13
Junior Member
Thread Starter
Join Date: Sep 2019
Location: Jacksonville, NC
Posts: 35
Likes: 0
Received 3 Likes
on
2 Posts
Car: 1992 Camaro RS
Engine: 305 TBI
Transmission: Auto
Re: Customizing dash pad
Just finished putting three coats of bed liner on it. There's some small imperfections but I'm happy with how it turned out. Now to let it sit for two days and cure.
#15
Member
iTrader: (11)
Re: Customizing dash pad
This looks really nice! Now I wish I'd held on to my old dash pad so I would have something to try this with. I also like your modification for round speakers - looks almost factory in that final shot.
Even with the time and material investment I'd guess this still came out much cheaper than a replacement dash pad, right?
#16
Junior Member
Thread Starter
Join Date: Sep 2019
Location: Jacksonville, NC
Posts: 35
Likes: 0
Received 3 Likes
on
2 Posts
Car: 1992 Camaro RS
Engine: 305 TBI
Transmission: Auto
Re: Customizing dash pad
Got the pad installed today. I'm happy with it. Like I said earlier, it's not perfect. It does look like a new dash now. You can see the carpet top I was running forever.
it took longer than it should've. I was only working on it a couple hours here and there after work. I only bought a quart of putty, gallon of resin (didn't use all of it), the fleece, a few cans of primer and two cans of bed liner. Way cheaper than a new one
The following users liked this post:
Bob88GTA (11-05-2019)
The following 2 users liked this post by Slash92rs:
Bob88GTA (11-05-2019), DynoDave43 (11-05-2019)
#20
Supreme Member
iTrader: (25)
Join Date: Sep 2005
Location: NJ
Posts: 1,837
Received 290 Likes
on
226 Posts
Car: 1987 IROC-Z
Engine: 406 on N20 w/ EFI
Transmission: P.B. 700R4
Axle/Gears: 12 bolt w/ 3.91
Re: Customizing dash pad
nice work. man that original dash pad was in realllly bad shape. way to go man!
Thread
Thread Starter
Forum
Replies
Last Post