**Project PITA** 86 TA frame up restoration
 04-26-2011, 11:02 PM
#651
Supreme Member

Thread Starter
iTrader: (8)

Join Date: Dec 2005
Location: Northern CT
Posts: 2,412
Likes: 0
Received 14 Likes
on
11 Posts
Car: 1986 Trans am
Engine: 5.3 LM7
Transmission: T56 6 speed
Axle/Gears: Dana 44 w/ 3.55's
Re: **Project PITA** 86 TA frame up restoration
In my shed of course ")
No runflats here....just crossed fingers lol. And thanks, that pic does make me feel better! I am getting pretty sick of wiring lately too honestly. I just ordered a painless 6 bank relay setup today for all the power accesories so once thats in, wiring will be coming to an end!
And also have a small update. Got the battery cables run and unfortunately it took way longer than expected since the original way I wanted to run them would have been too close to the exhaust. Heres the setup.
This optima battery is dead so I'm just using it for mockup...have to buy my nice EXPENSIVE new one afterwards.

This convienent stud and wingnut was on the car from the factory and it worked nicely for the ground cable.

This hole was also already in the trunk area so I just knocked out the drain plug and found a nice sized grommet for it. I prefer not to cut holes if I don't have to so I try to use what the factory gave me.
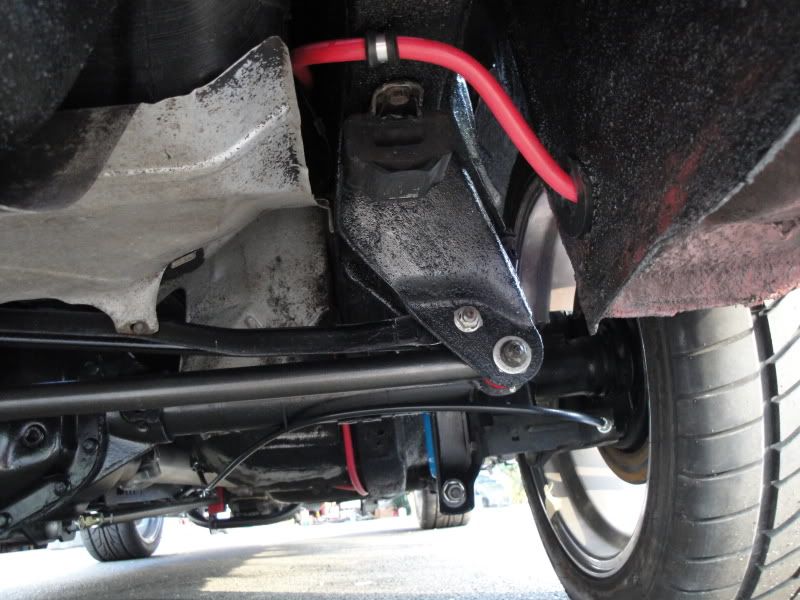
And heres where it plugs into the starter. I'm really hoping the turbo downpipe won't be too close to this. I really didn't know how else to run it so we'll see when the time comes. BMR told me the battery cable really only has to be a few inches from the exhaust so if thats true I should be fine!


Runflats are an option... not sure WhiteDevil is gonna do that though.
And just look at this picture when you're getting fed up with wiring lol.
http://image.gmhightechperformance.c...t+interior.jpg
And just look at this picture when you're getting fed up with wiring lol.
http://image.gmhightechperformance.c...t+interior.jpg
And also have a small update. Got the battery cables run and unfortunately it took way longer than expected since the original way I wanted to run them would have been too close to the exhaust. Heres the setup.
This optima battery is dead so I'm just using it for mockup...have to buy my nice EXPENSIVE new one afterwards.
This convienent stud and wingnut was on the car from the factory and it worked nicely for the ground cable.
This hole was also already in the trunk area so I just knocked out the drain plug and found a nice sized grommet for it. I prefer not to cut holes if I don't have to so I try to use what the factory gave me.
And heres where it plugs into the starter. I'm really hoping the turbo downpipe won't be too close to this. I really didn't know how else to run it so we'll see when the time comes. BMR told me the battery cable really only has to be a few inches from the exhaust so if thats true I should be fine!
 04-26-2011, 11:30 PM
#652
Member
iTrader: (4)
Join Date: Jan 2011
Location: San Diego
Posts: 235
Likes: 0
Received 0 Likes
on
0 Posts
Car: 1991 Camaro Z28
Engine: 5.7Liter HSR
Transmission: 700r4
Re: **Project PITA** 86 TA frame up restoration
why didn't u run it from inside the interior?? to risky ??
 04-27-2011, 12:36 AM
#654
Supreme Member
Thread Starter
iTrader: (8)
Join Date: Dec 2005
Location: Northern CT
Posts: 2,412
Likes: 0
Received 14 Likes
on
11 Posts
Car: 1986 Trans am
Engine: 5.3 LM7
Transmission: T56 6 speed
Axle/Gears: Dana 44 w/ 3.55's
Re: **Project PITA** 86 TA frame up restoration
No, not too risky, but I really didn't want to drill another hole through my firewall so I gave it a shot under the car. If it doesn't work out I can always run it inside, but this way I figured I wouldn't add any new holes and I could always change it later if I had to. Once I start making the exhaust we'll see how close it's going to actually be.
Thanks man!
Thanks man!
04-27-2011, 01:09 AM
#655
Member
iTrader: (4)
Join Date: Jan 2011
Location: San Diego
Posts: 235
Likes: 0
Received 0 Likes
on
0 Posts
Car: 1991 Camaro Z28
Engine: 5.7Liter HSR
Transmission: 700r4
Re: **Project PITA** 86 TA frame up restoration
ohh ok i doing mine too right now so i just wondering the best way to do it or ideas nice car seen it since day one a friend gave me is formula for me to built i will definitely so ur car so he can get his inspiration on lol
04-27-2011, 07:56 AM
#656
Supreme Member
iTrader: (34)
Join Date: Jul 2002
Location: Stamford, New York
Posts: 1,983
Likes: 0
Received 6 Likes
on
3 Posts
Car: 80 SE/TTA;88 T/A GTA;86 T/A
Engine: 4.9L Turbo; LT1; empty
Transmission: TH350; T56; empty
Axle/Gears: 3:23 disk; 4:10 disk ; 3.42 disk
Re: **Project PITA** 86 TA frame up restoration
Could try and use the antenna hole on that side of the car in the firewall if that doesn't work out. It will keep the entire wire inside the interior and also behind the wheel well shield, so it will only be open to elements in the engine bay.
04-27-2011, 09:08 AM
#657
Supreme Member
Join Date: Feb 2007
Location: Andover, NJ
Posts: 1,275
Likes: 0
Received 0 Likes
on
0 Posts
Car: '88 Trans Am GTA; '84 Trans Am
Engine: L98 350TPI; 5.3 LSx built
Transmission: N/A; T56
Axle/Gears: 3.70 9 bolt; 3.73 10 bolt
Re: **Project PITA** 86 TA frame up restoration
 Excellent idea, just run it along the passenger side like the chassis harness is on the drivers side, then exit stage right out the hole where the computer and antenna holes are then follow the stock wiring down to the starter. Would look somewhat factory and nice and neat.
  04-27-2011, 12:44 PM
#659
Supreme Member
Thread Starter
iTrader: (8)
Join Date: Dec 2005
Location: Northern CT
Posts: 2,412
Likes: 0
Received 14 Likes
on
11 Posts
Car: 1986 Trans am
Engine: 5.3 LM7
Transmission: T56 6 speed
Axle/Gears: Dana 44 w/ 3.55's
Re: **Project PITA** 86 TA frame up restoration
The only problem with that is that I'm still using my power antenna lol. Any way I try to run the wire to the starter on the pass side I have a feeling will be close to the turbo downpipe. I plan on wrapping the pipe in heat wrap and I may get some of those spark plug wire heat boots to put over the batt cable in a few spots where clearence may be close to the exhaust.
04-29-2011, 12:25 AM
#660
Supreme Member
Thread Starter
iTrader: (8)
Join Date: Dec 2005
Location: Northern CT
Posts: 2,412
Likes: 0
Received 14 Likes
on
11 Posts
Car: 1986 Trans am
Engine: 5.3 LM7
Transmission: T56 6 speed
Axle/Gears: Dana 44 w/ 3.55's
Re: **Project PITA** 86 TA frame up restoration
Finally got my painless relay bank kit today in the mail and started wiring that up. At this point I'm getting real sick of looking at wiring! But it is cool to see how it all works and just the fact that I'm completely wiring a car myself makes me feel good haha. Today was kind of crappy out so I didn't get much done but tomorrow will be gorgeous so I'll push the car outside and should have some motivation. Heres a few pics.
Started messing with the headlight harness. I got most of the wires labelled and know where to hook them to the painless harness but I need to figure out how I'm going to run everything before any connections. Also seperated my entire fog light wiring from the main headlight harness since I plan on hooking it up seperately.

Heres the highly technical bracket (lol) I made for all the relays, circuit breakers, and main harness fuse.

And heres where I left off. I'm missing a screw that painless FORGOT to add in for the main harness fuse on the right, so I need to go pick one up tomorrow and then the 3 power wires can be connected to the battery. Should be nice and convienent having everything right in the spare tire well, plus some added weight over the right rear tire is always nice.

Started messing with the headlight harness. I got most of the wires labelled and know where to hook them to the painless harness but I need to figure out how I'm going to run everything before any connections. Also seperated my entire fog light wiring from the main headlight harness since I plan on hooking it up seperately.
Heres the highly technical bracket (lol) I made for all the relays, circuit breakers, and main harness fuse.
And heres where I left off. I'm missing a screw that painless FORGOT to add in for the main harness fuse on the right, so I need to go pick one up tomorrow and then the 3 power wires can be connected to the battery. Should be nice and convienent having everything right in the spare tire well, plus some added weight over the right rear tire is always nice.
04-29-2011, 12:57 AM
#661
Re: **Project PITA** 86 TA frame up restoration
Runflats are an option... not sure WhiteDevil is gonna do that though.
And just look at this picture when you're getting fed up with wiring lol.
http://image.gmhightechperformance.c...t+interior.jpg
And just look at this picture when you're getting fed up with wiring lol.
http://image.gmhightechperformance.c...t+interior.jpg
05-01-2011, 12:39 AM
#662
Supreme Member
Thread Starter
iTrader: (8)
Join Date: Dec 2005
Location: Northern CT
Posts: 2,412
Likes: 0
Received 14 Likes
on
11 Posts
Car: 1986 Trans am
Engine: 5.3 LM7
Transmission: T56 6 speed
Axle/Gears: Dana 44 w/ 3.55's
Re: **Project PITA** 86 TA frame up restoration
Not a huge update, but I got my power window circuit completely wired up today and also finished up the dual fuel pump relays and got them all wired. Threw a battery in quick and turned the key to accesory and low and behold the windows work! Guess my hard work is paying off so far. Once I get the injectors installed I'll plug the pump relays in and see if I get some fuel pressure and test for any leaks.
I'm also in the process of sorting out the headlight harness. I'm kind of confused with what all the wires on the headlight switch/dimmer go to so I need to do a little research and get that figured out so I can start getting this thing buttoned up. Can't wait to finish this wiring...I'm starting to have nightmares from it!
I'm also in the process of sorting out the headlight harness. I'm kind of confused with what all the wires on the headlight switch/dimmer go to so I need to do a little research and get that figured out so I can start getting this thing buttoned up. Can't wait to finish this wiring...I'm starting to have nightmares from it!
05-02-2011, 01:49 AM
#663
Junior Member

Join Date: Mar 2011
Posts: 4
Likes: 0
Received 0 Likes
on
0 Posts
Re: **Project PITA** 86 TA frame up restoration
i have a question on the 1990 Camaro Iroc z28 Convertible the center spoiler has 4 bolts that holds down the center spoiler does anyone know the correct name for these and does anyone have any or do you know where I can purchase them
05-02-2011, 09:21 AM
#664
Supreme Member
iTrader: (1)
Join Date: Jun 2009
Location: Central Connecticut
Posts: 1,777
Likes: 0
Received 0 Likes
on
0 Posts
Car: 91 Trans Am 'vert
Engine: LB9
Transmission: T5
Axle/Gears: 3.45 9 bolt
Re: **Project PITA** 86 TA frame up restoration
It's one of GM High Tech Performance Magazine's latest projects.
http://www.gmhightechperformance.com...ect/index.html
http://www.gmhightechperformance.com...ect/index.html
05-05-2011, 04:20 PM
#665
Junior Member
Join Date: May 2010
Location: Streator, IL
Posts: 85
Likes: 0
Received 0 Likes
on
0 Posts
Car: 1985 Trans Am
Engine: 305 Carb
Transmission: 700r4
Axle/Gears: Borg Warner 3.27
Re: **Project PITA** 86 TA frame up restoration
Wow I just finished reading this entire thread, I have the same year t/a and I must say u have inspired me not to just give up on her, she is very rusty but justw atching what u have done....man u have honestly givien me hope that one day she will be eye worthy
05-06-2011, 12:16 AM
#666
Supreme Member
Thread Starter
iTrader: (8)
Join Date: Dec 2005
Location: Northern CT
Posts: 2,412
Likes: 0
Received 14 Likes
on
11 Posts
Car: 1986 Trans am
Engine: 5.3 LM7
Transmission: T56 6 speed
Axle/Gears: Dana 44 w/ 3.55's
Re: **Project PITA** 86 TA frame up restoration
It's a lot of work to get a car to the point mine is at but just like you, mine started with just a dream. Nothing is impossible and all the hard work does pay off at some point or another. Best of luck with yours and if you ever start building it, be sure to put a bild thread up!
05-10-2011, 12:50 AM
#667
Supreme Member
Thread Starter
iTrader: (8)
Join Date: Dec 2005
Location: Northern CT
Posts: 2,412
Likes: 0
Received 14 Likes
on
11 Posts
Car: 1986 Trans am
Engine: 5.3 LM7
Transmission: T56 6 speed
Axle/Gears: Dana 44 w/ 3.55's
Re: **Project PITA** 86 TA frame up restoration
Somewhat of an update....Got the entire headlight harness all laid onto the front of the car and cleaned up. I started to make connections to the painless harness but ran out of butt connectors. Also got my power locks working after NUMEROUS calls to painless. I swear, they make a great harness, but sometimes a simple question is so hard for them to answer even though they are a wiring specific company!! Tomorrow I'm going to try to finish up the connections on the headlight harness and possibly power it up to make sure everything works. Pics to come soon, I promise! It's been so frustrating trying to wire in a universal harness yet retain all the factory options, but every time I get a new circuit to work correctly it makes me feel great and I know that in the end the wiring will be problem free for a long long time.
05-10-2011, 07:59 AM
#668
Re: **Project PITA** 86 TA frame up restoration
White Devil, you are doing an awesome job. My only concern is that you seem to be using a lot of butt connectors. In my experience, these can be trouble spots, especially if they are exposed to the weather and/or any chemicals. If this were my car, I would have soldered and shrink-wrapped those connections, which would eliminate future problems.
Another thing that could help is to seal them with something or wrap them tightly with electrical tape. Just my two cents... carry on.
Another thing that could help is to seal them with something or wrap them tightly with electrical tape. Just my two cents... carry on.
05-10-2011, 11:39 AM
#669
Supreme Member
Thread Starter
iTrader: (8)
Join Date: Dec 2005
Location: Northern CT
Posts: 2,412
Likes: 0
Received 14 Likes
on
11 Posts
Car: 1986 Trans am
Engine: 5.3 LM7
Transmission: T56 6 speed
Axle/Gears: Dana 44 w/ 3.55's
Re: **Project PITA** 86 TA frame up restoration
White Devil, you are doing an awesome job. My only concern is that you seem to be using a lot of butt connectors. In my experience, these can be trouble spots, especially if they are exposed to the weather and/or any chemicals. If this were my car, I would have soldered and shrink-wrapped those connections, which would eliminate future problems.
Another thing that could help is to seal them with something or wrap them tightly with electrical tape. Just my two cents... carry on.
Another thing that could help is to seal them with something or wrap them tightly with electrical tape. Just my two cents... carry on.
I have also heard a few bad things about soldering in that it makes the wire brittle in that area and prone to cracking over time. Everyone is going to have a different opinion on how to do it, so I just chose the butt connector route since it recommended them in the painless instructions. I'm sure they'll be ok but I guess we'll see after the car is done and driving!
05-10-2011, 12:53 PM
#671
Supreme Member

Re: **Project PITA** 86 TA frame up restoration
I wired in my new fuel pump with butt connectors, in fact thats how the sending unit is wired stock, but I also put some in right above the tank since I put in an access panel. They've held up fine so far.
05-10-2011, 01:03 PM
#672
Re: **Project PITA** 86 TA frame up restoration
OK, I am not saying that butt connectors don't work or hold up. I just wanted to point out that I use them to a bare minimum because when troubleshooting problems, it has been my experience that the use of butt connectors has led to a lot of failures. The more protection you have against stress and the elements, the less likely that you will have a failure.
05-10-2011, 01:05 PM
#673
Supreme Member
Re: **Project PITA** 86 TA frame up restoration
I agree they shouldn't be used externally if it can be avoided, and regardless of where they are, should be electrical taped imo. But on the interior here and there, they are fine, speakers also use them come to think of it.
05-10-2011, 01:18 PM
#674
Supreme Member
iTrader: (2)
Join Date: Feb 2005
Location: West Warwick RI, postal code: 02893
Posts: 4,355
Received 61 Likes
on
46 Posts
Car: Building LS3, T56 Z28
Engine: LS3
Transmission: T-56
Axle/Gears: Moser/ 4.11
Re: **Project PITA** 86 TA frame up restoration
Soldering wire is the most robust way of connecting two wires. I wired my whole car up with a tunk mounted painless kit. All soldered and shrink wrapped. I have talked to three electrician buddies of mine, it is common knowledge to them that on cars, you solder.
When soldering correctly, the wire is not brittle at all. If done poorly, then yes, this could happen, but I had my gf solder some stuff up and she did great. LOL, def not a hard thing to do.
Just my two cents, but connections work fine I agree with what others are says, just saying solder is better. There is no opinion in that.
Its like welded SFC and bolt on ones. Welded is better, no opinion there either.
Anyways,....
Love the car, keep up the good work. Can't wait to see what it looks like in the end. Glad to see other people out there doing the REAL research to build a car right from the ground up!
05-10-2011, 01:27 PM
#675
Supreme Member
Re: **Project PITA** 86 TA frame up restoration
Well, soldering isn't clear cut better, pros and cons to both, when I change my fuel pump out next time, I won't have to cut the wires, can just unplug it right where the access panel is, thats the benefit of butt connectors, but yeah for something you won't have any reason to disconnect Soldering or heat shrinking is the way to go for sure. Of course in all honesty, you could take it a step further and solder the wire where it meets the butt connector after you crimp it, hell you could probably shrink wrap it afterwards too, lol.
05-10-2011, 10:21 PM
#676
Supreme Member
Thread Starter
iTrader: (8)
Join Date: Dec 2005
Location: Northern CT
Posts: 2,412
Likes: 0
Received 14 Likes
on
11 Posts
Car: 1986 Trans am
Engine: 5.3 LM7
Transmission: T56 6 speed
Axle/Gears: Dana 44 w/ 3.55's
Re: **Project PITA** 86 TA frame up restoration
Thanks for the input guys. We'll see how the butt connectors hold up. As I said, electrical tape is being used on every connection with a butt connector and this car will not be driven through rain so I'm pretty confident that they should be fine.
On another note, I did some more wiring today and got a ton done! Hooked up all outside lights and am VERY pleased to say that everything works just like factory. I even did a quick test wiring on the flip up headlights and they work flawlessly. Now I just have to run the wires in thier permanent locations and button it all up and I will be sure to get some pics. This thing is starting to have some life after a very long "dead" phase!
On another note, I did some more wiring today and got a ton done! Hooked up all outside lights and am VERY pleased to say that everything works just like factory. I even did a quick test wiring on the flip up headlights and they work flawlessly. Now I just have to run the wires in thier permanent locations and button it all up and I will be sure to get some pics. This thing is starting to have some life after a very long "dead" phase!
05-10-2011, 11:41 PM
#677
Supreme Member
Thread Starter
iTrader: (8)
Join Date: Dec 2005
Location: Northern CT
Posts: 2,412
Likes: 0
Received 14 Likes
on
11 Posts
Car: 1986 Trans am
Engine: 5.3 LM7
Transmission: T56 6 speed
Axle/Gears: Dana 44 w/ 3.55's
Re: **Project PITA** 86 TA frame up restoration
Felt like snapping a few pics. Not a huge update but a few circuits that I finished in the past few days...
Heres where the painless harness attaches to the tail harness. Pretty strait forward. Just match up the colors and ground the black wire coming out of the factory connector.

This is how I ran the headlight section wires. Trying to keep the engine bay as clean as possible so I drilled a hole and ran them through a grommet in the fender support. The relay is for the fog lights.

Heres where the wiring comes out by the horn. Horn is wired as well. Pretty simple...just a single green power wire and the horn is grounded through it's mounting bracket.

And thats how it looks. Nice and clean! The less wires, the better in the bay. You can also see the relay towards the front for the flip up light motors. There are a total of 3 relays for the earlier flip up light system. I kept all the wiring intact and wired the switch up to them and they work great!

Heres where the painless harness attaches to the tail harness. Pretty strait forward. Just match up the colors and ground the black wire coming out of the factory connector.
This is how I ran the headlight section wires. Trying to keep the engine bay as clean as possible so I drilled a hole and ran them through a grommet in the fender support. The relay is for the fog lights.
Heres where the wiring comes out by the horn. Horn is wired as well. Pretty simple...just a single green power wire and the horn is grounded through it's mounting bracket.
And thats how it looks. Nice and clean! The less wires, the better in the bay. You can also see the relay towards the front for the flip up light motors. There are a total of 3 relays for the earlier flip up light system. I kept all the wiring intact and wired the switch up to them and they work great!
05-10-2011, 11:47 PM
#678
Supreme Member
Thread Starter
iTrader: (8)
Join Date: Dec 2005
Location: Northern CT
Posts: 2,412
Likes: 0
Received 14 Likes
on
11 Posts
Car: 1986 Trans am
Engine: 5.3 LM7
Transmission: T56 6 speed
Axle/Gears: Dana 44 w/ 3.55's
Re: **Project PITA** 86 TA frame up restoration
Still need to tidy these wires up but I just wanted a feel for how to run them so I mounted the headlight assemblies. Got it pretty much figured out so I just need to mount them permanantly.

Heres my temporary ghetto rigged headlight switch. Didn't want to cut the wires and have something not work so I left them long for the test. Everything worked though so I can permanantly mount it now! I found out that the wires on the headlight switch are as follows...
-Red= constant 12V power
-Orange= fused 12V power (key on)
-Brown= parking lights
-Yellow (2 wires)= 1 to up operation for flip up light relay, 1 to headlight bulbs
-White= down operation for flip up light relay

Hope this helps anyone who may be wondering. More updates to come soon!
Heres my temporary ghetto rigged headlight switch. Didn't want to cut the wires and have something not work so I left them long for the test. Everything worked though so I can permanantly mount it now! I found out that the wires on the headlight switch are as follows...
-Red= constant 12V power
-Orange= fused 12V power (key on)
-Brown= parking lights
-Yellow (2 wires)= 1 to up operation for flip up light relay, 1 to headlight bulbs
-White= down operation for flip up light relay
Hope this helps anyone who may be wondering. More updates to come soon!
05-11-2011, 10:40 PM
#680
Supreme Member
Thread Starter
iTrader: (8)
Join Date: Dec 2005
Location: Northern CT
Posts: 2,412
Likes: 0
Received 14 Likes
on
11 Posts
Car: 1986 Trans am
Engine: 5.3 LM7
Transmission: T56 6 speed
Axle/Gears: Dana 44 w/ 3.55's
Re: **Project PITA** 86 TA frame up restoration
Also as an update, I got the whole headlight harness completely connected and pretty much cleaned up. Found out my front right turn signals were working intermittantly and after a little probing with my test light I saw that power was sometimes not present right at the plug at the steering column. After a little playing with my signal stalk I found that it only works when you press hard up on it so I need a new turn signal switch. Bummer...Guess the steering column needs to come apart! Better now though than later when the car was all back together I guess. I am LOVING the wires all hidden in the engine bay. You look at it and wonder how the headlights and everything works since there are no wires! I'll see about getting a pic or two up later.
05-12-2011, 01:14 AM
#681
Supreme Member
Thread Starter
iTrader: (8)
Join Date: Dec 2005
Location: Northern CT
Posts: 2,412
Likes: 0
Received 14 Likes
on
11 Posts
Car: 1986 Trans am
Engine: 5.3 LM7
Transmission: T56 6 speed
Axle/Gears: Dana 44 w/ 3.55's
Re: **Project PITA** 86 TA frame up restoration
Well, heres a few pics of the progress so far.
Heres the cleaned up headlight harness. Need to wait for my wire clips and nylon wire cover to get here and then I can tuck it up under the radiator support.

Heres the main power feed wire for the blower motor and headlight motors. It starts at the starter and runs through this grommet and through the fender support.

Heres where the wires come out of the fender support. I used a 30A circuit breaker which the constant power wire from the starter goes into and then it sends power to the blower motor relay and headlight motor relays from there. Tested it out and it works great!

And heres the completely wired engine bay minus the engine harness which should stay pretty clean looking. LOVE not seeing any wires running down the framerails or over the fender wells. All exposed wires will either be wrapped in electrical tape for small sections, or covered with nylon braided sleeving for the larger sections.

Heres the cleaned up headlight harness. Need to wait for my wire clips and nylon wire cover to get here and then I can tuck it up under the radiator support.
Heres the main power feed wire for the blower motor and headlight motors. It starts at the starter and runs through this grommet and through the fender support.
Heres where the wires come out of the fender support. I used a 30A circuit breaker which the constant power wire from the starter goes into and then it sends power to the blower motor relay and headlight motor relays from there. Tested it out and it works great!
And heres the completely wired engine bay minus the engine harness which should stay pretty clean looking. LOVE not seeing any wires running down the framerails or over the fender wells. All exposed wires will either be wrapped in electrical tape for small sections, or covered with nylon braided sleeving for the larger sections.
 05-13-2011, 01:11 AM
#684
Supreme Member
Thread Starter
iTrader: (8)
Join Date: Dec 2005
Location: Northern CT
Posts: 2,412
Likes: 0
Received 14 Likes
on
11 Posts
Car: 1986 Trans am
Engine: 5.3 LM7
Transmission: T56 6 speed
Axle/Gears: Dana 44 w/ 3.55's
Re: **Project PITA** 86 TA frame up restoration
Thanks guys! And heres a little youtube vid I made to show the wiring and a demonstration of everything working at the end.
http://www.youtube.com/watch?v=q76m6ETSNiU
http://www.youtube.com/watch?v=q76m6ETSNiU
05-13-2011, 05:30 AM
#685
Senior Member
Join Date: Apr 2006
Location: CT
Posts: 685
Likes: 0
Received 0 Likes
on
0 Posts
Car: 1988 Iroc
Engine: 5.7L
Transmission: '96 T56, Hurst Shifter, Mech VSS
Axle/Gears: 3.45 9 Bolt
Re: **Project PITA** 86 TA frame up restoration
Looks great, wring anything scares me. Congrats on getting it all to work.
05-14-2011, 06:59 PM
#686
Supreme Member
Thread Starter
iTrader: (8)
Join Date: Dec 2005
Location: Northern CT
Posts: 2,412
Likes: 0
Received 14 Likes
on
11 Posts
Car: 1986 Trans am
Engine: 5.3 LM7
Transmission: T56 6 speed
Axle/Gears: Dana 44 w/ 3.55's
Re: **Project PITA** 86 TA frame up restoration
Worked on the car a little bit today and completely finished the headlight harness wiring. I know I said I wasn't going to use the plastic wire loom but I had 2 brand new boxes of it in different sizes and was getting impatient! I plan on using the nice nylon braid stuff on the engine wiring though. Came out great and once the car is together it will almost be completely hidden. Heres a few pics.
Completed drivers side tray area.

Heres where it's clipped under the radiator support and runs to the relays in the pass side tray area.

And heres the completed chassis wiring in the engine bay. Only engine harness wires left now! Also picked up a brand new LS1 F-body style water pump since I found out the truck one woudn't fit with the LS6 intake.

Completed drivers side tray area.
Heres where it's clipped under the radiator support and runs to the relays in the pass side tray area.
And heres the completed chassis wiring in the engine bay. Only engine harness wires left now! Also picked up a brand new LS1 F-body style water pump since I found out the truck one woudn't fit with the LS6 intake.
Last edited by whitedevilTA; 05-14-2011 at 07:03 PM.
05-14-2011, 08:17 PM
#687
Senior Member
Join Date: Apr 2006
Location: CT
Posts: 685
Likes: 0
Received 0 Likes
on
0 Posts
Car: 1988 Iroc
Engine: 5.7L
Transmission: '96 T56, Hurst Shifter, Mech VSS
Axle/Gears: 3.45 9 Bolt
Re: **Project PITA** 86 TA frame up restoration
I gotta ask, have you been keeping track of what it costs to build this car? I imagine if you did you would have a heart attack looking at the final total.
05-15-2011, 12:56 AM
#688
Supreme Member
Thread Starter
iTrader: (8)
Join Date: Dec 2005
Location: Northern CT
Posts: 2,412
Likes: 0
Received 14 Likes
on
11 Posts
Car: 1986 Trans am
Engine: 5.3 LM7
Transmission: T56 6 speed
Axle/Gears: Dana 44 w/ 3.55's
Re: **Project PITA** 86 TA frame up restoration
Yes and no. I have a rough idea on what I've spent by adding up the higher dollar parts but I don't really care to sit down and add up every little receipt for the heart attack reason haha. I save all the receipts just to have them but they go into a manilla folder and honestly I don't know if I ever really want to sit and add it all up. In my eyes, when the cars done, I'll have a gorgeous trans am that will only go up in value and it will be like a new car without the payments, so that makes me happy!
05-16-2011, 12:14 AM
#689
Supreme Member
iTrader: (1)
Join Date: Jun 2009
Location: Central Connecticut
Posts: 1,777
Likes: 0
Received 0 Likes
on
0 Posts
Car: 91 Trans Am 'vert
Engine: LB9
Transmission: T5
Axle/Gears: 3.45 9 bolt
Re: **Project PITA** 86 TA frame up restoration
I was fortunate enough to visit the car today (well yesterday after looking at the time I'm posting this lol), and I gotta say that the photos on this thread look great, but this thing just POPS in person; cameras can't handle the color lol. Whitedevil is doing a great job and it'll be awesome to see this thing tearing up the road; simply staring at this paint job gives you a thrill. I snapped a few pictures of my own which I'll share, but as I said, they just don't do the car justice.

Hard to tell in the picture but the left taillight was wet-sanded and buffed giving it a really fresh look. That's something I ought to try with my car.

And one more of this animal:

And a couple of the black 91 along side of it (getting some interior work done), looks terrific as well!


Hard to tell in the picture but the left taillight was wet-sanded and buffed giving it a really fresh look. That's something I ought to try with my car.
And one more of this animal:
And a couple of the black 91 along side of it (getting some interior work done), looks terrific as well!
05-16-2011, 09:39 AM
#690
Senior Member
Join Date: Apr 2006
Location: CT
Posts: 685
Likes: 0
Received 0 Likes
on
0 Posts
Car: 1988 Iroc
Engine: 5.7L
Transmission: '96 T56, Hurst Shifter, Mech VSS
Axle/Gears: 3.45 9 Bolt
Re: **Project PITA** 86 TA frame up restoration
Looks great man. On the 5.3 can you use the truck oil pan with your bmr k member, or do you need an ls1 pan?
05-17-2011, 01:09 AM
#691
Supreme Member
Thread Starter
iTrader: (8)
Join Date: Dec 2005
Location: Northern CT
Posts: 2,412
Likes: 0
Received 14 Likes
on
11 Posts
Car: 1986 Trans am
Engine: 5.3 LM7
Transmission: T56 6 speed
Axle/Gears: Dana 44 w/ 3.55's
Re: **Project PITA** 86 TA frame up restoration
And musclecarfan...thanks for the kind words! Feel free to stop by anytime. Me and my brother are always working on the birds in the garage so were always around!
05-17-2011, 10:09 PM
#692
Supreme Member
Thread Starter
iTrader: (8)
Join Date: Dec 2005
Location: Northern CT
Posts: 2,412
Likes: 0
Received 14 Likes
on
11 Posts
Car: 1986 Trans am
Engine: 5.3 LM7
Transmission: T56 6 speed
Axle/Gears: Dana 44 w/ 3.55's
Re: **Project PITA** 86 TA frame up restoration
More work done today on the wiring, thank god! Really getting tired of playing with wires at this point but it's a good learning experience. Heres a few pics.
Ran the speaker wiring and put the two 4x6 speakers I had in each side. Still need the round one since I'm using the performance sound optioned boxes instead of the standard box.

Also finished up the fuel pump wiring and grounded the pumps to the factory spot on the rear seat bracket.

Straightened up the trunk motor area and got that wired up, though one of the sensors on the trunk motor is bad and it is currently stuck in the up position.

Cleaned up the tail light wiring and got that all secured.

And finally, got the headlight switch plug permanantly wired up. I may end up getting a new plug in the future since I don't know how I like the butt connectors being so close to the plug. Had to do it that way since in my younger years I tapped lights and other crap into the plug and I cut up the wiring real close to it.

Ran the speaker wiring and put the two 4x6 speakers I had in each side. Still need the round one since I'm using the performance sound optioned boxes instead of the standard box.
Also finished up the fuel pump wiring and grounded the pumps to the factory spot on the rear seat bracket.
Straightened up the trunk motor area and got that wired up, though one of the sensors on the trunk motor is bad and it is currently stuck in the up position.
Cleaned up the tail light wiring and got that all secured.
And finally, got the headlight switch plug permanantly wired up. I may end up getting a new plug in the future since I don't know how I like the butt connectors being so close to the plug. Had to do it that way since in my younger years I tapped lights and other crap into the plug and I cut up the wiring real close to it.
05-17-2011, 10:13 PM
#694
Re: **Project PITA** 86 TA frame up restoration
Looks like I'm not the only one with a "collection" of dead optimas. I haven't had one of those POS batteries last for more than a year and never more than 3000 miles (I rarely drive some of these cars and they are always on battery tenders)
The car is coming along very nicely
 05-17-2011, 10:49 PM
#695
Supreme Member
Thread Starter
iTrader: (8)
Join Date: Dec 2005
Location: Northern CT
Posts: 2,412
Likes: 0
Received 14 Likes
on
11 Posts
Car: 1986 Trans am
Engine: 5.3 LM7
Transmission: T56 6 speed
Axle/Gears: Dana 44 w/ 3.55's
Re: **Project PITA** 86 TA frame up restoration
Looks like I'm not the only one with a "collection" of dead optimas. I haven't had one of those POS batteries last for more than a year and never more than 3000 miles (I rarely drive some of these cars and they are always on battery tenders)
The car is coming along very nicely
The car is coming along very nicely
05-21-2011, 02:21 AM
#696
Supreme Member
Thread Starter
iTrader: (8)
Join Date: Dec 2005
Location: Northern CT
Posts: 2,412
Likes: 0
Received 14 Likes
on
11 Posts
Car: 1986 Trans am
Engine: 5.3 LM7
Transmission: T56 6 speed
Axle/Gears: Dana 44 w/ 3.55's
Re: **Project PITA** 86 TA frame up restoration
Making progress slowly but surely. Got all my rear speakers in and wired. Ran speaker wiring to the front too but I don't have speakers yet. Also put the rear section carpet back in and the pass side B-pillar trim peice. Heres a few pics.
Trunk motor I scored at the local junkyard for 30$ since mine wasn't going back down. Works perfectly and is in better shape than my original!

Rear carpet installed. Thats not where I'm mounting the amps either....just stuck them there for the time being. They will most likely be mounted in a custom bracket in place of the rear seats, since I will be leaving them out.

My new speakers in the performance sound optioned boxes.

At this point, 95% of the chassis wiring is done (thank god!!!). Only things left are to hook up the dimmer switch, and wire up the rear defroster and trunk release switch. It was a hell of a job but I'm happy I did it and shouldn't have any problems with wiring for a long time now!

Trunk motor I scored at the local junkyard for 30$ since mine wasn't going back down. Works perfectly and is in better shape than my original!
Rear carpet installed. Thats not where I'm mounting the amps either....just stuck them there for the time being. They will most likely be mounted in a custom bracket in place of the rear seats, since I will be leaving them out.
My new speakers in the performance sound optioned boxes.
At this point, 95% of the chassis wiring is done (thank god!!!). Only things left are to hook up the dimmer switch, and wire up the rear defroster and trunk release switch. It was a hell of a job but I'm happy I did it and shouldn't have any problems with wiring for a long time now!
05-23-2011, 12:38 AM
#697
Supreme Member
Thread Starter
iTrader: (8)
Join Date: Dec 2005
Location: Northern CT
Posts: 2,412
Likes: 0
Received 14 Likes
on
11 Posts
Car: 1986 Trans am
Engine: 5.3 LM7
Transmission: T56 6 speed
Axle/Gears: Dana 44 w/ 3.55's
Re: **Project PITA** 86 TA frame up restoration
Little update. Got the last 2 things wired up that I had to do. The rear window defroster and the trunk popper switch. Both work great so I'm really happy about that. Now I can actually order a carpet and get somewhat of an interior in! Only bad thing is that the newer glass I'm using has a lot of bad grids on it so I need to go over it with conductive paint and fix them all. Not a huge deal so I'll get to it eventually.
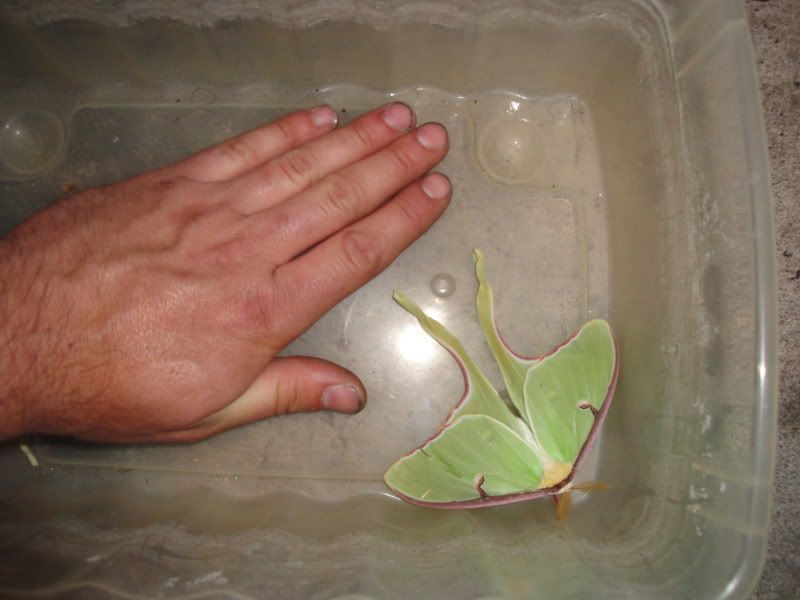
Funny thing happened while I was working on the car too. Me and my brother were in the garage at about 11:00 at night. He was working under his hood and I was inside my car. We had the garage doors open since it was nice out. I looked up for a minute and saw this MASSIVE flying creature swoop into the garage and start dive bombing me and my brother. My brother freaked and ducked for cover haha. We finally trapped it with a tupperware container to get it out of the garage and I snapped a few pics. Never seen anything like it before here in CT!

This was after we brought it outside and let it climb onto the side of the house. It looks MUCH bigger in person. Scared the crap out of us at first lol.

Funny thing happened while I was working on the car too. Me and my brother were in the garage at about 11:00 at night. He was working under his hood and I was inside my car. We had the garage doors open since it was nice out. I looked up for a minute and saw this MASSIVE flying creature swoop into the garage and start dive bombing me and my brother. My brother freaked and ducked for cover haha. We finally trapped it with a tupperware container to get it out of the garage and I snapped a few pics. Never seen anything like it before here in CT!
This was after we brought it outside and let it climb onto the side of the house. It looks MUCH bigger in person. Scared the crap out of us at first lol.
05-23-2011, 01:34 AM
#699
Member
iTrader: (4)
Join Date: Jan 2011
Location: San Diego
Posts: 235
Likes: 0
Received 0 Likes
on
0 Posts
Car: 1991 Camaro Z28
Engine: 5.7Liter HSR
Transmission: 700r4
Re: **Project PITA** 86 TA frame up restoration
that's a weird bug i never seen those here in cali , on other note did u make those panels for the speakers or did u buy them? i need more for my camaro since the factory gave us 4 speakers